Yellow Text Edit Bar
The content of a document (text, graphics) plus its style tags and any processing instructions are stored in streams, referenced from frames and written into those frames during the formatting process. The yellow bar can be used as a simple text editor for the streams, it displays a text-only version of the currently selected stream of an open document. From here you can see and edit the text content of the stream, any style tags it contains and the inline processing instructions that have been entered into the text. When MathJax is enabled you can edit mathematical expressions and add mathematical expressions to the current document from here . To edit the tags in the stream, simply click in the name of the tag you wish to edit and press Alt+ to access its properties (press Alt- to exit and go back to the previous position in the stream).
The bar also contains some information regarding the position of your cursor in the stream, changing dynamically as you navigate through the document. The bar at the top of the yellow bar contains this information:
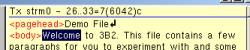
• Tag type: in this example, a .Tx tag, i.e. a text stream
• Name of selected stream: in this example, strm0
• Character position in the stream: this is shown as a single number or, as shown below, as a range and number of characters if you have highlighted, for example, a word in the text stream. In this example, 26..33 shows the range of characters for the word "welcome".
• Total number of characters in stream: in this example, 6042
• Password and / or encryption status of the stream, if applicable
Buttons at the base of the window define what information is displayed in the edit bar and at times display this information contextually depending on which operating mode
PTC ALD is set to work in. See
ALD’s Operating Modes for further information about ALD's operating modes.
Toggles the display of line breaks.
Toggles the execution of 1:1 editing mode which will allow you to enter characters into the text stream that would normally be escaped and given their character number. As a default the mode is deactivated, so you must therefore ensure this button is pressed if you want to enter inline commands to the text stream that can be understood and processed during formatting:
◦ With 1:1 mode active: the processing instruction <?th=24pt> is displayed as typed
◦ In normal edit mode: the angle brackets are escaped so the same command is shown as <?th=24pt%#62;. The formatting process will not recognize this as a valid command.
Toggles word wrap. With the option deactivated words can break at any of their constituent characters and carry the rest of the word to the next line, depending on the fit in the edit bar display. Activate the setting to ensure only full words are included in each line.
Toggles proportional spacing for text in the edit bar. With this option deactivated the text is shown in monospaced form.
Toggles the display of spaces in text in the edit bar. Activate the option to have spaces shown as

characters instead of blank spaces.
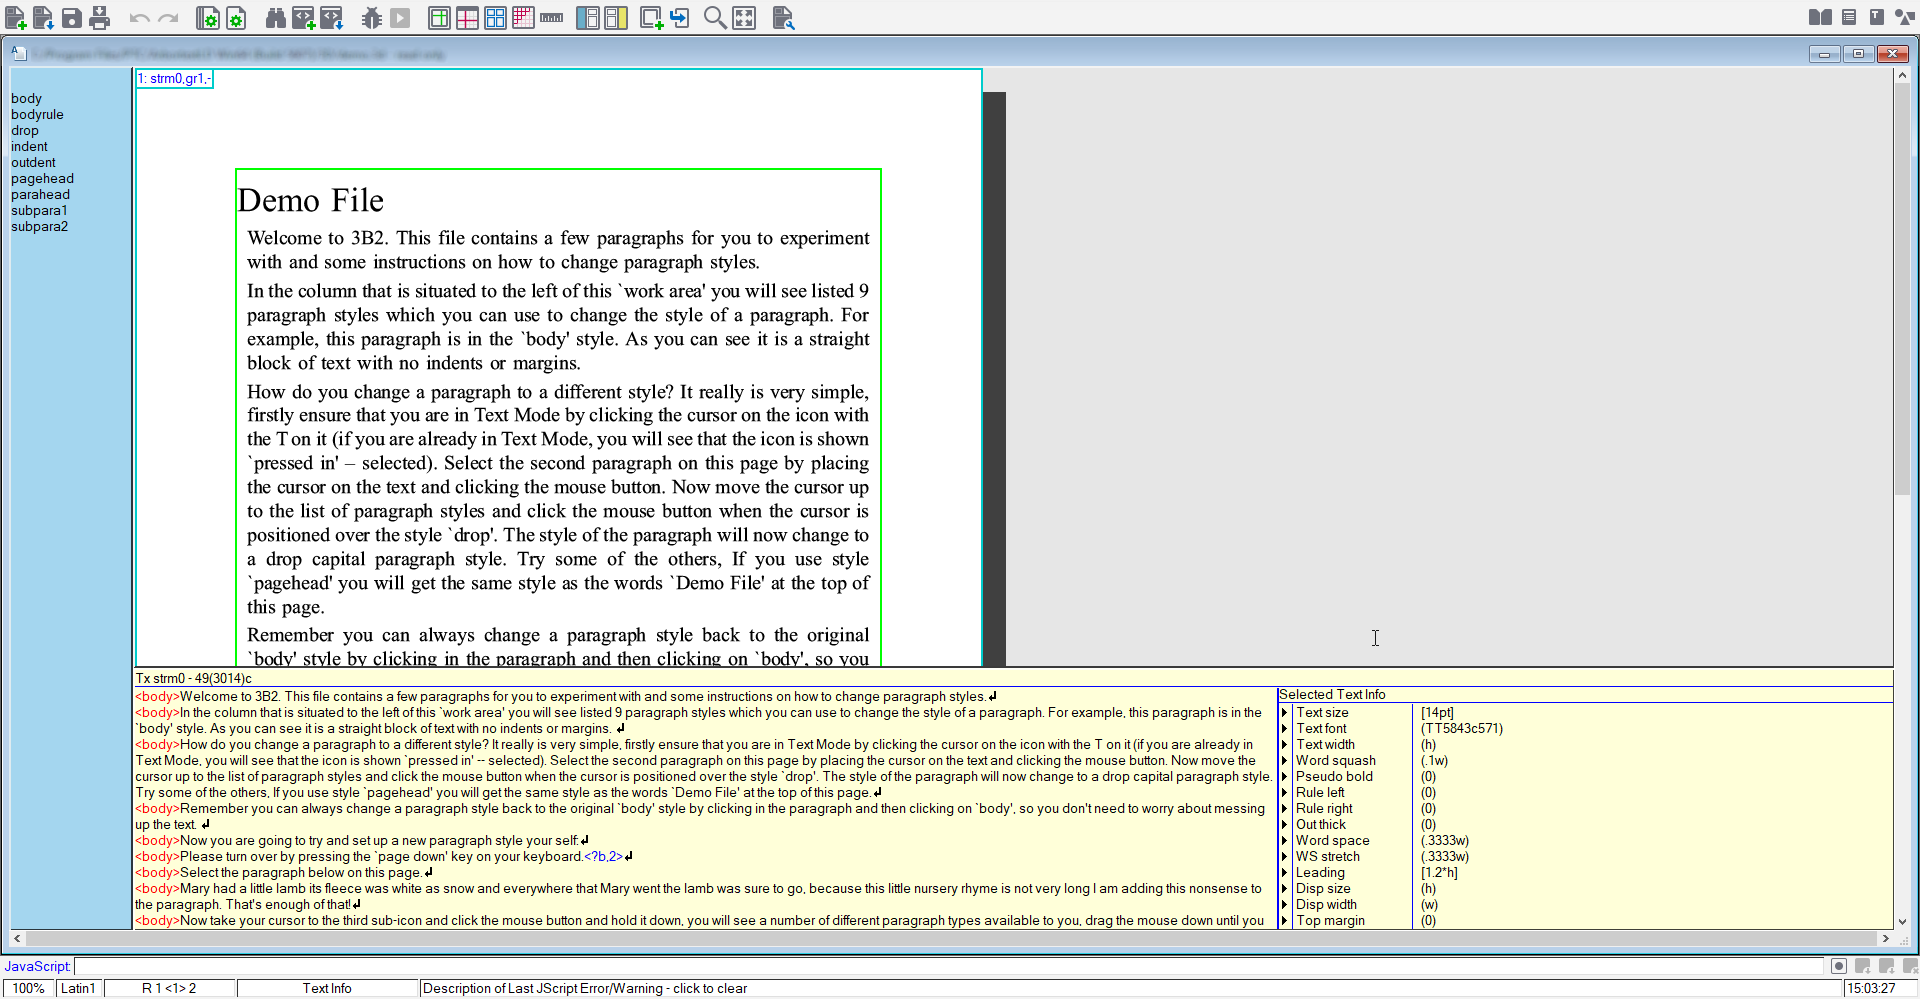
Toggles the display of an additional window in the edit bar, as well as the text representation of the stream, which contains information depending on the current PTC ALD operating mode or the pressing of additional buttons.
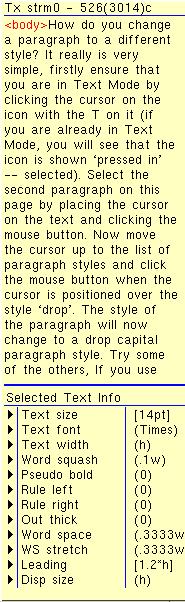
◦ In Text Mode: displays Selected Text Info in the window, containing the properties of the text at the current cursor position. The properties can be edited from this window.
◦ In Page/Frame Mode: displays some properties of the current frame in the window. These properties can be edited here.
If the additional window in the edit bar has been activated using the button detailed above, this button will change the display in the window to Paragraph Info, containing the properties of the paragraph style in place at the current cursor position.
Toggles the inclusion of the text representation of the current stream. When this option is activated only the additional information window will appear.
A user can vary the size and position of the yellow edit bar to their personal preference, using the ty macro. These settings are saved by document, so the same edit bar representation will appear every time you open the same document. Some examples of how to size and position the edit bar are given below; press F9 to invoke the macro bar and Return to enter the macro:
• ty -20: make the yellow bar 20 characters wide and position it on the right hand side of the work area
• ty 15: make the yellow bar 15 lines high and position it at the bottom of the work area
• ty 0: deactivate the information bar at the top of the yellow bar and display the yellow bar as one edit line only
These settings can also be specified via the > > > : view menu option.
It is possible to create actions that will revert to a specified arrangement of the yellow bar, and draw these as icons on one of the interface toolbars as shown below. Although the detail of this process is outside the scope of this document, you can use the basic steps listed below:
1. Create an icon to be added to the toolbar using the iconedit macro
2. Associate a macro action (for example ty 15) to the icon using the actedit macro
3. Add the icon to the required toolbar using either the tooledit macro or the > > > menu option.
The image below shows suggested icons added to the doc_main toolbar: