Upgrading PTC Arbortext Content Delivery from 6.x.x.x to 7.2.x.x Release
This section describes the steps that you must follow to upgrade PTC Arbortext Content Delivery from 6.4, or 6.5, to 7.2.x.x release.
PTC recommends the fresh installation of PTC Arbortext Content Delivery 7.2.x.x release with data loading and migrating the customizations and the dynamic data.
Pre-requisites
• Ensure that PTC Arbortext Content Delivery 6.4 or 6.5 is installed. It is assumed that the bundles are loaded and all dynamic data is created.
• Servers are down before starting the upgrade process.
• If you have any previous customizations that you want to migrate to the upgraded release, see the Analyzing 7.1 Customization section.
Upgrade Steps
Review the following high-level steps before proceeding to the detailed upgrade steps.
1. Perform Dynamic Data Extraction from the 6.x servers.
2. Install a fresh 7.2.x.x Monolithic/Split/Cluster/Multisite Environment of PTC Arbortext Content Delivery.
3. Load data on the newly installed 7.2.x.x server.
4. Import Dynamic Data in the 7.2.x.x installation.
Step 1: Perform Dynamic Data Extraction from the 6.x servers
This step extracts the dynamic data from the existing servers, such as users, profiles, carts, orders, notes, feedback, into files in the specified folder. These files are later loaded into 7.2.x.x after installation.
• Perform following steps from: ◦ For Split – Viewer machine ◦ For Cluster – Master Viewer machine ◦ For Multi-site – Any Master Viewer machine • The following steps must be performed only on respective PTC Arbortext Content Delivery (6.4 or 6.5) installation and the server must be up and running. • Export the data from 6.x system by applying the patch provided in the Data Extract Utility here. • For the Notes to migrate successfully, the user who created notes should have the create note and share note privilege. If they don not have these privileges, create one common OEM profile for all such users and check these two privileges and add all the users to this profile. After this is done, you can perform the export of data. • While upgrading to 7.1, if you want to go back and access the current system, revert all the data extraction changes mentioned in this section, that is Step 1: Perform Dynamic Data Extraction from the 6.x servers. |
1. Unzip DataExtractUtility.zip, and copy xconf/dataExtraction.service.properties.xconf to /<HOME>/SW/SW/Applications/Windchill.ear/codebase.war/com/ptc/sc/xconf folder.
The DataExtractUtility.zip file is not included in the release package, and must be downloaded from the PTC download center. 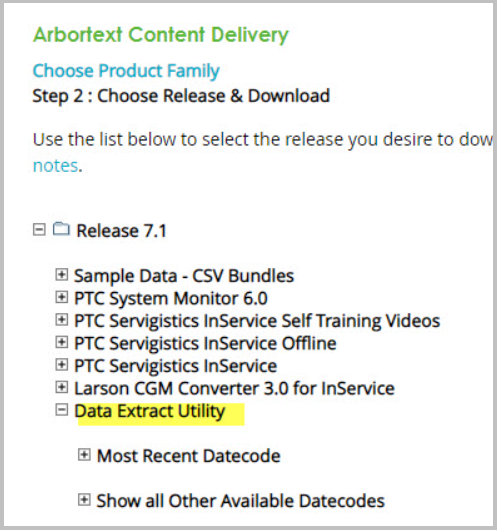 |
2. Copy DataExtractUtility.jar and gson-2.3.1.jar to the codebase.war/WEB_INF/lib folder.
3. Open a Windchill shell.
4. Add or uncomment the following entry in <WT_HOME>/declarations.xconf at the end of the file.
<ConfigurationRef
xlink:href="codebase.war/com/ptc/sc/xconf/dataExtraction.service.properties.xconf" />
xlink:href="codebase.war/com/ptc/sc/xconf/dataExtraction.service.properties.xconf" />
After successfully extracting the dynamic data, revert this configuration step, for PTC Arbortext Content Delivery 6.4 application. |
5. Run the following commands:
xconfmanager -s
com.ptc.sc.WncInSDataExtractor.fileChunkSize=50 -t codebase.war/wt.properties
xconfmanager -s
com.ptc.sc.WncInSDataExtractor.fileWriterPoolSize=250 -t codebase.war/wt.properties
com.ptc.sc.WncInSDataExtractor.fileChunkSize=50 -t codebase.war/wt.properties
xconfmanager -s
com.ptc.sc.WncInSDataExtractor.fileWriterPoolSize=250 -t codebase.war/wt.properties
6. Run xconfmanager -Fp.
7. Update <HOME>\SW\SW\Applications\Windchill.ear\codebase.war\log4j.properties file and perform the following steps:
a. Add "file" to the rootLogger:
log4j.rootLogger=ERROR, stdout, file
b. Add the following entries:
log4j.appender.file=org.apache.log4j.RollingFileAppender
log4j.appender.file.File=
{Provide Path here}<export_path_location>/<output_logFileName>.log
log4j.appender.file.layout=org.apache.log4j.PatternLayout
log4j.appender.file.layout.ConversionPattern=%d{ISO8601} %-5p [%t] %c - %m%n
log4j.appender.file.File=
{Provide Path here}<export_path_location>/<output_logFileName>.log
log4j.appender.file.layout=org.apache.log4j.PatternLayout
log4j.appender.file.layout.ConversionPattern=%d{ISO8601} %-5p [%t] %c - %m%n
• It is not required to restart the server when performing the above steps. • This utility is developed for JAVA 11, hence before performing step 6 ensure that you have JAVA version 11 installed. |
8. To extract the data, run the following command:
java com.ptc.sc.extract.WncInSDataExtractor -path=<export_path_location>
Ensure that the server is up and running, and this command is run in the Windchill Shell.
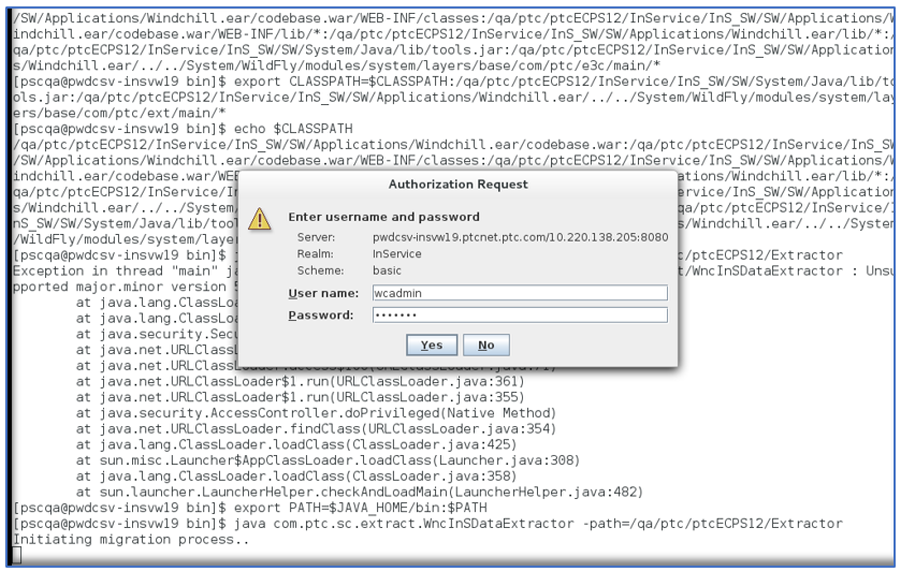

• The system IDs of Options and Choices data are updated to support data from multiple authoring systems. This requires ReTAL of the product hierarchy bundle with Options and Choices data after the upgrade from PTC Arbortext Content Delivery 6.4 (or 6.5) to 7.2.x.x is complete. This is required only in case you have loaded Options and Choices data from multiple authoring systems; that is, data has PI level Options and Choices defined. Also ReTAL is required when PI data is already loaded and logical expression is already present before the upgrade from PTC Arbortext Content Delivery 6.x to 7.2.x.x. Therefore PH must be loaded again on the 7.2.x.x system. • Extraction and Loader utility tasks can be run only on master Viewer in case of Cluster setup. Copying of files (such as titles) must be done on both Publishers and Viewers. • The error messages seen in the above image are expected and should be ignored. |
Step 2: Install a fresh 7.2.x.x Monolithic/Split/Cluster/Multisite Environment
• For the Monolithic environment, see installing Monolithic.
• For the Split environment, see Split Configuration.
• For the Cluster environment, see Deploying in a Clustered Environment.
• For the Multi-Site environment, see Mult-isite Configuration.
Step 3: Load data on the newly installed 7.2.x.x server
For loading the data, see the PTC Arbortext Content Delivery Publishing and Loading section.
Step 4: Import Dynamic Data in the 7.2.x.x installation
• Perform following steps from: ◦ For Split – Viewer machine ◦ For Cluster – Master Viewer machine ◦ For Multi-site – Any Master Viewer machine |
Before dynamic data import, all of the bundled or catalog data must be loaded in the 7.2.x.x environment like it was loaded in 6.x.
1. Log in to the PTC Arbortext Content Delivery user interface and ensure that the bundle data is visible.
2. MongoDB must have only that base data which persisted during the installation. This step is not required right after installation or after bundle data load.
3. To open the Windchill shell on the viewer machine, go to <HOME>/SW/SW/Applications/Windchill.ear/bin/, open a terminal and run ./windchill shell command.
4. Custom preferences must be loaded before starting the upgrade (using the wt.load.LoadFromFile command). See the preference.xml file in InS_SW\SW\Applications\Windchill.ear\loadXMLFiles\scloaders\files\wnc
This is not a mandatory step but good to have. |
5. Custom privileges must be loaded before starting upgrade (using the wt.load.LoadFromFile command), attaching a reference file– custom_privilege.xml. See the admin.xml file in InS_SW\SW\Applications\Windchill.ear\loadXMLFiles\scloaders\files\wnc
6. Check if options and choices were added in 6.x system. If yes, same option and choices must be added in 7.2.x.x as well. (using the wt.load.LoadFromFile command). See the scaccessoptions.xml file in InS_SW\SW\Applications\Windchill.ear\loadXMLFiles\scloaders\files\wnc
For more information, see the Load Access Option into the System section in Customizing Access Options.
7. The LDAP must have users (same LDAP of 6.x can also be used or ldif files can be imported from the previous LDAP in the 7.x system. If any user level custom attributes were created and new LDAP is used, then add those attributes as well in LDAP.
For adding attribute steps, see Mapping User Enterprise Attributes.
8. Stop all the servers.
9. Add the following properties to sc.wt.properties.xconf.
<Property name="com.ptc.sc.upgrade.skipUserCreationInLdap"
default="false"
overridable="true"/>
default="false"
overridable="true"/>
It is better to keep this property as false. |
<Property name="com.ptc.sc.upgrade.skipOnMigration"
default="true"
overridable="true"/>
default="true"
overridable="true"/>
Always set this property to true. |
<Property name="com.ptc.sc.upgrade.crossModeSIMMigrationProperty"
default="false"
overridable="true"/>
default="false"
overridable="true"/>
Set this property to true if the mode of migration is from shared to non-shared, and if the bundled data is a SIM bundle. |
Run xconfmanager –p from the Windchill shell and verify if the property is reflecting in the wt.properties file.
10. Restart the server and load the dynamic data.
11. Run the following command specifying the path where the extracted files are stored:
java com.ptc.sc.loader.WncInsLoader -u wcadmin -p wcadmin -d <Extracted_Data_Path>
or
windchill com.ptc.sc.loader.WncInsLoader -u wcadmin -p wcadmin -d <Extracted_Data_Path>
The message All Objects were imported successfully is displayed.

• If at any point the data is not loaded properly, ensure that all of the above points are taken care of. • Even after ensuring all of the above points, if the data is not loaded completely or any extra data is created, clean the database by dropping the database and reload the base data using the following command: windchill com.ptc.sc.loader.SCLoader baseset -u <siteAdmin_username> -p <siteAdmin_password> |
12. Restart the Core Server, CoreCMI, JBOSS services on master Viewer.