部品のハイライト表示
このエクスペリエンスでは、動的な構造を使用してモデルの部品を選択します。これを Vuforia Studio のコンテキストから考えた場合、「モデルアイテム」オプションを使用して部品を分離することなく、モデルの部品を選択できることになります。tml3DRenderer (WebGL をベースとする Vuforia Studio のレンダラー) とオカレンスデータを使用すると、ノード ID に基づいて 3D コンポーネントを変更するための一連のサービスを利用することができます。これにより、ユーザーが選択した部品に基づいて、動的な変更を行うことができます。
この方法の場合、ウィジェットをエクスペリエンスに追加することなく、よりインタラクティブなモデルにすることができます。特定の部品を選択すると、その部品に関する情報とともに Ionic ポップアップが表示されるだけでなく、その部品がハイライトされます。このセクションでは、JavaScript コードと「TML テキスト」ウィジェットを使用してシェーダーを作成する方法について説明します。
1. 「Home.js」で、部品をハイライトするための hilite という新しい関数を作成する必要があります。この関数には、選択された部品となる items の入力と、その部品をハイライトする必要があるかどうかを判断するためのブール値である hilite の入力が指定されます。この関数内で、tml3DRenderer オブジェクトが編集されます。このオブジェクトは、次の手順で追加する「TML テキスト」ウィジェットに対応しています。
tml3DRenderer オブジェクトによって .setProperties サービスが呼び出され、このオブジェクトのプロパティが設定されます。このサービスは、ハイライトするアイテムの情報を受け取ると、関数の入力情報である hilite ブール値が真か偽かを確認します。条件演算子「?」により、hilite が真なのか偽なのかが判断され、その結果に基づいて、一連のオブジェクトプロパティが返されます。hilite が真の場合、オブジェクトに対して次のプロパティが設定されます。{ shader:"green", hidden:false, opacity:0.9, phantom:false, decal:true }。この場合、「TML テキスト」ウィジェットの名前は「green」になります (「TML テキスト」ウィジェットは、次の手順で追加します。追加すると、このウィジェットがアクティブになります)。hilite が偽の場合は、{shader:"", hidden:false, opacity:1.0, phantom:false, decal:false} がプロパティとして設定されます。この場合、部品がデフォルト設定のままで表示されます。関数のこの部分で、WebGL を使用して Vuforia Studio のグラフィックインタフェースを編集します。このコードでは、「TML テキスト」ウィジェットを追加するまで、選択した部品がハイライトされることはありません。
//
// highlighting function. Inputs are the selected part and a boolean for hilite
$scope.hilite = function (items, hilite) {
//
//iterate over each item that is used as an imported variable for the function using .forEach to look at each value that comes in the items input
items.forEach(function(item) {
//
//set the properties of the TML 3D Renderer to highlight the selected item using a TML Text shader. "green" is the name of the script for the TML Text.
tml3dRenderer.setProperties(item, hilite === true ? { shader: "green", hidden: false, opacity: 0.9, phantom: false, decal: true }
: { shader: "", hidden: false, opacity: 1.0, phantom: false, decal: false });
}) //foreach end
} //hilite function end
2. 「プロジェクト」枠の「ホーム」に戻って 3D キャンバスを表示します。「TML テキスト」ウィジェットをキャンバス上にドラッグアンドドロップし、このウィジェットの「Studio ID」を「shaders」に変更します。
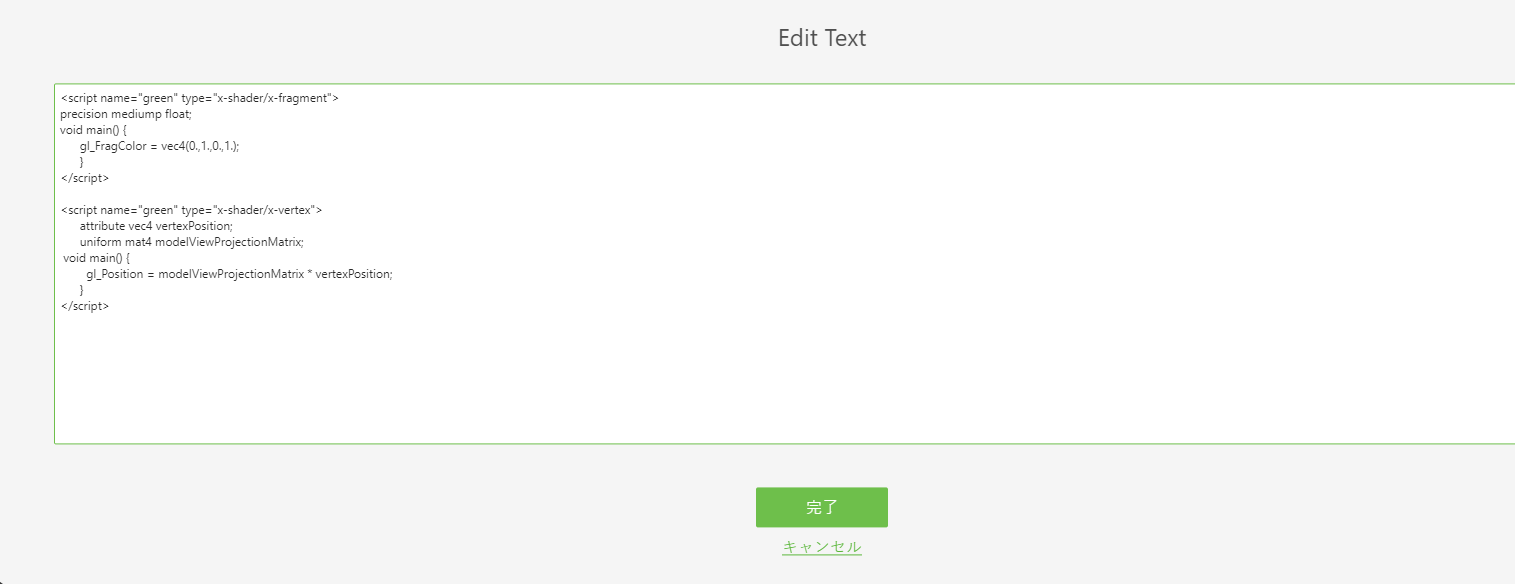
3. 「テキスト」プロパティの横にある緑の編集アイコンをクリックして「テキスト編集」ボックスを開き、以下のコードのみを入力します。コメントは入力しないでください。終了したら、「完了」をクリックします。
このコードにより、スクリプト内で関数を呼び出すたびに、シェーダーが適用されるようになります。
| コメントは、コードでどのような動作が実行されるかを説明するための情報です。コメントをコードに含めた場合、そのコメントが画面に表示されます。 |
//name of the shader is green, the type is setting the color.
//
<script name="green" type="x-shader/x-fragment">
//
// setting the precision of the shader. medium is fine for this application.
precision mediump float;
//
// function to set the color of the shader. Syntax is vec4(R, G, B, A) format and the values are on a 0.0-1.0 scale
void main() {
gl_FragColor = vec4(0.,1.,0.,1.);
}
</script>
// name of the shader is green, this time the type sets the position
<script name="green" type="x-shader/x-vertex">
attribute vec4 vertexPosition;
uniform mat4 modelViewProjectionMatrix;
//
// sets the position of the vertex
void main() {
gl_Position = modelViewProjectionMatrix * vertexPosition;
}
</script>
4. これで、関数の設定が完了しました。次に、部品をクリックしたときに呼び出されるコードにこの関数を追加します。userpick 関数の「popup」セクションの下に、以下のコードを追加します。
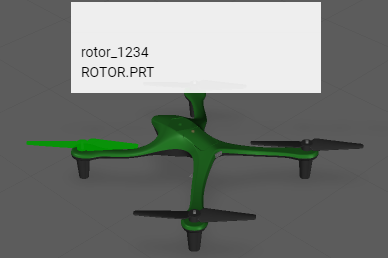
コードは、前に作成した currentSelection 変数を使用して、どの部品がクリックされたのかを判断できるようになります。クリックされた部品と、その部品が属するモデルの名前が入力情報として関数に渡され、そのモデルのどの部分をハイライトするのかが判断されます。たとえば、前部左側のローターが選択された場合、[$scope.currentSelection] が [quadcopter + “-“ + /0/18/0/0] になります (文字列として記述した場合、「quadcopter-/0/18/0/0」になります)。True の場合、ブール値が真になり、ハイライト表示シェーダーが適用されます。
//
//highlight the chosen item and set the shader to true
$scope.hilite([$scope.currentSelection], true);
5. 「プレビュー」をクリックして、シェーダーが正しく動作していることを確認します。部品をクリックしたときに、その部品の色が緑になれば、シェーダーが正しく追加されています。
6. ポップアップが画面から消えても、シェーダーが消えることはありません。シェーダーを非表示にするには、シェーダーを除去する部品を判断するための入力情報として、refitems を closePopup 関数に追加する必要があります。入力情報として false ブール値と refitems を使用して、closePopup 関数の内部で hilite 関数が呼び出され、選択された部品のシェーダーがオフになります。これは、「Home.js」のコードにも追加されるため、同じ関数内でシェーダーが非表示になります。
| closePopup 関数の新しい入力情報として refitems を追加する必要があります。追加しなかった場合、エクスペリエンスが正しく機能しません。 |
既存の closePopup 関数に、その他のコードを追加します。
//
// create a function to close the popup and turn off shading. popup is the popup, refitems is the input for the part(s) that is being highlighted
var closePopup = function (popup, refitems) {
//
//The function returns a method for removing the popup from the screen and turns off the shader
return function () {
//
//using the input parts, set the hilite function to be false, removing the shading
$scope.hilite(refitems, false)
//
//apply the .close method, which removes a certain section of a selected object, to the popup variable
popup.close()
//
//change the Text property of the playButton to the instructionName variable, which was created from the JSON data of the model
$scope.view.wdg.playButton.text = instructionName;
//
// create an object for the playButton called toPlay. This object will have properties of model, which will be the name of the object that
//is clicked on and instruction, which will add the proper syntax for calling a sequence, based off the instructionName variable, into Studio
$scope.view.wdg.playButton.toPlay = { model: targetName,
instruction: 'l-Creo 3D - ' + instructionName + '.pvi' };
} //return end
} // closepopup function end
7. closePopup 関数のターゲットを、選択された部品に更新します。
$timeout(closePopup(popup, [$scope.currentSelection]), 3000);
8. 「プレビュー」をクリックして、エクスペリエンスをもう一度表示します。ポップアップが画面から消えたときにシェーダーも消えれば、この手順は成功です。
9. 次の「3D-Guided Service Instructions 202」セクションで使用できるように、プロジェクトを保存してください。