Add Attributes in Bulk
In
3D-Guided Service Instructions 101 you added attributes for
partNumber and
Illustration to the quadcopter model. Those attribute values were populated one-by-one, but this section will show you how to add the attributes in bulk. You will add pricing data to the models as an attribute that will then be used to create a total when you add items to a cart.
1. Open Creo Illustrate.
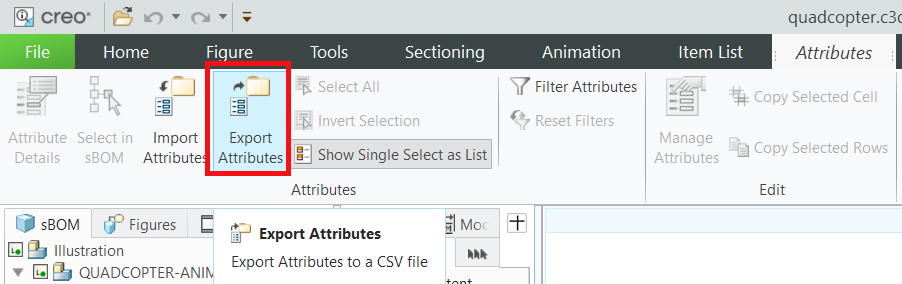
3. Open the lower data panel if it isn’t already open. Select the Attributes tab to display the attributes for the selected part.
4. When the Attributes tab is opened in the lower data panel, another Attributes tab opens in the ribbon. In the Attributes tab at the top of your screen, select Export Attributes to prepare the attributes for export. In order to edit the attributes for the model in bulk, they must be exported as a .csv file that can be opened in Microsoft Excel or a similar application.
| The Attributes tab must be selected in the lower data panel in order for the Attributes tab in the ribbon to appear. |
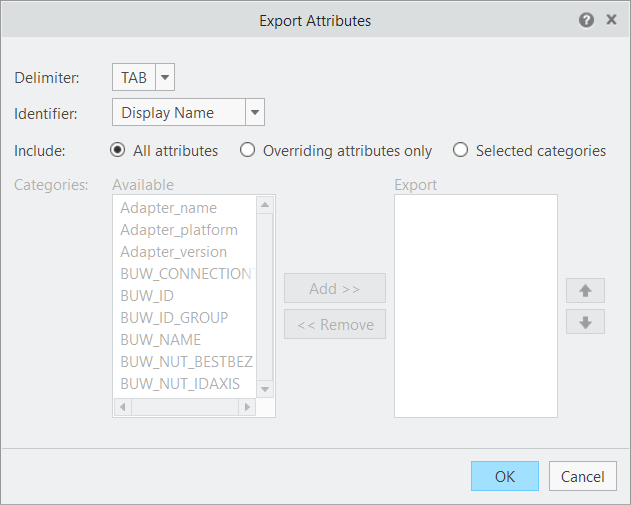
a. In the Export Attributes window, select a Delimiter and Identifier from their respective drop-downs. A delimiter is the character that separates the values in the list of attributes. In this example, TAB is selected as the delimiter. The Identifier is used to determine which attribute is used to identify each part. Select Display Name so that each part is designated by the name of its .prt file, as it is displayed in the sBOM.
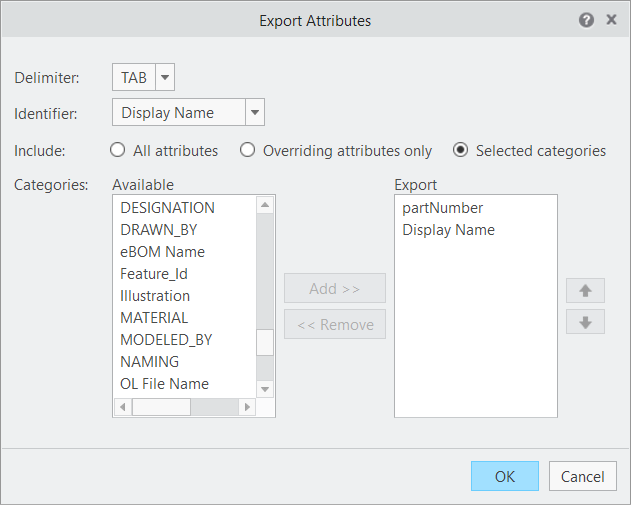
b. You must add at least two categories of attributes to the Export list to make the file readable. For readability sake, we will only add two attributes, as leaving all attributes checked would produce an exported .csv file with as many columns as there are attributes. Select the Selected categories option next to Include: select the partNumber attribute in the Available list on the left and click Add >>. You will see that since Display Name was chosen as the identifier, that it was automatically added to the Export list.
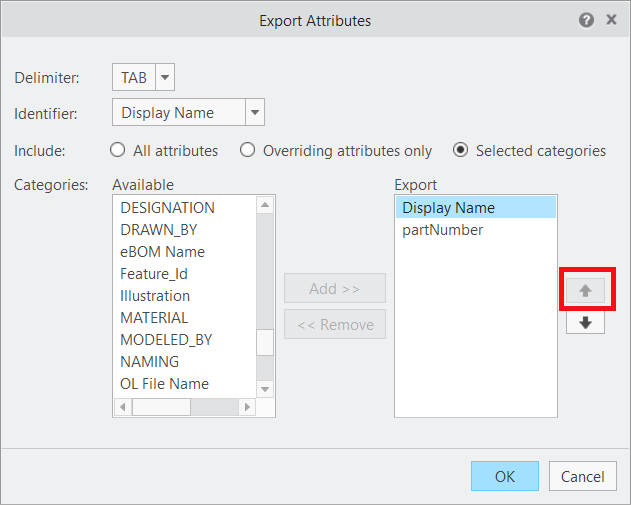
c. Select Display Name in the Export list, and click the up arrow to move it above partNumber.
d. Click OK, name the file quadcopter, and click Export to create a .csv file.
e. When a message appears saying that the export of the .csv file was successful, click OK.
5. Open Microsoft Excel or a similar application. The next few steps will show you how to bulk edit in Microsoft Excel.
a. When Excel opens, select Blank workbook.
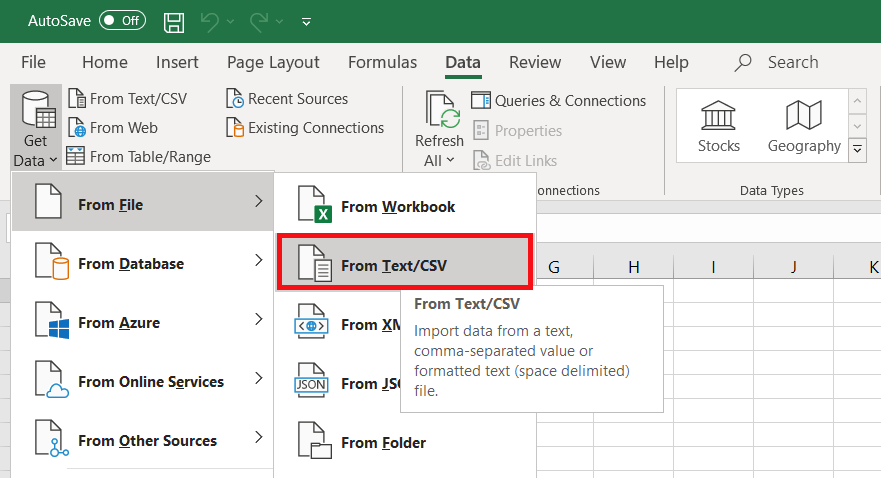
b. Navigate to the Data tab and click > > . This opens a File Explorer window.
c. Navigate to and select the quadcopter.csv file from its saved location and then click Import.
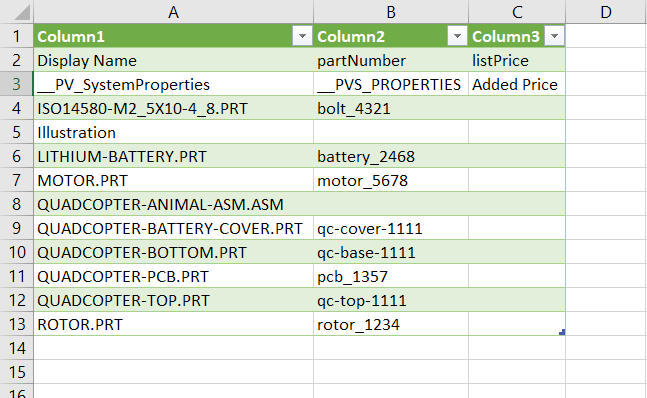
d. When the window below appears, click Load to load the two data columns into the Excel sheet.
e. If your workbook looks similar to the image below, then it has been imported correctly. If not, repeat the steps prior to this.
f. In cell C2, type listPrice. This creates a new attribute name when imported back into Creo Illustrate. In cell C3, type Added Price. This will be the new attribute category.
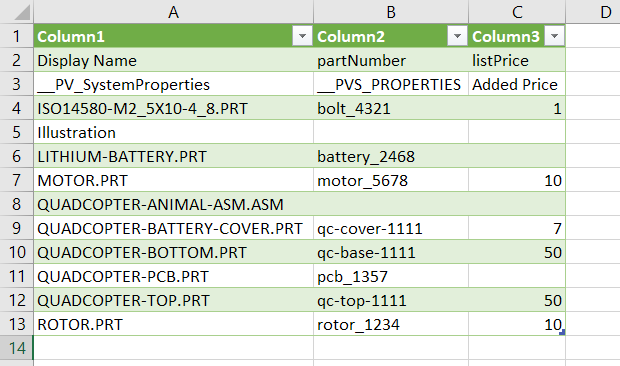
g. Add the prices displayed below for the given parts. Illustration and QUADCOPTER-ANIMAL-ASM.ASM do not get prices because they are the assembly portion of the model in the model tree, not actual parts. The electronics combined part is also not listed in this because it is two combined parts, so the pricing information will need to be added manually. Because of that, LITHIUM-BATTERY.PRT and QUADCOPTER-PCB.PRT will not have prices listed.
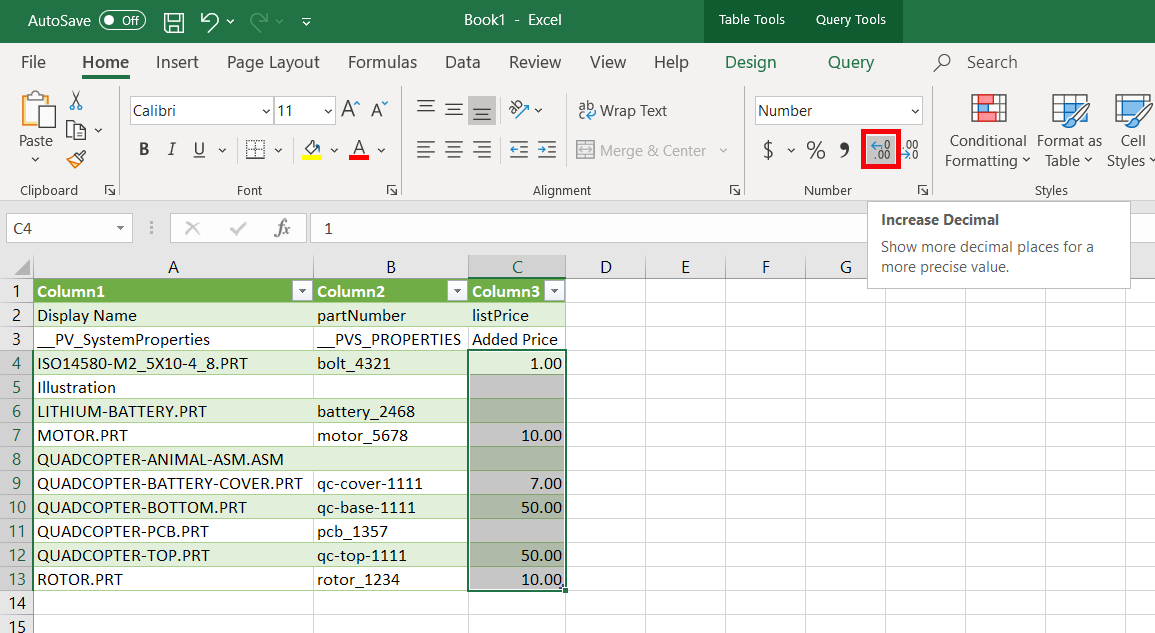
h. Select all listPrice values and click the Increase Decimal button to add two decimal points to the end of the values. This ensures that they correspond with how monetary values are written out.
i. Click > . Save the file to a desired location as a .csv.
| You must complete the Save As action and not the ctrl+S method of saving to ensure that you save the file as a .csv file. |
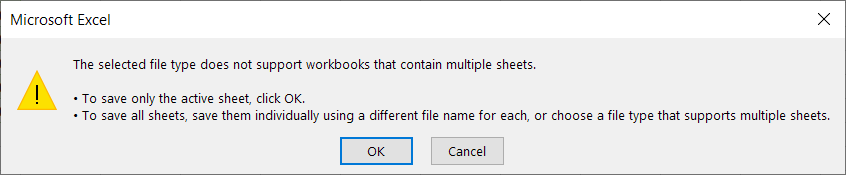
j. In the pop-up that appears, click OK since only the active sheet needs to be saved.
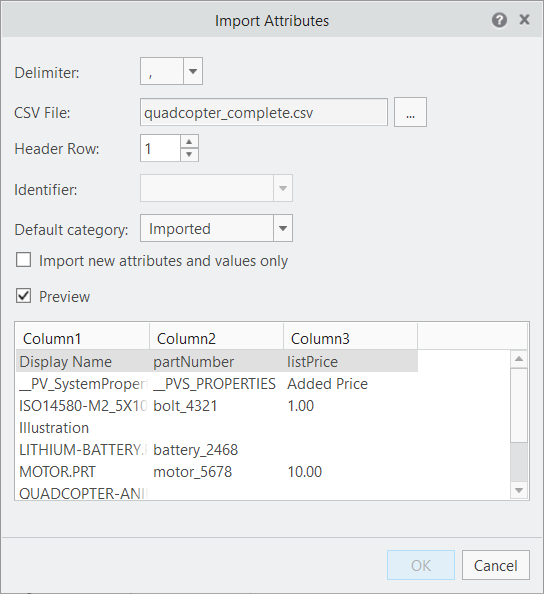
6. Now that this file has been created, navigate back to Creo Illustrate. From the Attributes tab, select Import Attributes. The Import Attribute action is used to bring the listPrice attribute that was just created into the quadcopter model.
a. On the Import Attributes window, click … next to CSV File. Navigate to the file you just created, and click Import. Your Import Attribute window should look like the image below.
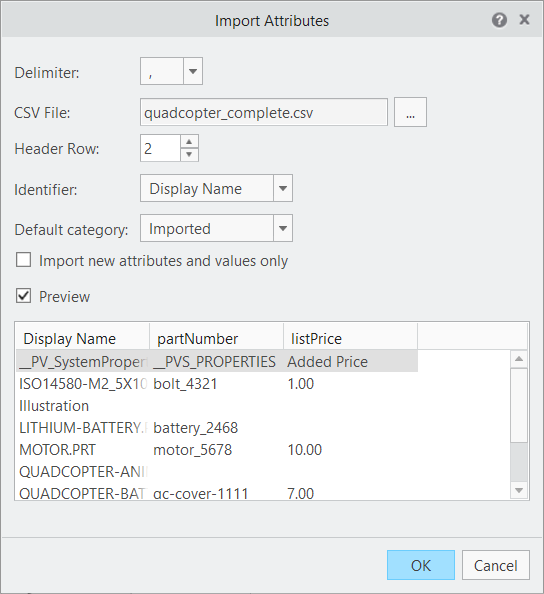
b. Once the data has been imported, you’ll notice that the column headers from Excel have also been imported even though they are not attributes. You will need to change the value of the Header Row box to 2 to set the second row in the attributes list as the header row. For example, once you update the Header Row to 2, listPrice will be the header instead of Column3. Click OK.
c. Click OK on the success window.
7. Click on the parts inside the sBOM. The Attributes tab in the lower data pane should now show the listPrice attribute for each part.
8. As mentioned before, the electronics combined part needs to have its price attribute created manually.
a. Click the
Edit Structure button to open the structure editor again. Repeat the same process you used in
3D-Guided Service Instructions 101 to make the model appear in the
Structure Edit window.
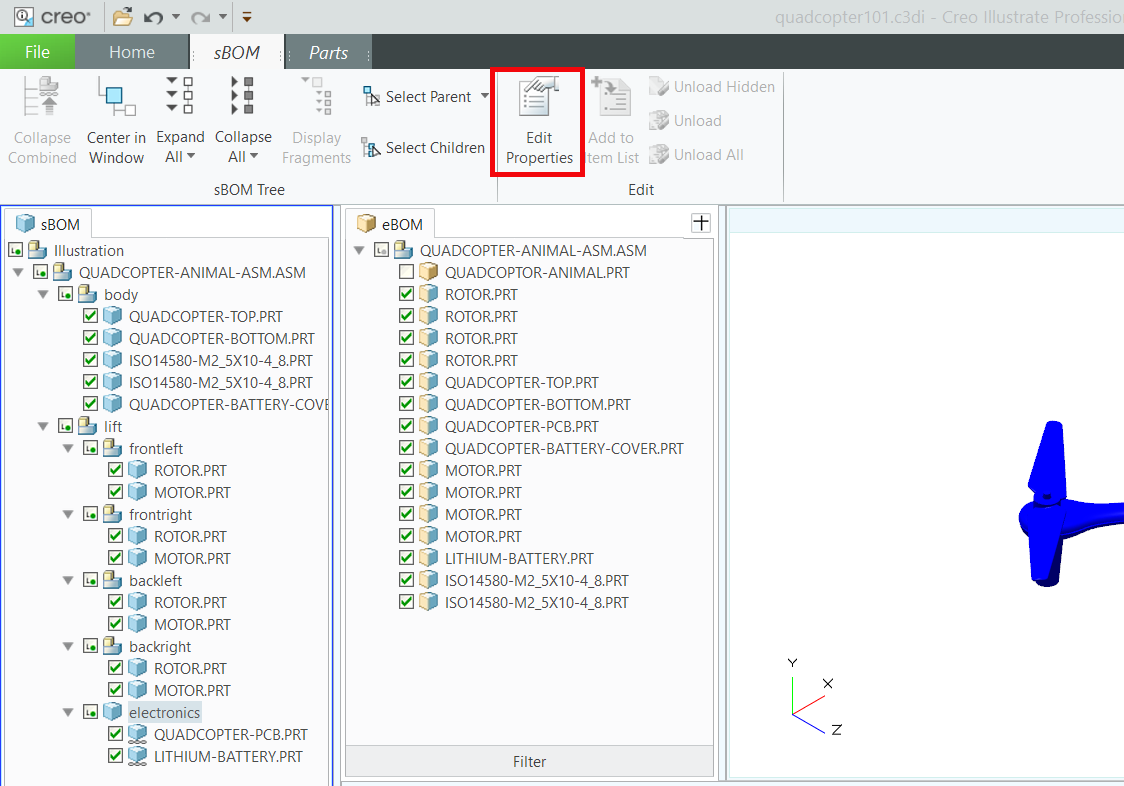
b. Like before, select electronics in the sBOM panel, and then select Edit Properties in the sBOM tab in the ribbon.
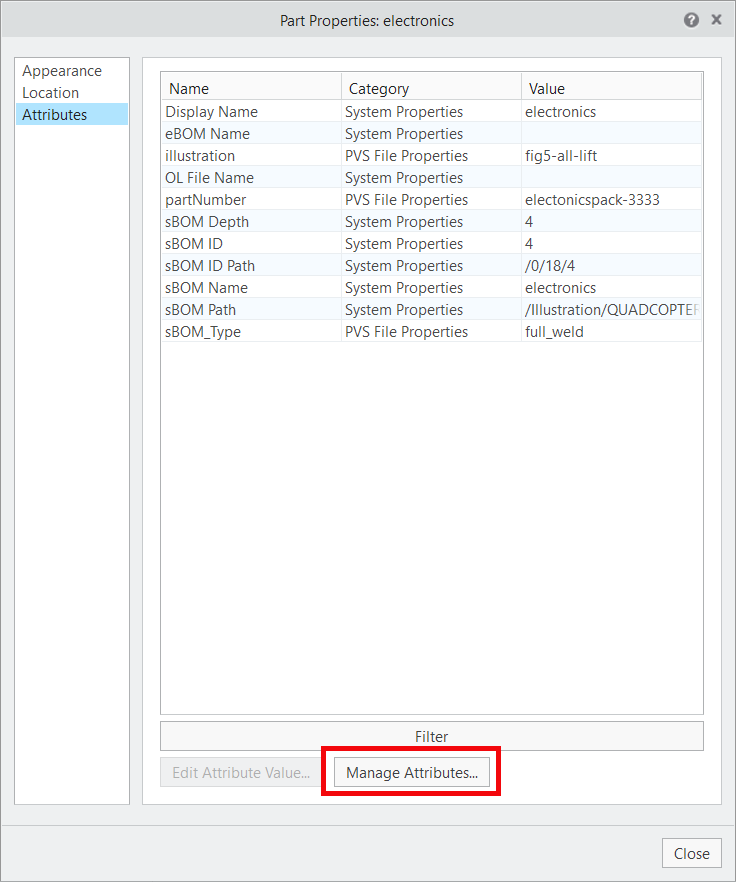
c. In the Part Properties menu, click the Attributes tab and then select Manage Attributes.
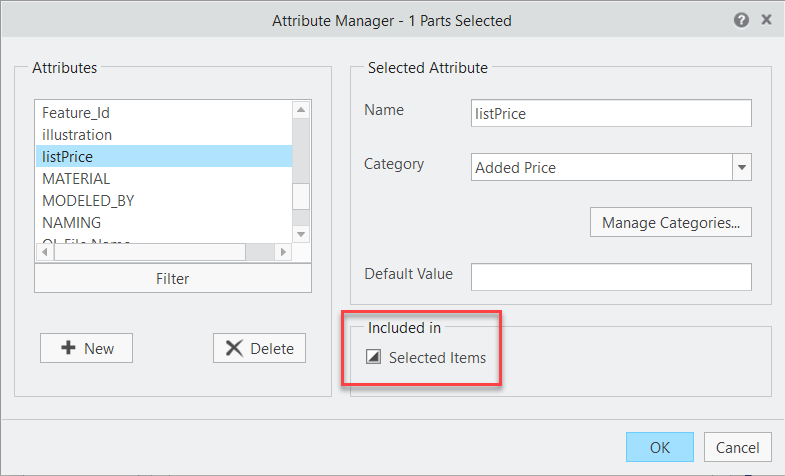
d. In the Attribute Manager, scroll down to the listPrice attribute. You will see that listPrice is listed as an attribute since you created it, but it is not currently associated with the part. You can determine if an attribute is associated with a part by the state of the Selected Items checkbox. Below, it shows that the attribute is associated with other items, but not this one.
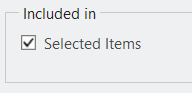
Update the Selected Items checkbox until it looks as follows:
e. Click OK on the Attribute Manager window. This adds listPrice as an attribute for electronics.
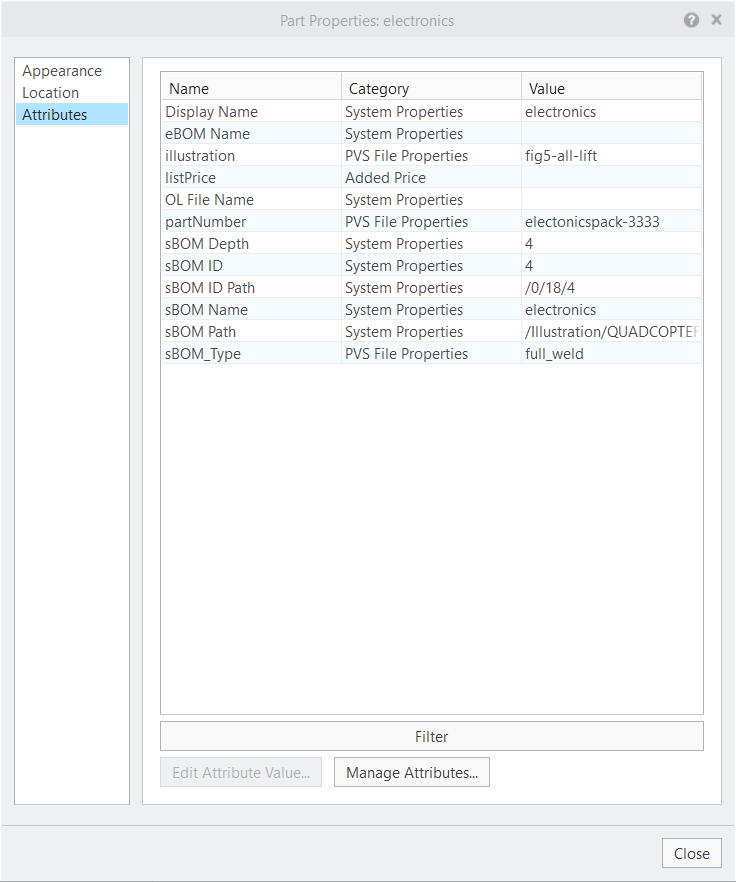
f. Verify that listPrice is shown in the Part Properties menu and click Close.
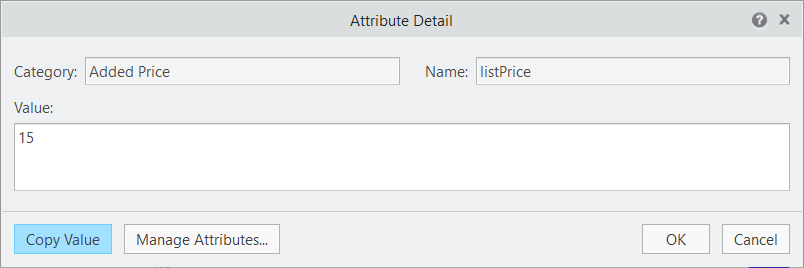
g. Once you are back to the Structure Edit window, double-click the listPrice attribute in the Attributes (electronics) tab at the bottom of your screen. Enter 15 in the Value box, and click OK.
h. Once this is completed, open the Home tab in the ribbon and click Close Edit to exit Structure Edit mode.
9. Click
Save As and name the file
quadcopter.c3di. It’s okay to overwrite the first version of
quadcopter.c3di that you created in 3D-Guided Service Instructions 101, as this new version contains all the information from that section plus the new attributes created. A completed
.c3di file named
quadcopter301.c3di is also provided in
3D-Guided Service Instructions 300 folder in GitHub for reference.
10. Click > , and save the file as
quadcopter.pvz. Similar to the previous step, it’s okay to overwrite the previous file. A completed
.pvz file named
quadcopter301.pvz can be found in the
3D-Guided Service Instructions 300 folder in GitHub.