Create an Experience with Dynamic Model Loading
You can create an experience that includes multiple models and the ability to switch between them dynamically.
What You’ll Need
• Access to Vuforia Studio
• A ThingMark to associate your experience to
• Access to an Experience Service
• Access to at least two CAD models (.pvz files)
|
|
As an example for this tutorial, we’ll use blue_pump.pvz, Chessboard.pvz, and Fan.pvz.
|
Steps
1. Create a new project, and select Mobile - Default as the template type. Enter a project name and your Experience Service URL on the New Project window, and click Create.
2. Drag and drop a ThingMark widget onto the canvas.
The ThingMark determines where other 3D augmentations are scaled and positioned in the experience when you scan the physical ThingMark.
3. Drag and drop a Model widget onto the canvas.
4. In the PROJECT pane, click the green + sign next to RESOURCES. The Add Resource window appears.
5. Click Select File, and navigate to the 3D model files you want to add. Click Open, and then click Add on the Add Resource window. The files appear under Uploaded.
6. Next, select 2D from the canvas toolbar.
| You can switch back and forth between the 3D and 2D overlay using this toolbar. |
7. Drag and drop a Select widget onto the center panel on the canvas.
8. In the DETAILS pane, enter Model in the Label field for the Select widget.
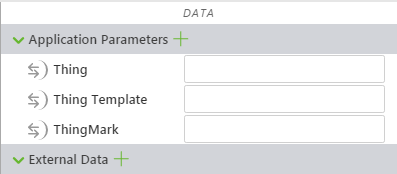
9. Next, we’ll create a new application parameter. Click the green plus icon next to Application Parameters in the DATA pane.
10. Enter modelSelect in the Name field on the Add Application Parameter window, and click Add.
11. Drag and drop the new application parameter onto the List property of the Select widget.
12. Switch back to the 3D canvas.
13. Now, click select-1 in the project tree to display the properties for Select widget in the DETAILS pane. Drag and drop the Value property of the Select widget directly onto the model. Select Resource on the Select Binding Target window, and click Bind.
14. Click Home.js in the PROJECT pane, and enter the following in the JavaScript editor:
$scope.populateModelList = function() {
$scope.app.params.modelSelect = [
{
display: "Chessboard",
value: "app/resources/Uploaded/Chessboard.pvz"
},
{
display: "Blue Pump",
value: "app/resources/Uploaded/blue_pump.pvz"
},
{
display: "Fan",
value: "app/resources/Uploaded/Fan.pvz"
}
];
}
$scope.populateModelList();
| You’ll want to edit the display parameter to show the desired display name in the Select widget and the value parameter to enter the exact filenames of the .pvz files you’re using. For example, if your CAD models you’re using are a circular saw, drill, and a table saw, your JavaScript will look similar to the following: $scope.populateModelList = function() {
$scope.app.params.modelSelect = [
{
display: "Circular Saw",
value: "app/resources/Uploaded/circular_saw.pvz"
},
{
display: "Drill",
value: "app/resources/Uploaded/drill.pvz"
},
{
display: "Table Saw",
value: "app/resources/Uploaded/table_saw.pvz"
}
];
}
$scope.populateModelList(); |
15. Next, in the PROJECT pane, click Experiences under Configuration.
16. On the Edit Experiences page:
◦ Leave ThingMarks selected in the ThingMark Association field
◦ Enter a title in the Title field
◦ Enter your unique ThingMark ID in the ThingMark field (for example, the format is Domain:ID)
17. Finally, click Publish.
18. When you scan your ThingMark, you’ll see the Select widget, and no model.
19. Use the drop-down to select the model you want to view!