Working with Signals
Overview
Signals indicate the predictive strength or weakness of specific features on the goal variable. Use Signals to explore which features are important to predicting outcomes, and which are not.
A Signals page displays a list of all the features in the dataset, arranged in descending order based on their predictive strength on the goal. When you select a feature from the list, its available values are listed in a grid on the right, along with additional information about the strength of the signal. You can then use the slider control on the right (or the number of records fields) to control the range in the number of records each value must represent in order to be displayed in the values grid below.
In the sample Signals page below, the numbers correspond to the numbered items below the image.

1. Keyword Search – Use the search to find specific features in the list below the search.
2. Features List – The list displays all of the features in the dataset arranged in descending order based on their predictive strength on the goal (see the image above). Predictive strength is determined based on Mutual Information scores between each feature and the goal. However, if the signals job is run with redundancy filtering turned on, the features are ranked according to the amount of Information Gain each feature, in combination with previously-selected features, provides. See the image below and compare the columns shown to the image above.

To view more information about any one feature, select it from the features list. Its available values are listed in the values grid on the right, along with additional information about the strength of the signal.
If you select a feature whose first character is a number, make sure that you have followed the field naming rules defined in Data Field Names that Start with a Number |
3. Export Button – Click to export the Signals data to a CSV file. For more information, see Export Signals.
4. # of Records – Use the slider (or the range fields) to control the range in the number of records each feature value must represent in order to be displayed in the grid below. Only rows where the number in the # of records column falls within the slider range, will be displayed in the grid.
For example, if you want to eliminate unique values that represent only a few outlier records, you can increase the minimum number of records by sliding the left endpoint to the right. Values that represent fewer records than the new minimum will drop out of the display.
5. Values Grid — Each row in the grid shows the average of the goal variable (Avg. Goal) for records with a specific value. Each row also shows the difference (Diff vs Avg.) between that average and the overall average (Avg. Value for Goal) for the filtered dataset, as shown in the header. In other words: Avg. Goal – Avg. Value for Goal = Diff vs Avg.
Two Methods for Working with Signals
Analytics Builder provides two ways to identify and view signals, each of which is described in the subsections below:
• View from the Signals List Page – The Signals list page provides a list of all existing signals for every available dataset.
• View Signals from the Model Results – If a signal is based on a specific model, you can view the signal information directly from the results page of the model. For a demonstration of this signals method, see the following video: Create Signals in ThingWorx Analytics Builder
View from the Signals List Page
The Signals list page contains two sections. At the top, a table lists all of the existing sets of signals that have been created. When you select one of the signal rows, the selected signal is displayed in the bottom section of the page.
The Signals list at the top of the page includes the following columns of information about each signal:
Column Name | Description |
|---|---|
Signal Name | The name of a signal. The name will be user-defined if the signal was created from the Signlas list page. If the signal was created from a Model results page, the name will be auto-generated. |
Job ID | An automatically-assigned identifier for the signals job. |
Start Time | The date and time the signals job was started. |
State | The current status of the signals job. When you first identify signals, the state is "Queued" and then "Running." When the signals are identified and ready for use, the state changes to "Completed." If the job fails, the state will show "Failed." |
Goal | The goal variable selected for identifying signals from the dataset. |
Dataset | The name of the dataset the signals are based on. |
Filter | A filter that was applied to the dataset when the signals were identified. |
The Signals list page contains several options for identifying new signals and working with existing signals in the list table:
• Delete – Removes the selected signal.
• Job Details – Displays run time information for the signals job.
• Refresh – Refreshes the information on the Signals list page
• Filter Definition – Opens a Filter Definition dialog box and displays the conditions defined for the filter applied to the dataset when the signal was identified.
• Exclusions – Opens a Feature Exclusions dialog box and displays a list of any features that were excluded from the dataset when the signal was identified.
• Prev/Next – Pages back or forward through the list of signals when the list is too long to display all at once.
To filter the list of signals displayed in the list table, click Add Filter and select from the list of columns (example: "Goals"). Then identify the conditions for filtering the column (example: Contains "Pump"). Click Save (only signals with "Pump" included in the Goals column will be displayed).
View Signals from the Model Results
To view Signals for a specific model:
1. On the Models list page, find and select the model for which you want to view signals.
2. Click the View button.
The Model Results page opens.
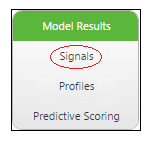
3. On the left, under the Model Results heading, click Signals.
One of the following will happen:
◦ If you have previously viewed or signals for the selected model, the Signals page will open and display a list of features and signal strengths.
◦ If this is the first time you have opened the Signals page for the selected model, the signals have not yet been identified and a dialog box is displayed to prompt you to create them. Click Yes. A list of signals will be generated.
When identifying signals from an existing model, the dataset, filtering, and time series parameters inherit the values used when the model was trained. |