Adding and Deleting Rows
You can add or delete rows in Advanced Grid using the EnableEditButtons and EnableAddDeleteButtons properties. If you set the EnableEditButtons property to true, the EnableAddDeleteButtons property appears in the Mashup Builder configuration. When you set this property to true, Add and Delete buttons appear in the Grid tool bar so that you can add or delete rows.
When you set row addition and deletion, the DeletedTable property also becomes available. Use this property to bind deleted rows to a service.
|
|
Add and Delete buttons are not available at the same time because their operations are separated to avoid row data corruption or overwriting.
|
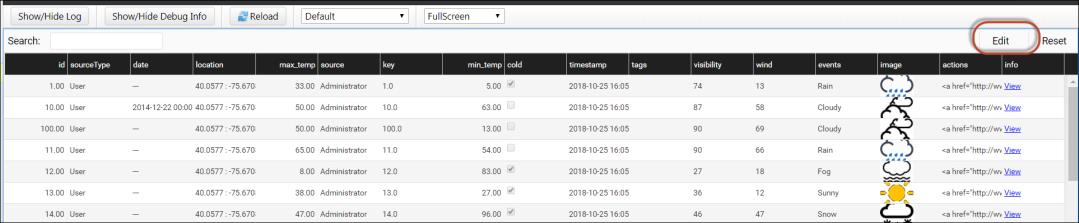
Click Edit in the tool bar to see Add, Save, and Cancel. Also, a column with a check box in each cell appears on the left side of the grid.
For example:
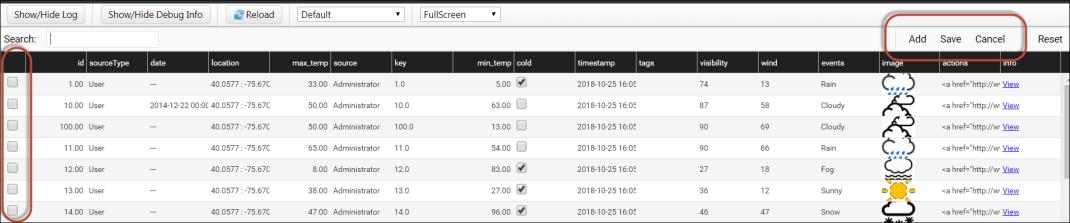
• To add a row follow these steps:
1. Click Add. A new row appears at the bottom of the grid.
2. Enter the desired values and click Save.
Make sure that you enter correct values in the fields, as they are validated.
New rows appear only at the bottom of the grid.
• To delete a row follow these steps:
1. Select the check box on the row you want to delete.
2. Click Delete.
After you delete a row, the Edit button reappears in the grid.
For example:

Use Cancel button to cancel the addition or deletion and to go back to the last operation.
Cell Editing in the JSON Configuration
Add the following top-level global property to enable cell editing in the JSON configuration.
var config = { “cellEditingEnabled”: true, “columns”: ... } };
Add the following content to any column that needs to be edited.
...
“ColumnFormatter”: {
“type”: “boolean”,
“format”: “notext”,
“cellEditor”: {
“enabled”: true, // *{boolean} to indicate whether cell editing is enable for this column
},
}
...
“ColumnFormatter”: {
“type”: “boolean”,
“format”: “notext”,
“cellEditor”: {
“enabled”: true, // *{boolean} to indicate whether cell editing is enable for this column
},
}
...