Set State
Use the Set State action to set a lifecycle state for a Windchill entity.
Complete the following steps to use the Set State action in your workflow:
1. Drag the Set State action under the Windchill connector to the canvas, place the pointer on the action, and then click  or double-click the action.
or double-click the action.The Set State action window opens.
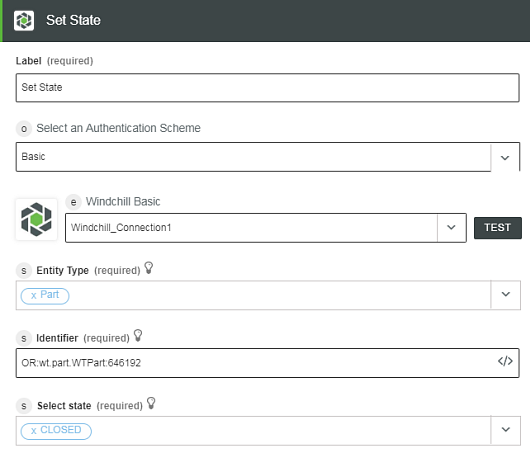
2. Edit the label name, if needed. By default, the label name is same as the action name.
3. To add an authentication scheme, refer to Authorize Windchill.
If you previously added an authentication scheme for Windchill, select it from the list.
4. In the Entity Type list, select one of the following options:
◦ Part
◦ Document
◦ CADDocument
◦ Change Object — For example: Change Request, Change Notice, Remote ChangeItem, and so on.
5. In the Identifier field, enter an identifier to set its state in the Windchill object identifier (OID) format: OR:Type:ID where, Type is the internal name of the Windchill entity type.
This action supports only a single identifier. |
6. In the Select state field, select the state that is applicable for the specified OID, and then click Done.
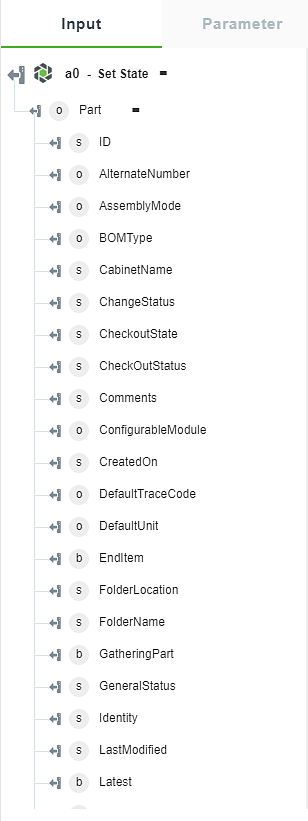
Output Schema
The output schema for this action changes depending on the entity type you select.
See a sample output schema for the Set State action when you select a Part entity in the figure that follows: