Check-In
Use this action to check in a Windchill object.
Using the Check-In Action
To use this action in your workflow, connect it to ThingWorx Flow. To connect to the flow, do the following:
1. Drag the Check-In action under the Windchill connector to the canvas, place the pointer on the action, and then click  or double-click the action. The Check-In action window opens.
or double-click the action. The Check-In action window opens.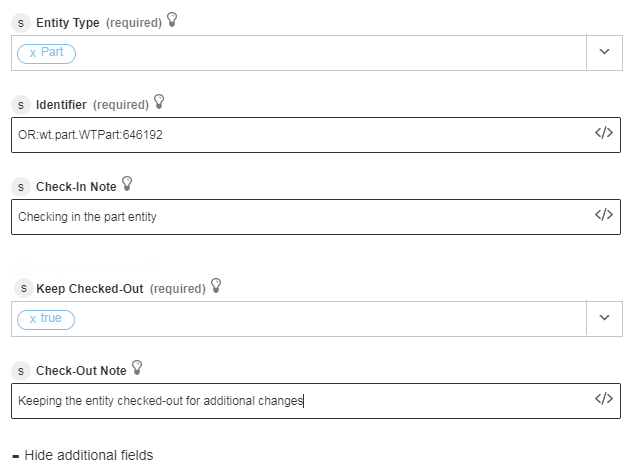
2. Edit the label name, if needed. By default, the label name is same as the action name.
3. To add a connection, refer to the section Adding a Connection in the Windchill connector topic. The default value is Basic.
If you previously added a connection for Windchill, select a connection from the list. |
4. Select an Entity Type from the list:
◦ Part
—Check-in the part entity.
◦ Document
—Check-in the document entity.
◦ CADDocument
—Check-in the CADDocument.
5. Enter a Windchill entity identifier in the Windchill object identifier (OID) format: OR:Type:ID where, Type is the internal name of the Windchill entity type. The identifier should not be URL encoded.
This action supports only a single identifier. For example, the part identifier is OR:wt.part.WTPart:646192. |
6. Click + to view the additional fields, and then enter the following details:
◦ Check-In Note—Comments about any changes made to the part, document, or CADDocument. These comments appear in the Version History table in Windchill.
This is an optional step. |
◦ Keep Checked-Out—Select true to check-out the entity again after the check-in is complete or select false.
For example, select true if you want other users to view your changes but you intend to make additional changes.
Check-Out Note—The check-out comment.
7. Click Done.
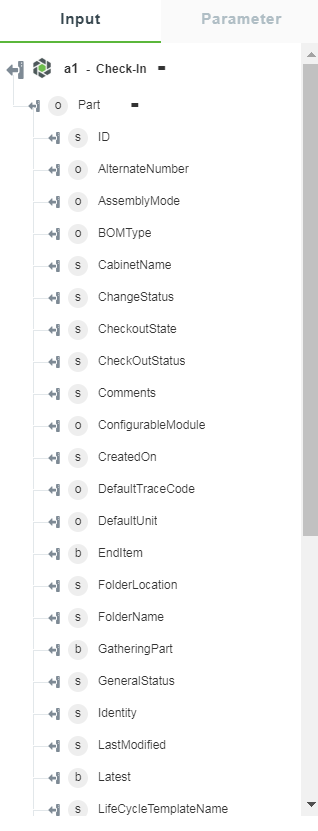
Output Schema
The output schema of the check-in action displays the details of the checked-in Windchill entity. This output schema is dynamically injected as per selection of an entity from the Entity Type list.
See a sample output schema for the Part entity type of the Check-in action in the figure that follows: