Get Rows
Use the Get Rows action to retrieve row details.
Complete the following steps to use the Get Rows action in your workflow:
1. Drag the Get Rows action under SQL Connector to the canvas, place the pointer on the action, and then click  or double-click the action.
or double-click the action.The Get Rows window opens.
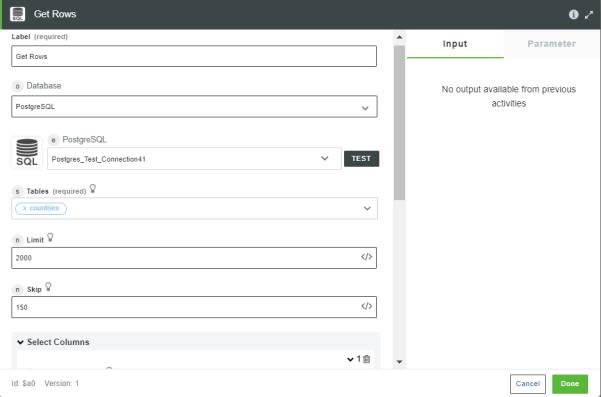
2. Edit the Label, if needed. By default, the label name is the same as the action name.
3. In the Database list, select the type of database that you want to connect:
◦ PostgreSQL
◦ SQL Server
◦ MySQL
◦ Oracle
4. Depending on the type of database that you selected, add the database connection. To add a new connection, refer to Add SQL Connector Connection.
If you have previously added a connection for the SQL Connector, select a connection from the list.
5. In the Table list, select the appropriate database table from where you want to retrieve row details.
6. In the Limit field, enter the number of rows that you want to retrieve.
7. In the Skip field, enter the number of top rows that you want to skip from the result.
8. Under the Select Columns group, click Add, and do the following:
a. In the Column field, select the specific column that you want to retrieve for the rows.
Click Add to add multiple columns. Alternatively, click  to delete any column that you added.
to delete any column that you added.9. Under the Where group, in the Join Clauses by list, select one of the following options:
◦ AND — All conditions specified under the Attributes group must return true.
◦ OR — Either of the conditions specified under the Attributes group must return true.
10. Under the Attributes group, click Add, and do the following:
a. In the Attribute list, select the column that you want to filter.
b. In the Operators list, select the appropriate conditional operator.
c. In the Value field, enter the value of the column for the filter.
Click Add to add multiple attributes to the join clause. Alternatively, click to delete attributes.
to delete attributes.If you add the same attributes and select AND in the Join Clauses by list, the attributes are joined by the OR operator.
11. Under the Order group, click Add, and do the following:
a. In the Column Name list, select the column by which you want to order the result.
b. In the Order list, select ASCENDING or DESCENDING.
Click Add to add multiple columns to order the results. Alternatively, click to delete the columns that you added to order.
to delete the columns that you added to order.12. Click Done.
Output Schema
The output schema for the Get Rows action returns the rows and an array of objects.
The following image shows the sample output schema:

If you select a table or view that does not have a primary key column, but has an ID column, the Get Rows action fails. |