Switch
Switch is a like a selection control statement. It lets you define a number of possible execution paths for your workflow.
In the Switch action, you can add one or more cases. Each case contains one or more conditions and a next step is performed if the defined conditions are met. The action also includes a default block that specifies the action to be executed if none of the conditions are met. This action makes it easier for you to add complex workflow and reduces the overall workflow execution time.
Using the Switch Action
To use this action in your workflow, connect it to ThingWorx Flow. To connect to the flow, do the following:
1. Click  and drag the Switch action under the Developer Tools utility to the canvas, place the pointer on the action, and then click
  or double-click the action. The Switch action window opens.
and drag the Switch action under the Developer Tools utility to the canvas, place the pointer on the action, and then click or double-click the action. The Switch action window opens.2. Click Case.
3. Specify the condition for Case 1 using the conditional block. You can use AND or OR operator to specify multiple conditions. The OR operator cannot be added inside a group. The complex conditions need to be resolved to simple level logic in order to work with the Switch utility.
If the condition is set to either of the following: Is True, Is Date, Is Number, Is Alphanumeric, Is Empty, Is An Array, do not enter the Expected value. |
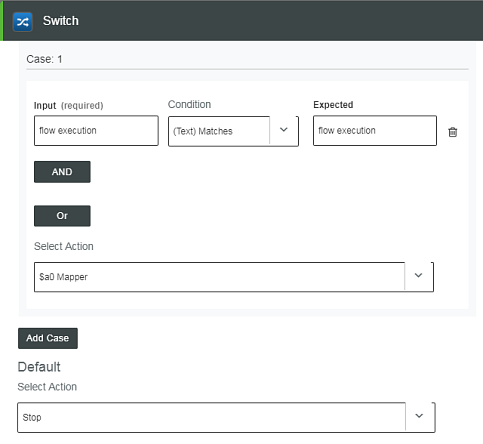
4. In the Select Action field, select an action that you want to execute if the specified condition under Case 1 is met. Click Add Case to add multiple cases.
5. In the Default section, in the Select Action field, select an action that you want to execute if none of the conditions are met.
6. Click Done. It automatically creates connections between Switch and its corresponding actions. You cannot make these connections manually.
Example
Let us say we have a requirement where, whenever a new file is uploaded to a OneDrive account from some vendor, that file is downloaded and is sent as an attachment over mail to a client. However, due to some download restrictions, if the file size is greater than the specified limit, a download file URL is sent over mail instead of attaching the file.
Add and Configure the OneDrive Trigger
Let us set up a OneDrive trigger that fires off each time a new file is uploaded to OneDrive.
1. Place the pointer on the start icon  and then click or double-click . A list of triggers appear.
and then click or double-click . A list of triggers appear.2. Select the OneDrive trigger. The OneDrive trigger configuration window opens.
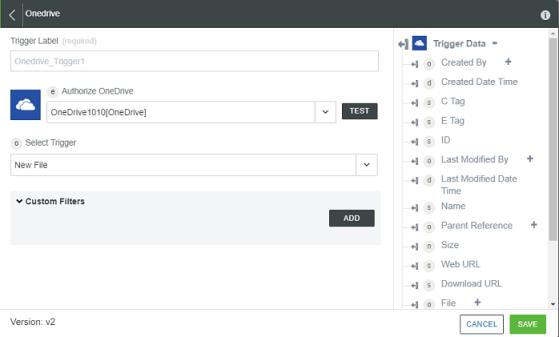
3. Enter the information in the trigger window, and then click SAVE.
Configure the Switch Action
We will now define the following conditions in the Switch action:
• If the size of the uploaded file exceeds 1 MB, then a download file URL is sent over mail.
• If the size of the uploaded file is less than 1 MB, then the file is downloaded and sent as an attachment in an email.
Complete the following steps to configure the switch action:
1. Click and drag the Switch action under the Developer Tools utility to the canvas, place the pointer on the action, and then click or double-click the action. The Switch action window opens.
and drag the Switch action under the Developer Tools utility to the canvas, place the pointer on the action, and then click or double-click the action. The Switch action window opens.2. Click Case. A new case block appears.
3. Define the condition and specify the action to be executed if the specified condition is met. In the first case, we will check if the file size is greater than 1024 bytes.
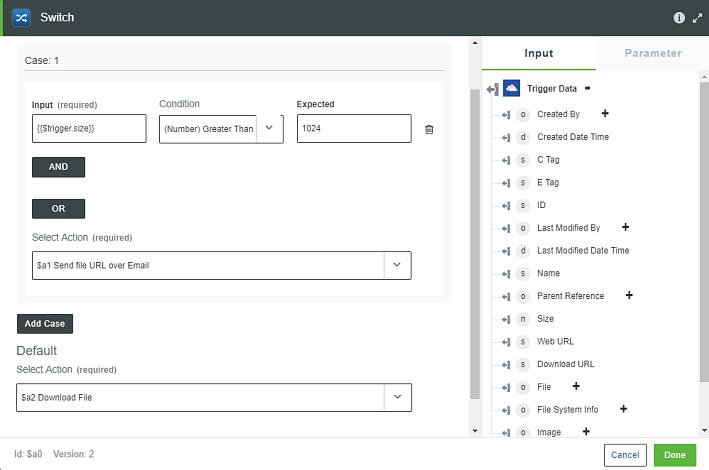
a. In the Input field, add the data parameter Size from the Trigger Data section on the right side of the Switch configuration window. This returns the size of the file.
b. In the Condition list, select the (Number) Greater Than operator.
c. In the Expected field, enter 1024.
d. Specify the action to be executed if this condition is met. In the Select Action field, select the Send file URL over Email action.
This field automatically fetches all available actions on canvas and displays it in the list.
4. Under the Default section, in the Select Action field, specify the action to be executed if the specified condition is not met.
In the Next Action field, select Download File.
5. Click Done. ThingWorx Flow automatically connects the Switch action with the other actions as specified in the switch configuration window; thus creating different paths for each case stating the case numbers.

You cannot manually create, edit, or delete these connections. If you want to make changes to these connections, you will need to change the settings from Switch configuration window.
Configure Other Actions in the Workflow
We will now configure the rest of the actions to complete the workflow. The following section provides information only about the field mappings. You might have to enter additional information for each action.
• Developer Tools—Download File
1. Map the Download URL parameter under the Trigger Data section to the URL field.
2. Map the Name parameter under the Trigger Data section to the Name of the Downloaded File field.
• Office 365—Send an Email
1. In the Label field, enter Send file URL over Email.
2. Map the Download URL parameter under the Trigger Data section to the Body field.
• Office 365—Send an Email
1. In the Label field, enter Attach File to Mail.
2. Map the File/Folder Path parameter under the Download File section to the Source File Path field.
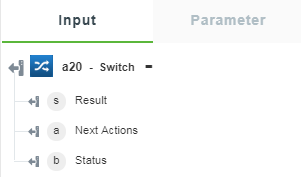
Output Schema
The Switch action returns an output schema as shown in the figure that follows: