Speech Service
Use the Speech Service action to convert speech-to-text and text-to-speech. For more information, see Azure Speech Services.
Complete the following steps to use the Speech Service action in your workflow:
1. Drag the Speech Service action under the Azure connector to the canvas, place the pointer on the action, and then click  or double-click the action.
or double-click the action.The Speech Service window opens.
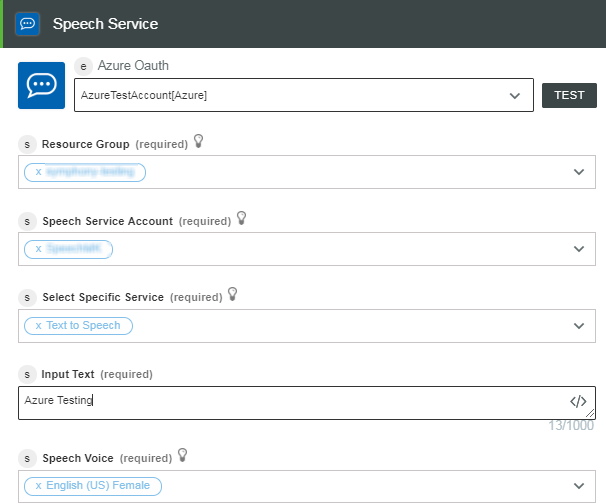
2. Edit the Label, if needed. By default, the label name is the same as the action name.
3. To add an authentication scheme, refer to Authorize Azure.
If you previously added an authentication scheme for Azure, select it from the list.
4. In the Resource Group list, select the appropriate resource group defined under your Azure subscription.
5. In the Speech Service Account list, select the Speech account defined in your resource group.
6. In the Select Specific Service list, select the speech service that you want to use:
◦ Select Text to Speech and do the following:
1. In the Input Text field, enter the input text that you want to convert to voice.
2. In the Speech Voice list, select the voice for the output audio.
◦ Select Speech to Text and do the following:
1. In the Audio FilePath field, map the output of a previous action to provide the path to an audio file.
2. In the Speech Language list, select the language of the audio file.
7. Click Done.
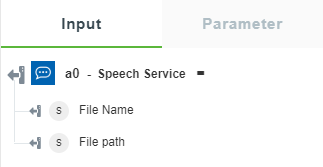
Output Schema
Each Speech Service service has its own output schema.
• Text to Speech — Returns the file name and file path of the audio file.
The following image shows the sample output schema:
• Speech to Text — Returns the transcribed text.
The following image shows the sample output schema:
