Face Recognition
Use the Face Recognition action to detect human faces in an image, and retrieve the rectangle coordinates of their locations. Optionally, you can retrieve face IDs, face landmarks, and face attributes. The Azure Face API can recognize up to 64 faces in an image, and ranks faces by rectangle size, from large to small. For more information, see Azure Face.
The Face Recognition action supports images that meet the following requirements:
• JPEG, PNG, GIF (the first frame), or BMP format.
• File size is between 1 KB and 6 MB.
• Image size is between 36 x 36 pixels and 4096 x 4096 pixels.
To detect clear faces in smaller images, enlarge the input image.
Complete the following steps to use the Face Recognition action in your workflow:
1. Drag the Face Recognition action under the Azure connector to the canvas, place the pointer on the action, and then click  or double-click the action.
or double-click the action.The Face Recognition window opens.
2. Edit the Label, if needed. By default, the label name is the same as the action name.
3. To add an authentication scheme, refer to Authorize Azure.
If you previously added an authentication scheme for Azure, select it from the list.
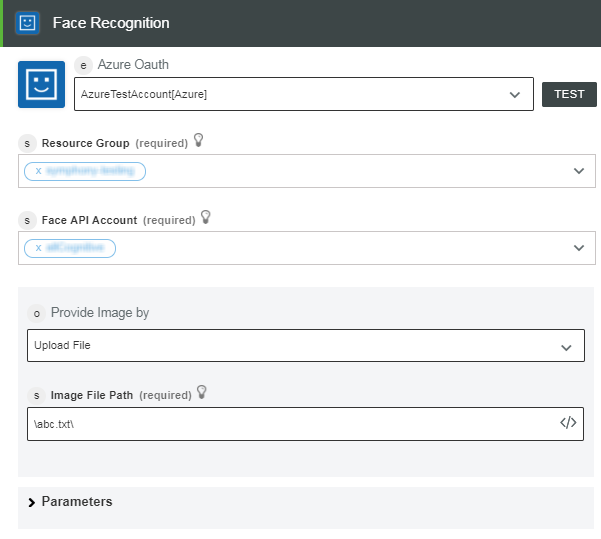
4. In the Resource Group list, select the appropriate resource group defined under your Azure subscription.
5. In the Face API Account list, select the Face API account defined in your resource group.
6. In the Provide Image by list, select one of the following options, and do the following:
◦ Select URL and in the Image URL field, specify a publicly accessible image URL.
◦ Select Upload File and in the Image File Path field, map the output of a previous action to provide the path to an image.
7. In the Should Face IDs be Returned list, select true if you want the service to return face IDs of the detected face, else select false.
8. In the Should Face Landmarks be Returned list, select true if you want the service to return landmarks of the selected face, else select false.
9. In the Face Attribute list, select the attribute that you want the service to analyze and return.
Click Add to add multiple face attributes. Alternatively, click  to delete any face attributes that you added.
to delete any face attributes that you added.10. Click Done.
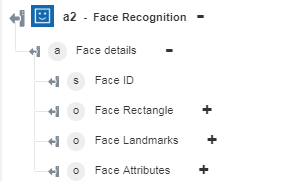
Output Schema
The Face Recognition action returns an array with face details such as face ID, face rectangle coordinates, and selected face landmarks.
The following image shows the sample output schema: