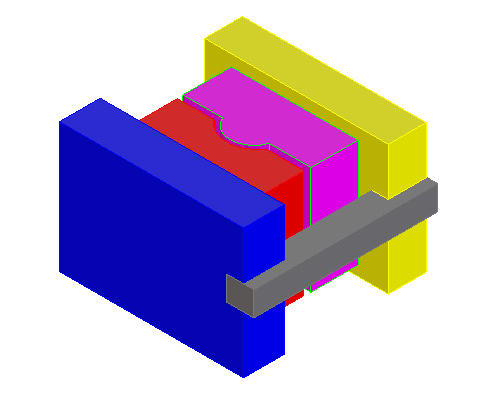
Mold Base can work with molds of any size and shape. Here we show the option to create a mold base from any collection of parts, designed in the standard OneSpace Designer environment (or read in through a neutral file format).
After we have identified the parts in an assembly as being a mold the full functionality of Mold Base including component creation, modification attributes etc. is available.
This mode enables you to use Mold Base not only for plastic mold design, but also for other mechanical applications i.e. Progressive Dies, Blow Molds, Jigs and Fixtures, etc.
User defined plates can also be added to standard molds which were created under the Plate Only option.
The files for this tutorial are in the Tutorial/ UserPlate folder.
* Load UserMold.pkg.
* Click Application.
* Click Modules...
* Check Mold Base box.
The Mold Base dialogue box appears.

* Click Mold base button.
Mold Base dialogue box appears.

* Click Mold from the Mold Base Dialogue under Initialization.
Mold Initialization dialogue box appears.
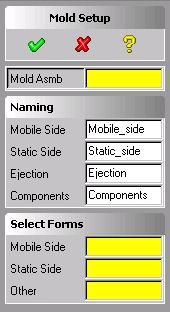
* Click Mold Asmb and Identify the assembly that contains the user mold select usermold assembly from menu browser.
* Click  .
.
You have now defined a plate assembly on which all Mold Base functionality can be used. Let's demonstrated this by created some components.