1. Pipes Cycle from Concept design.
* Load the file MoldBase.pkg, This is a mold base similar to the one we created in lesson 1.
* Hide the Mobile Block in the HeatExchange assembly.
* Hide the Static_side sub assembly in the Mold assembly.
* Press Heat Exchange.
* Press From Solid under Create Pipe Cycle.
* Select one of the solid pipes from the browser or from the screen.
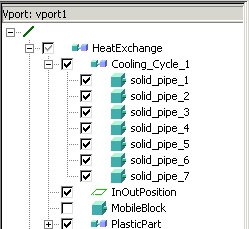
* Click  .
.
Pipes holes created in Plate3 and in the core insert, look from all sides on the core and Plate3 to see that the cooling cycle is ok.
2. Direct Pipes Cycle on Mold.
* Hide the Heat Exchange assembly.
* Show only Plate2 and the Position work plane from the static side In the Mold assembly.
* Change view to Isometric xy-z.
* Press the fit button  .
.
* Change to wire frame (F6).
* Press Heat Exchange button.
* Press Pipe button under Create Pipe Cycle.
* Press Face and select the right side face.
* Press Select button.
* Select from screen the left circle in Position work plane
* Select 12 in the Diameter list box.
* Key-in 150 to the Length box.
* Key-in 80 to the H box.
* Press Next button.
* Press Face and Select the left side face.
* Key-in 10 in the Offset box.
* Check the Through radio button and press Next Face button.
* Press Next button.
* Press Face and Select the right side face.
* Press Position.
* Press Select button.
* Select from screen the right circle in Position work plane
* Key-in 160 to the Length box.
* Check the FaceNor radio button under Create Pipe Cycle.
* Key-in 100 to the H box.
See that the pipe rotates around the start face. If you pick the PipeDir radio button it will rotate the pipe around the intersection point with the previous pipe.
* Click .