
Creo Elements/Direct Modeling Express displays a reduced ribbon. Click the More button to display the complete ribbon with all the available tabs. You can click the Less button to revert to the reduced ribbon.   |
1. |  | |||||
2. | Select the border of the workplane in the viewport. A Command Mini Toolbar (CMT) opens. The CMT displays relevant commands. | |||||
3. | Click | |||||
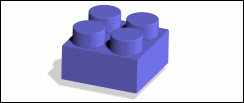
4. | Draw a rectangle on the workplane. | |||||
5. | Select the border of the workplane and Pull the rectangle (2D profile) into a 3D object. After pulling the profile to a 3D object, you can delete the workplane. | |||||
| ||||||
1. |  | |
2. | Select the lateral face of the 3D object and click | |
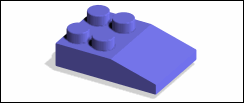
3. | Draw four circles; the radius of each circle must be 20 units. | |
4. | Select the border of the workplane and Pull all four circles (2D profiles) into bosses (3D objects). After pulling the profiles to 3D bosses, you can delete the workplane. | |
5. | Select the top edge of a boss and create a constant radius blend with a radius of 1 unit. | |
6. | Select the edges of the remaining bosses to propagate the blend. |
