The following refers only to viewport lighting, and not to the light studios of the Creo Elements/Direct Rendering Module.
When you view a model, it is lit by an array of up to 8 lights. These light sources are the most important factor in making models look realistic.
Most designers keep Creo Elements/Direct Modeling's default setting for the best results. But you can change the color, intensity, direction, and other characteristics of these lights using the Light Settings menu to strategically cast shadows, shade, and reflections on your image.
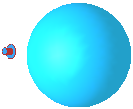
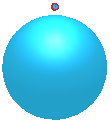
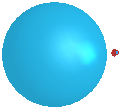
The images above show the three types of lights (from left to right): Directional, Positional, and Spotlight. See
The light types.
Creo Elements/Direct Modeling uses lights 0 through 7 by default. Light 0 is an ambient light; you can only change its color and brightness. All other lights are set as directional in a variety of colors so that they follow the model. You can change these settings with the Light Settings menu.
The fewer lights you use, the faster the performance.
To change viewport light settings,
1. Right-click in a viewport and click Light Properties. The Lights: vport1 dialog box opens.
2. Enter the number of the light you want to change in the field next to Light.
3. To turn a light on or off, click the check box on the left of the Light field. A check shows that the light is on.
4. You can change the following settings:
◦ Cone Angle: The cone angle specifies how the light beams radiate out from the spotlight. Enter a value for the cone angle or use the angle tool in the Measure menu. The default cone angle for lights is 45 degrees and the maximum is 180. Must be a spotlight.
◦ Spot Pwr: The value can range from 1 to 16383 (1 is a broad splash of light and 16383 is a small spot of light). This setting is for point lights and spotlights only. You can switch on or off the spot power without losing the value by clicking on or off Spot Pwr. The default spot power is 1. Must be a positional light or spotlight.
◦ Attn Dist: Enter a value for the attenuation distance. You can switch off the attenuation distance without losing the value by clicking off Attn Dist. When you need it again, click Attn Dist on. The default attenuation distance is 1. Must be a positional light or spotlight.
◦ Position: Set the position by clicking a point in the viewport, or enter a 3D coordinate (e.g. 5,5,5) in the user input line. Must be a positional light or spotlight.
◦ Brightness: The value must be between 0.0 (off) and 1.0 (full brightness). The default brightness for a light depends on its current color.
◦ Color: To change the color, click on the light's color indicator.
5. Close the dialog when you are finished. Changes are applied as you change settings.
Switching off a light does not affect the light's properties (color, position, and so on). The properties you set will still be there when you turn the light on again.