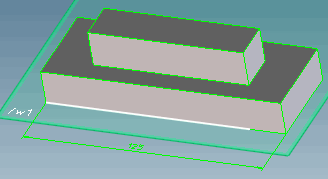
Adding faces to a move operation using linear dimensions
To add a face to a move operation using a linear dimension,
1. Select a linear dimension close to the reference face in the viewport. The visual feedback shows the 3D CoPilot arrow, which you can drag to move the face connected to the dimension.
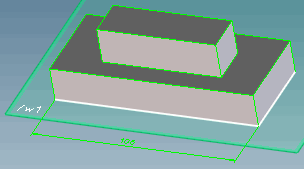
2. Click the 3D CoPilot dragger and move the cursor to move the face as shown in the following image.
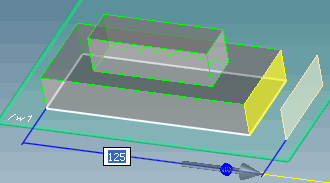
3. Press the SPACEBAR(or the assigned key combination) to open the Option Mini Toolbar (OMT) and select (Add Faces to Move) on the OMT.
4. Select one or more additional faces in the viewport and middle-click to complete the selection.
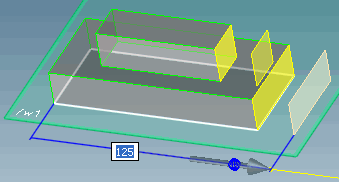
5. Click the 3D CoPilot dragger and move the cursor to move the selected faces as shown in the following image. The visual feedback shows the selected faces moving as you move the cursor.
6. Click to complete the operation. The following image shows the part after transformation.
 to complete the operation. The following image shows the part after transformation.