Item | Description |
|---|---|
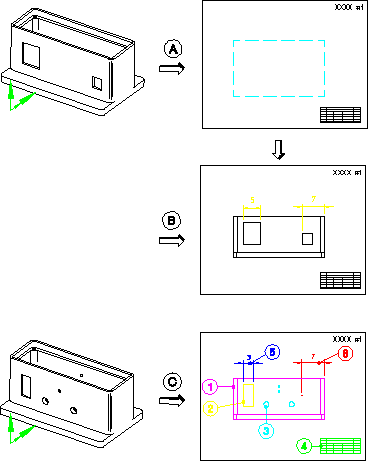
A | A new Creo Elements/Direct Modeling model with an associated sheet showing the front-view placeholder. |
B | The sheet has been updated and shows the 2D geometry for the front view. A couple of dimensions have also been added. |
C | The Creo Elements/Direct Modeling model has been modified by adding several holes to the front view and deleting a slot. The sheet was updated and existing/new geometry is color-coded as follows (to see the colors, look at the online help version): • 1: Magenta—Original unchanged geometry. • 2: Yellow—Slot has been modified. • 3: Cyan—Hole has been added. • 4: Green—Original 2D sketch. • 5: Blue—Dimension has changed because slot was modified. • 6: Red--This slot has been deleted. |