Create Import Mappings for Replicated Object Life Cycles
When replicated objects are imported, they are normally assigned to the life cycle template that is specified in the exported ZIP file. In this case, they should be assigned to the custom life cycle templates described in Create Custom Life Cycle Template for Replicated Objects. This is accomplished by creating life cycle import mappings before importing the objects.
1. Open the Mapping Management utility and select the Define Mapping action for the exporting Windchill installation.
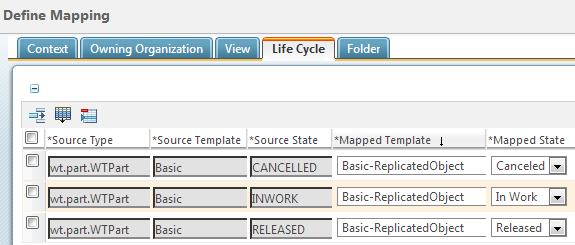
2. Select the Life Cycle tab from the Define Mapping window and add rows as needed to map all states from the exported life cycle template to the custom template. For example, the OOTB Basic life cycle has three states: In Work, Released and Canceled. So three rows are needed for mapping.
3. Fill in the mapping fields so each source state maps to its associated target state. Note that this utility defines “Source” values as those coming from the exporting Windchill installation and “Mapped” values as those defined in the importing Windchill installation. Also note that the “Source” values are taken directly from the Zip file, and are not localized, whereas the “Mapped” values show localized text. For example, the mappings for the Basic life cycle template example to be used for replicated WTPart objects are:

4. Repeat this process for all object types being replicated.
5. When all mappings are complete select “OK” or “Apply” to save them.
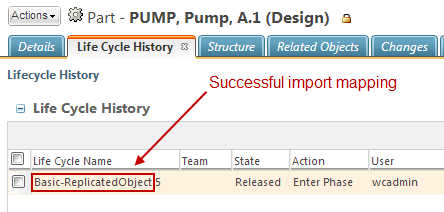
6. After an import is complete, you can verify that the mappings are correct by viewing the Life Cycle History of replicated objects. Note that if the information page of a replicated object does not already display the Life Cycle History, a new tab can be added to include this information. For example, the replicated Pump object described in Intended Outcome shows the following Life Cycle History:
