Add to Change Task Flow
|
|
For overview information, see Adding Objects to a Change Task from the Workspace.
|
To add workspace objects to the Resulting Objects table of a pending change task:
1. From a server-side workspace, select one or more objects in the workspace table that have been uploaded and are available on the server.
|
|
• If these workspace objects have dependent objects, be sure they are valid, as invalid objects are not collected or added to the Resulting Objects table of a change task by the Add to Change Task action.
• Valid objects have already been uploaded and are available on the Windchill server.
|
2. From the workspace File menu or tool bar, select  .
.
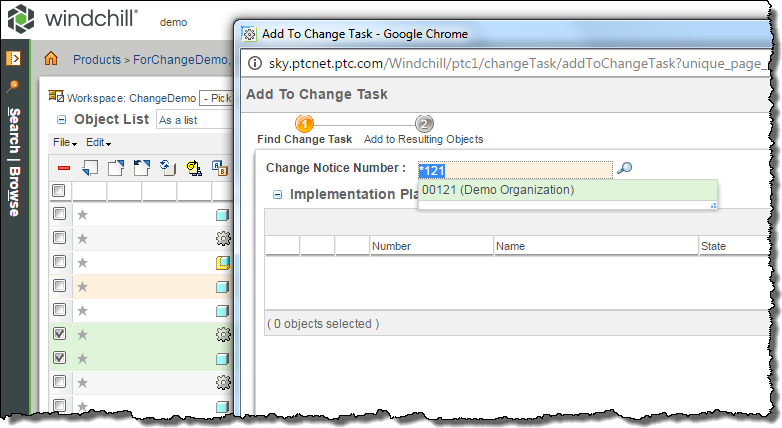
The Add to Change Task wizard launches as shown in the following figure.

3. In the wizard, you begin by searching for change tasks related to the latest version of a specified change notice. The best way to specify a change notice is by using the auto-suggest picker (shown in the previous figure) where you can use a * wildcard to quickly search and select it. You can also click the  icon and enter an explicit change notice number in the Search window.
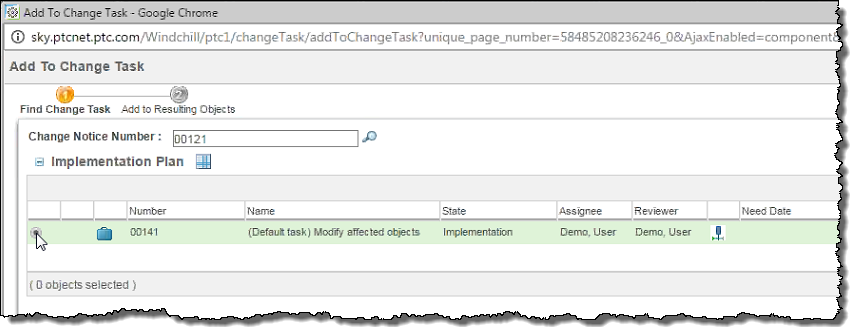
All the change notice tasks related to the specified change notice appear in the Implementation Plan table as shown in the following figure.

4. Select the task that you want to edit and add your objects to, then click Next.
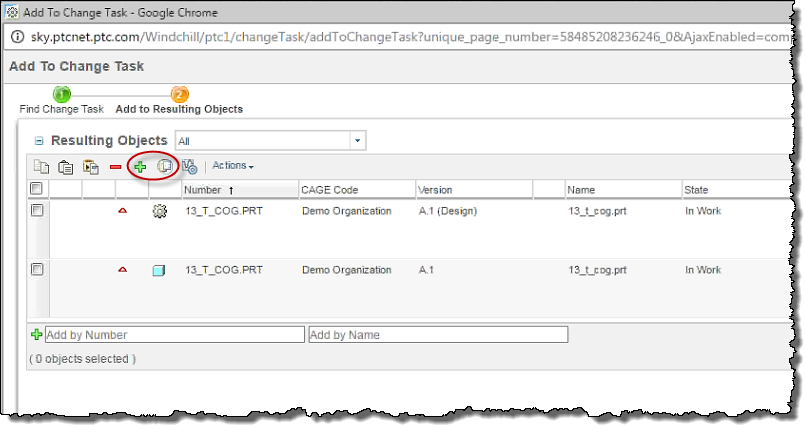
The Resulting Objects table for that task loads and displays on the next page in the wizard. The following figure shows the selected workspace objects added to the table.
• Optionally, within the Resulting Objects table, you can select one or more objects and click • You can also click |

5. When you have finished adding objects to the Resulting Objects table, click Finish to exit the wizard.
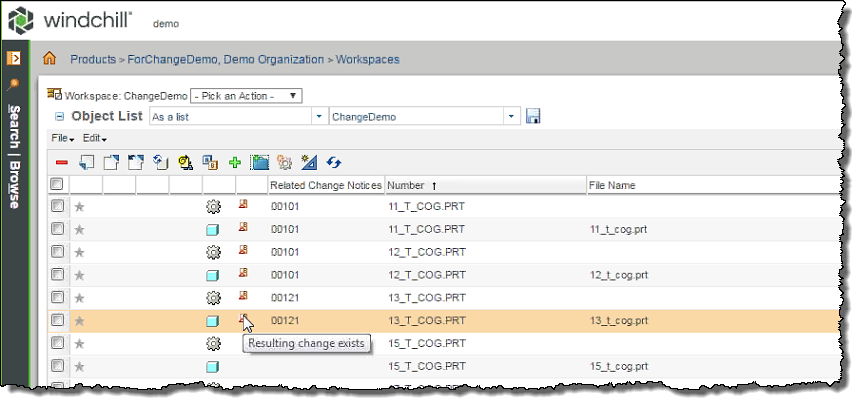
The objects are added to the change task and their status changes to  Resulting change exists in the workspace table as shown in the following figure.
