Build the Toolkit DLL
PTC provides a ready-to-use Microsoft Visual Studio solution on the Windows platform to build and test the Windchill Workgroup Manager Toolkit applications by using an appropriate makefile.
This ready-to-use Microsoft Visual Studio solution has the following advantages:
• Provides an effective way to build and test sample applications provided by PTC
• Provides a pre-configured Visual Studio development environment for use with the Windchill Workgroup Manager Toolkit
• Supports Intellisense for the Windchill Workgroup Manager Toolkit functions
This procedure assumes you are working in Windows.
1. Close the authoring application if it is connected to Windchill.
2. Close Windchill Workgroup Manager, if it is running.
3. Copy the template project from settings/wwgmtk_vs_project.vcxproj to an empty directory.
4. Launch Microsoft Visual Studio.
5. Click > > .
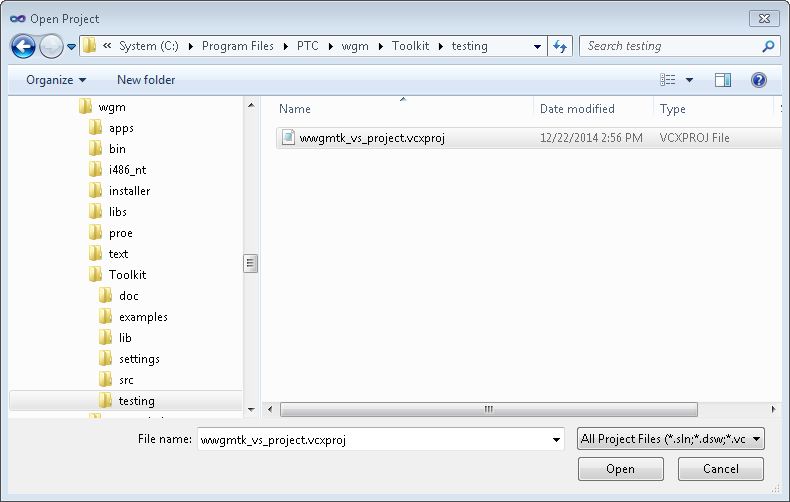
6. Browse to the directory to where you have copied the wwgmtk_vs_project.vcxproj file. Select the wwgmtk_vs_project.vcxproj file and click Open.

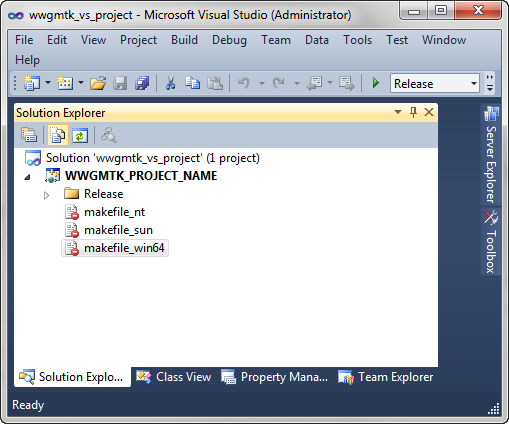
7. The Solution Explorer window opens.

8. Select the applicable makefile for your operating system.
The makefile encapsulates the build instructions needed to build a DLL. |
The following makefiles are available to choose from:
◦ makefile_nt
◦ makefile_sun
◦ makefile_win64
For example, if you are using Windows, select makefile_win64.
9. Select other applicable criteria for the DLL from the ribbon menus above the Solution Explorer window.
10. You can use the existing "Release" configuration, or build the DLL for the first time. To build the DLL for the first time:
a. Select >
b. Under Active solution configuration, select New. The New Project Configuration window opens.
▪ Enter a configuration file name in the Name field.
▪ Select to copy settings from <Empty> or Release.
▪ Select the checkbox to Create new project confutations.
▪ Click OK.
▪ The Configuration field under the Project contexts section in Configuration Manager populates with the build configuration name.
▪ Click Close to exit.
11. To rebuild the DLL, select > . The Output window is populated with the latest build configuration.
12. The application should build without errors. This creates a toolkit DLL file. If the application fails, check to see if the user environment variable for your operating system is set correctly. For more information, see Setting up the Development Environment.
For example, When the application builds without errors, it creates the toolkit DLL file named wwgmtk_project_name.dll.
13. The following file types can be generated for a project or solution:
File Type | Definition |
|---|---|
*.vcxproj. | The main project file for Microsoft Visual Studio generated using an Application Wizard. It contains information about the version of visual C++ that generated the file, its platforms, configurations, and project features selected with the Application Wizard. |
*.vcxproj.filters | The filters file for the Microsoft Visual Studio project generated using an Application Wizard. It contains information about the association between the files in your project and the filters. This association is used in the IDE to show grouping of files with similar extensions under a specific node. |
*.vcxproj.user | The user file for the Microsoft Visual Studio project generated using an Application Wizard. |