Creating and Using an Advanced Search Report Template
For complete information on using reports and the query builder, see Query Builder.
Create a Report Template
The following example creates a report template that you can use to search for parts that have an associated CAD document.
2. Under Properties, provide a template name and select Available for use with Advanced Search:

3. Under Tables and Joins, click the add icon  .
.
 .
.4. In the Select Types to Add window, select Part or wt.part.WTPart and click OK.
5. Right-click the part table and select Add Table and Join:

6. The Add Table and Join window displays all tables and join types that are applicable to parts. Under Join Type, select EPMBuild Rule and click OK.
The CAD document (or EPM document) object type is automatically added to the template.
7. Ensure that Part is selected in the Main Type field.
This indicates that the report template is available when searching against the part object type. To make this template available to CAD document searches, select the CAD document type.

8. Under the Select or Constrain tab, you can configure the attribute fields that appear under the Related Object Search field.
From the add menu, select Reportable Item. For more information about the available options, see Select or Constrain.
9. In the Select Attributes to Add window, select CAD Document (or EPM Document, depending on your site).
You can include part attributes, however this is generally unnecessary. If the user wants to narrow the search using part attributes, they can use the advanced search Criteria field. |
10. Select one or more attributes to add and then click OK.
• For the purposes of advanced search, you want to select Column attribute types • Hold down the Ctrl key to add multiple attributes at once. |
11. If necessary, modify the Heading field to provide additional information. For example, because this template will be used when performing a part search, it is a good idea to clarify that the user should enter information relevant to the CAD document type. Therefore, in the example below, the “Name” heading is renamed “CAD Name.”
You can also click and drag headings to change the order in which they appear:

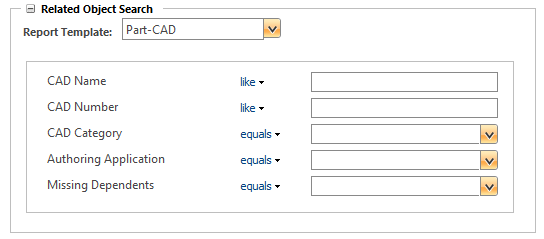
12. Use the Criteria tab to specify any additional criteria that should automatically be applied. For more information, see Query Builder Criteria.
The Sort tab does not affect how the search results are sorted.
13. Click Apply and Close.
Use the Template in an Advanced Search
In this example, you perform a search for the following parts:
• Parts created by the site administrator
and
• Are in the In Work state
and
• Are located in the “Drive System” product
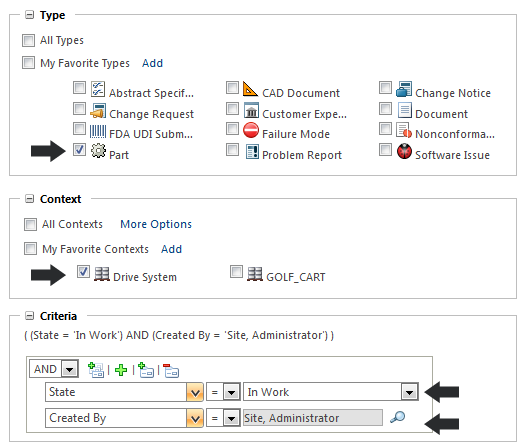
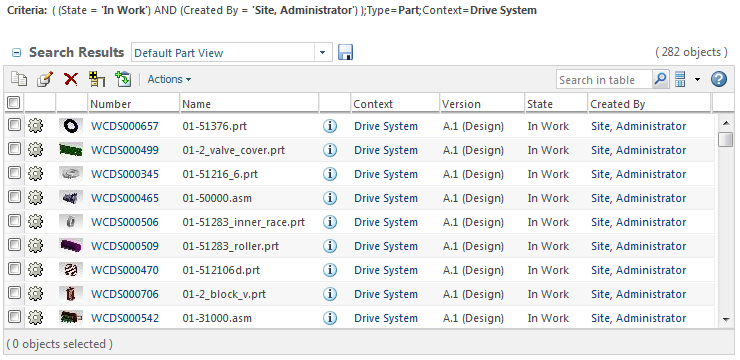
This search returns 282 results:
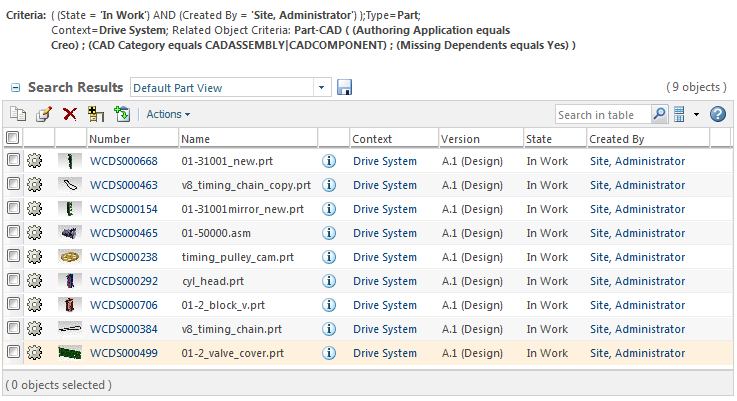
You narrow the search using the report template created earlier. You only want to return parts that have an associated CAD document matching the following criteria:
• Is an assembly or CAD part
and
• Was authored in Creo
and
• Has missing dependents
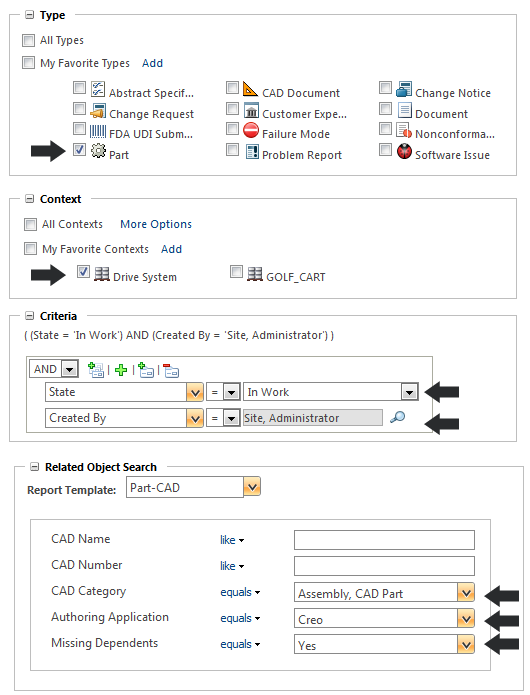
This search returns 9 results:
If you navigate to the information page of one of the parts, you can verify that it has an associated CAD document that meets the search criteria:
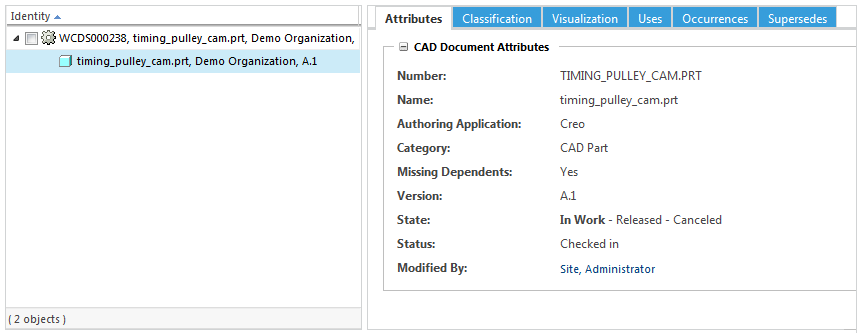
For the purpose of this example, the CAD Document Attributes layout was modified to display the relevant attributes. |