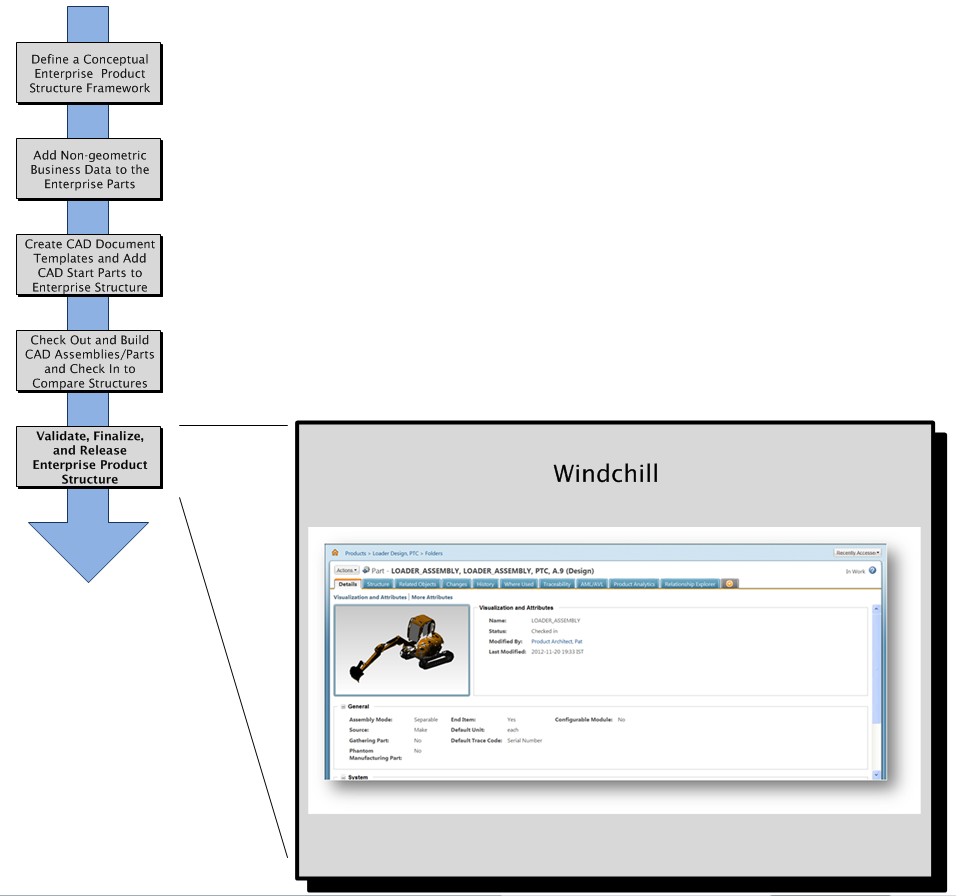
Sample Top-down Methodology Flow
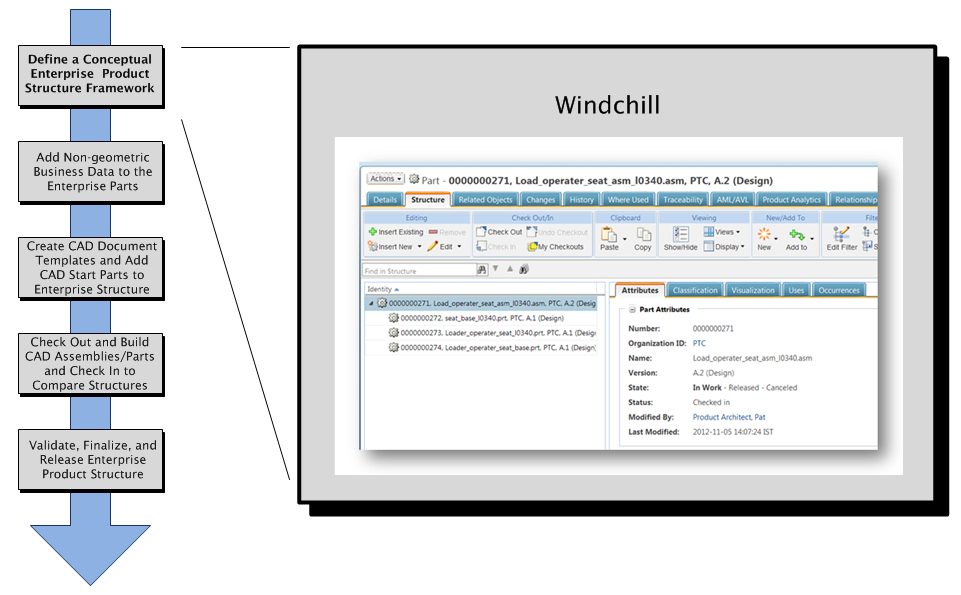
Step 1 — Define a Conceptual Enterprise Product Structure Framework in Windchill
The top-down flow begins in Windchill. Product Architects use the Product Structure browser to define a conceptual enterprise product structure framework using part and assembly templates as placeholders for new parts as well as inserting existing product structure modules that they wish to reuse.
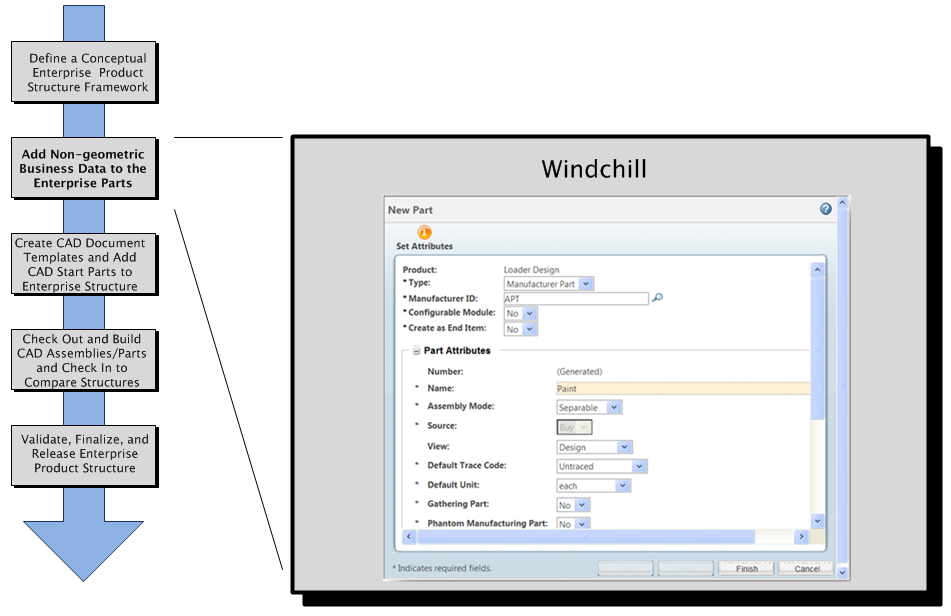
Step 2 — Add Business Data to Develop and Enrich the Structure
Product development teams across the enterprise are invited to access the product structure and contribute non-geometric business data (part attributes) for purposes of procurement, material specification, regulatory compliance, spatial constraints, tooling, and so on.
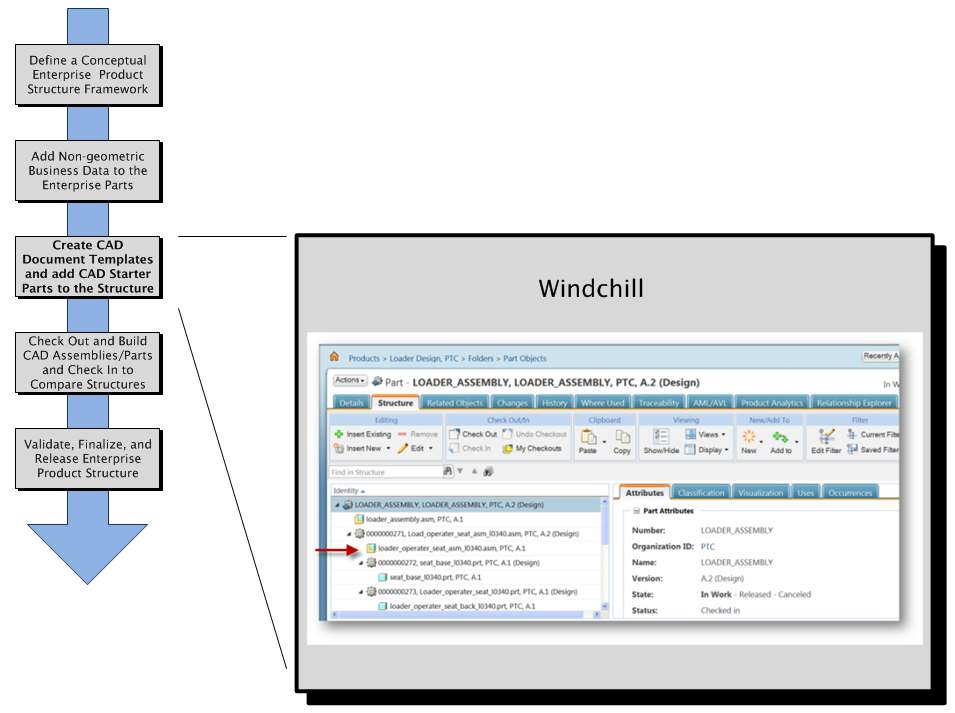
Step 3 — Create CAD Document Templates and Check in CAD Start Parts for Designers
The Windchill administrator updates or recreates the CAD document templates available in Windchill. Values and parameters are set to define the document type and to suit enterprise business logic. Appropriate values are set for boolean part attributes such as Gathering Part and Phantom to ensure accurate BoM reports and Windchill part structure builds required for downstream consumers.
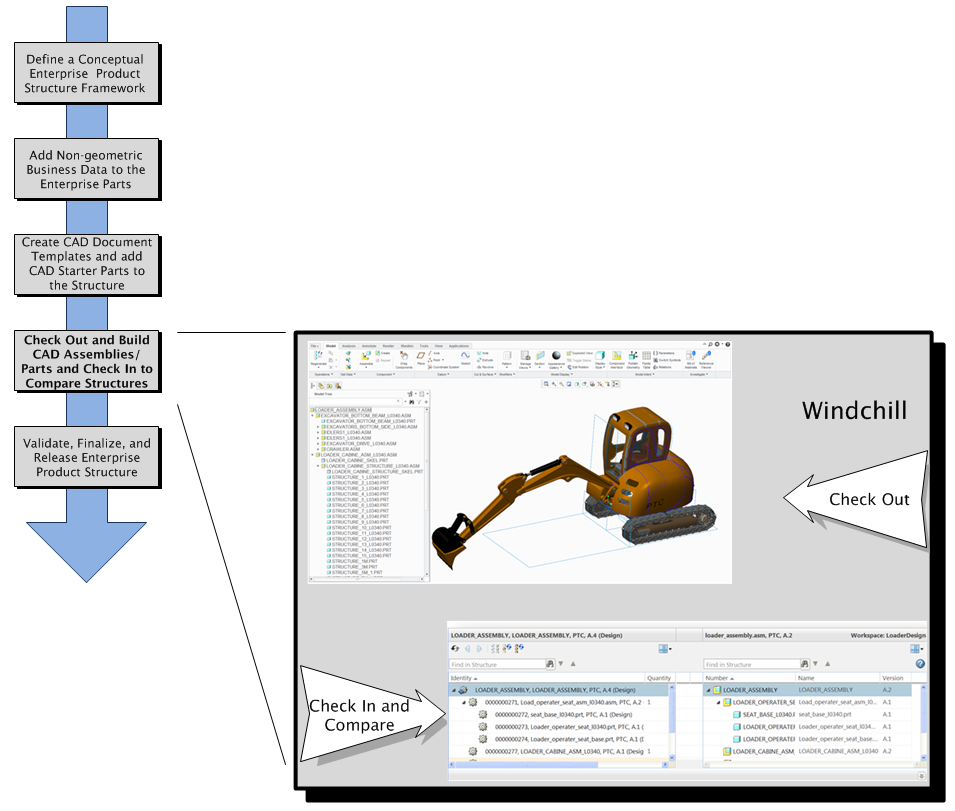
Step 4 — Product Assembly / Part Geometry Build-out and Structure Compare
CAD designers check out CAD start parts in the product structure and begin detailed geometry definition tasks in their authoring applications. CAD assembly and component parts are checked back in as required to update the product structure and share the latest CAD data with other enterprise development teams. Resulting ECO changes are addressed. As development progresses, designers compare CAD document and Windchill part structures and resolve any differences.
Step 5 — Product Structure Validation and Release
In the final step, the product structure is validated by enterprise design teams and clears the final review milestone. An accurate product BoM is now available in Windchill for downstream consumers and processes such as ERP.
