Setting Up Team Roles
After you create a quality context, set up team roles for your users. Roles indicate the workflow steps your users can access. Roles currently exist for the Windchill CAPA and Windchill Nonconformance applications. Roles will be expanded to the Windchill Customer Experience Management application in the future.
|
|
For this example, all roles are assigned to the Demo user. That way, the Demo user can perform all tasks within the workflow.
|
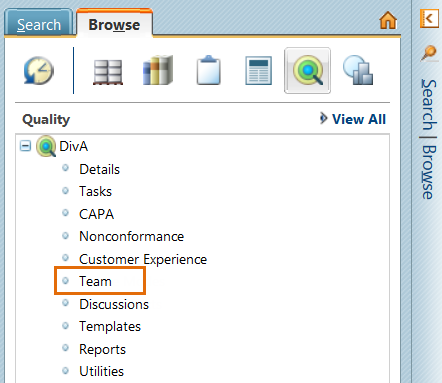
1. Under the quality context where you want to assign the role to the user, click Team.
2. Click the add participants to team icon.
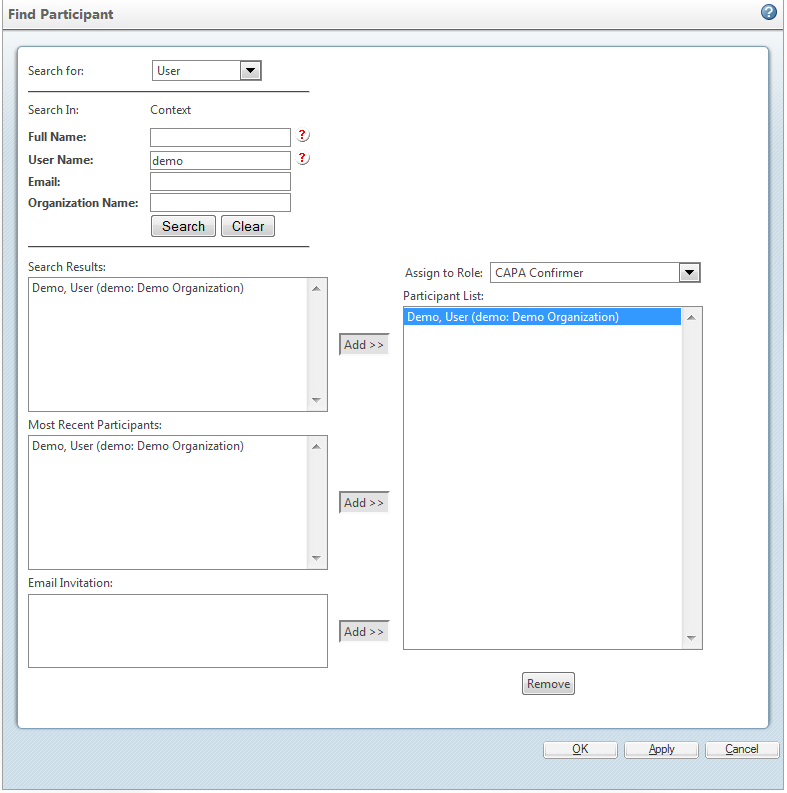
3. In the Find Participant window, do the following:
a. From the Assign to Role list, select the role.
b. Enter information in the Full Name, User Name, Email, or Organization Name fields and click Search. The system searches the directory server (such as the LDAP directory). Users who match the criteria appear in the Search Results field. The search returns a maximum of 50 users. If the user you are looking for does not appear in the list, narrow your search by adding more characters to the search criteria.
c. To add users to the group, select the names from the Search Results list and click Add. The names appear in the Participant List field.
d. Click Apply.
e. Repeat steps a–d as applicable for each role.
f. Click OK to add the selected users to the group and close the window.


