將註釋 (已標記為控制特性) 從 Creo Parametric 發行至 Windchill 所需的組態
在 Windchill 機器上執行轉接器需要檔案同步。這是因為 Worker 需要 Windchill 伺服器中的 CAD 檔案。它們會加入到工作區並下載。若 Worker 在 Windows 電腦上且伺服器在 VM 上,則需要將其同步。
WVS Worker Agent 服務透過使用配置為 CAD Worker 之各自的 Creo View 轉接器與相關的 CAD 應用程式,管理從 Windchill 至 Creo View 可檢視檔的 CAD 資料轉換。
CAD Worker 則使用 Windchill 整合的 Workgroup Manager 用戶端 (WWGM,隨附 Creo Parametric),以透過 CAD 應用程式中的最新 Windchill CAD 文件中繼資料對原始 Windchill CAD 資料執行下載與同步處理。
以管理員身份執行下列組態:
1. 在 Windows 電腦上安裝 Creo Parametric。
2. 在 Windows 電腦上安裝 Creo View 轉接器。
◦ 在安裝流程中選取 PRO E 選項。
◦ 安裝服務程式並將連接埠設定為 601。
3. Creo View 轉接器安裝流程完成之後,在 Creo View 轉接器安裝位置建立名為 proe_setup 的資料夾。
例如,proe_setup 資料夾的位置可以是:D:\ptc\creo_view_adapters\proe_setup。
4. 執行 <install directory of Creo view adapter>\bin\proe2pv_config.exe。
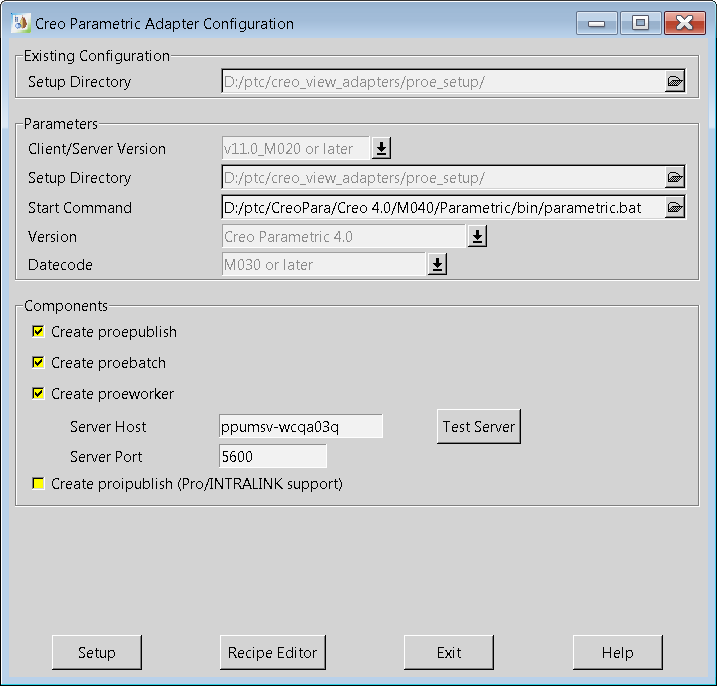
Creo Parametric Adapter Configuration 對話方塊即會開啟。
5. 在 Existing Configuration 部份,指定 proe_setup 資料夾的位置。例如,D:\ptc\creo_view_adapters\proe_setup。
6. 在 Parameters 部份中設定值,如下列屬性所述:
◦ Client/Server Version:從下拉清單中選取適當的值。值的清單根據安裝在您系統上的 Creo Parametric 版本而有所不同。例如,v11.0_M020 or later。
◦ Setup Directory:指定 proe_setup 資料夾的位置。例如,D:\ptc\creo_view_adapters\proe_setup。
◦ Start Command:指定 Creo Parametric 資料夾中 parametric.bat 檔案的位置。例如,D:/Program Files/PTC/Creo 4.0/M040/Parametric/bin/parametric.bat。
◦ Version:指定安裝在您系統上之 Creo Parametric 的版本。例如,Creo Parametric 4.0。
◦ Datecode:選取 Creo Parametric 的 M030 or later 發行版本日期代碼。
7. 在 Components 部份中設定值,如下列屬性所述:
a. Server Host:指定主機名稱。例如,ppumsv-wcqa03q。伺服器主機位置可在 Windchill 伺服器 url 中找到:ppumsv-wcqa03q.ptcnet.ptc.com。
b. Server Port:指定連接埠。依預設,此值為 5600。但是,使用者可以變更組態中的該值。
8. 按一下 Test Server,以測試伺服器狀況。
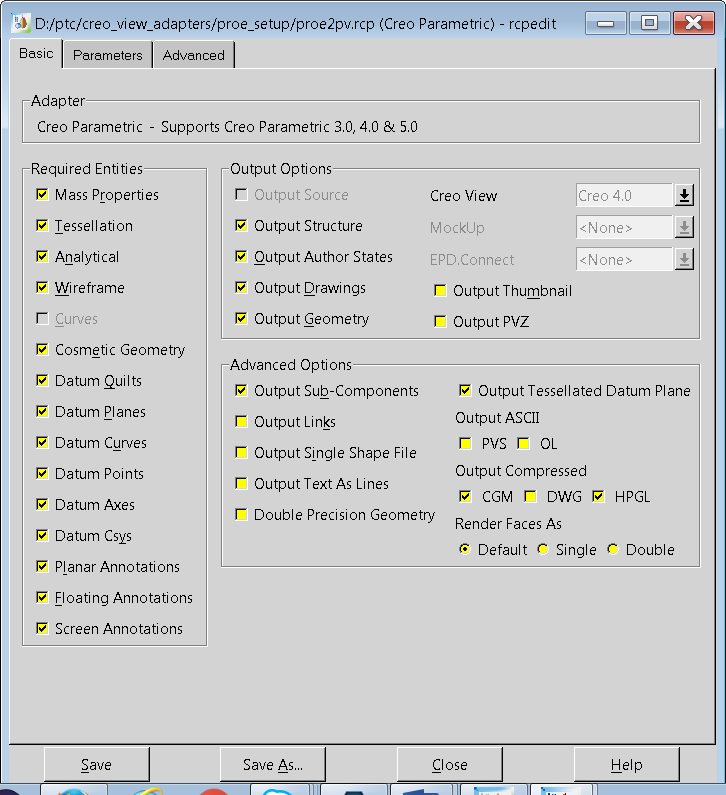
9. 按一下 Recipe Editor。rcpedit 對話方塊即會開啟。
確保會選取 Required Entities 部份下之下列特徵的核取方塊。
◦ Planer Annotations
◦ Floating Annotations
◦ Screen Annotations
10. 在 rcpedit 對話方塊中,按一下 Save。按一下「關閉」。
11. 在 Creo Parametric Adapter Configuration 對話方塊中,按一下 Setup。proe2pv_config – Question 對話方塊即會開啟。
12. 按一下 Yes。proe2pv_config – Message 對話方塊即會開啟。
13. 按一下 Ok。
14. 在 Creo Parametric Adapter Configuration 對話方塊中,按一下 Exit。Exit proe2pv_config 對話方塊即會開啟。
15. 按一下 Yes。
16. 要在 Windchill 中執行的組態步驟:
a. 核對 auth.properties 是否存在於 Windchill 的 <server_location>/Windchill/ 中。若不是,建立帶有文字的 auth.properties 檔案,並將其儲存在指定的位置:
auth=admin 認證 (使用者名稱:密碼)。
例如,auth=wcadmin:wcadmin
b. 核對 worker.exe.whitelist.prefixes 內容是否新增至伺服器的 site.xconf。若不是,將下列內容詳細資訊新增至 site.xconf,並使用 Windchill中的 Xconf 公用程式傳播更新。
<Property name="worker.exe.whitelist.prefixes" overridable="true" targetFile="codebase/WEB-INF/conf/wvs.properties" value=" C:\|D:\|E:\|G:\|/|nohup /"/>
c. 核對 WVS.VisualNavigation 內容是否新增至伺服器的 site.xconf。若不是,將以下內容詳細資訊新增至 site.xconf,並使用 Windchill 中的 Xconf 公用程式傳播更新。該內容可確保 Visualization 標籤的可用性。
<Property name="WVS.VisualNavigation" overridable="true" targetFile="codebase/installed.properties" value="true"/>
d. 核對 publish.copyrepresentationsforward.restrict 內容是否新增至伺服器的 site.xconf。若不是,將以下內容詳細資訊新增至 site.xconf,並使用 Windchill 中的 Xconf 公用程式傳播更新。該內容可確保當零件出庫時,表示會轉移。
<Property name="publish.copyrepresentationsforward.restrict" overridable="true" targetFile="codebase/WEB-INF/conf/wvs.properties" value="false"/>
17. 移除現有發佈規則,如下所述:
a. 以 Windchill 管理員身份登入並導覽至 > 。
b. 轉至Visualization Configuration Administration。
c. 移除任何現有的網站發佈規則檔案。
d. 這些組態完成後,在 Windchill shell 中執行下列指令來傳播變更:xconfmanager –pF
e. 重新啟動 Windchill 伺服器,以使變更生效。
18. 在本機的 Windows 電腦上安裝 FileZilla FTP 伺服器。
a. 設定可透過 FTP 共用的資料夾。例如,資料夾的位置可以是 D:\ftproot
b. 在共用資料夾中建立子資料夾來儲存資料檔案。例如,子資料夾的位置可以是 D:\ftproot\ftptemp。
c. 啟動並連接至 Filezilla 伺服器。
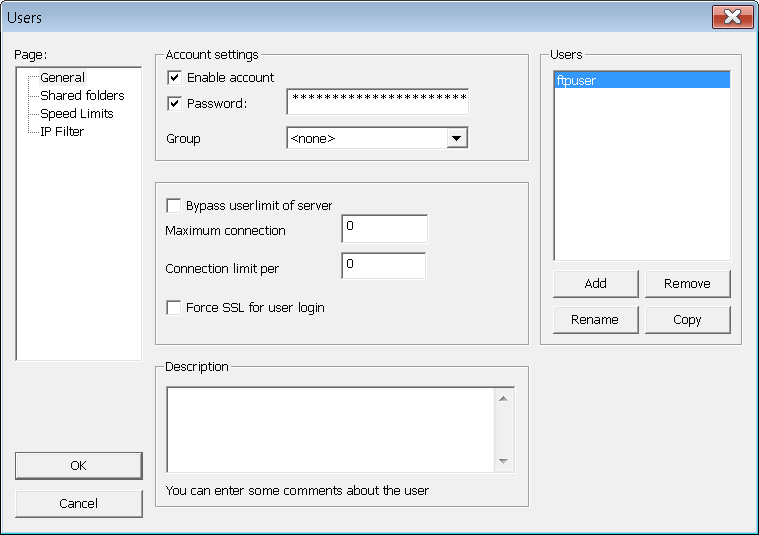
d. 按一下 > > 來建立新使用者。Users 對話方塊即會開啟。
e. 按一下「新增」。 Add User Account 對話方塊即會開啟。
f. 輸入名稱,然後按一下 OK。
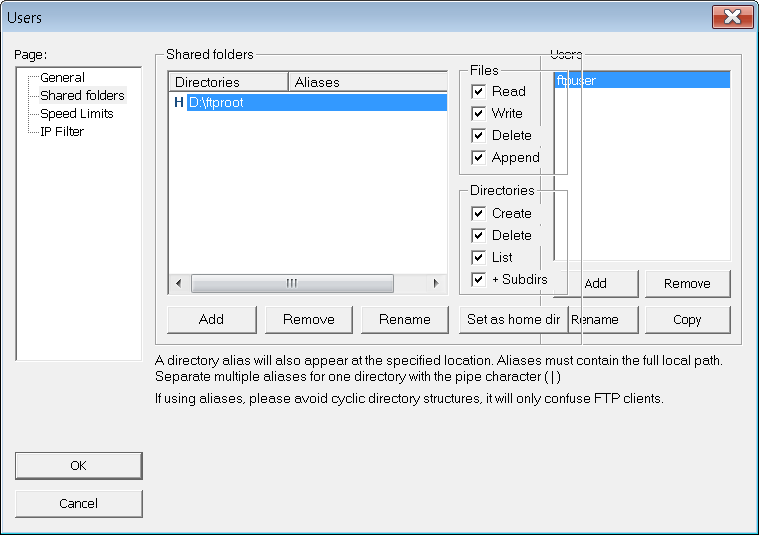
g. 按一下 Shared folders。
h. 按一下 Add,然後瀏覽至您在步驟 18a 中為 FTP 共用建立的資料夾位置。例如,資料夾的位置可以是 D:\ftproot。
i. 欲確保使用者具有新增之資料夾的完整存取權限,請選取 Files 與 Directories 部份下之全部圖元的核取方塊。
j. 按一下 Set as home dir 將其設為預設資料夾。
k. 按一下「確定」。
轉至 Windchill 伺服器並嘗試透過 ftp://<machine_name>.ptcnet.ptc.com/ 檢查 FTP 是否可供存取。
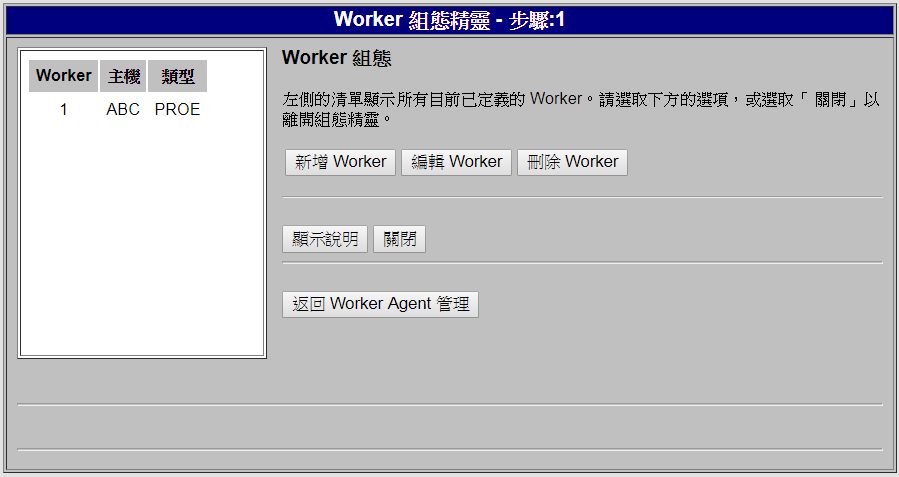
19. 在 Windchill 中之網站公用程式的 Worker Agent Administration 中執行下列組態,如下所示:
a. 按一下 Configure。
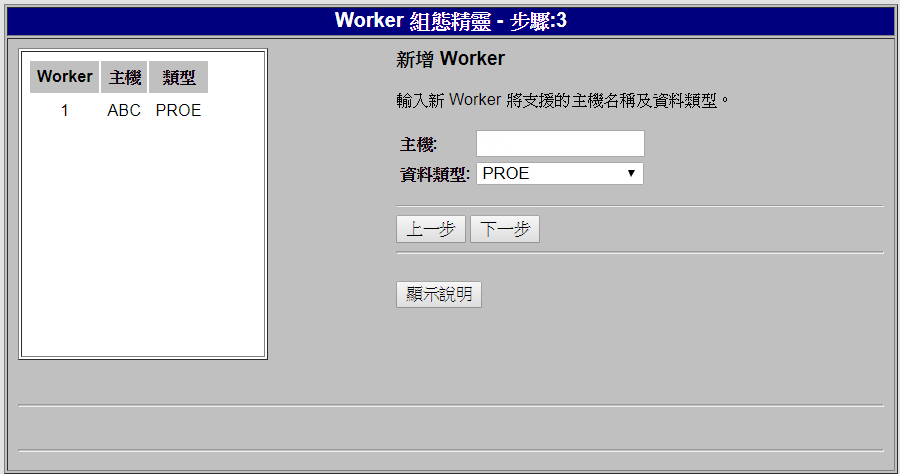
b. 按一下 Add Worker。
c. 遵照下列步驟來輸入主機和資料類型的詳細資訊,然後按一下 Next:
▪ Host:<Windows_machine_name>
▪ DataType:從下拉清中選取 PROE。
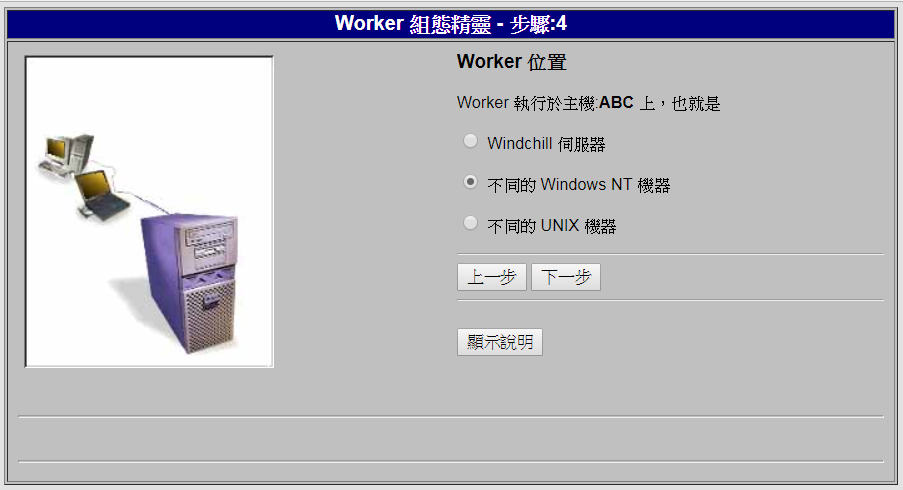
d. 在 Worker Location 中,按一下 A different Windows NT Machine,然後按一下 Next。
| 若 Windchill 伺服器可在相同的電腦上使用,請選取 The Windchill Server 選項。 |
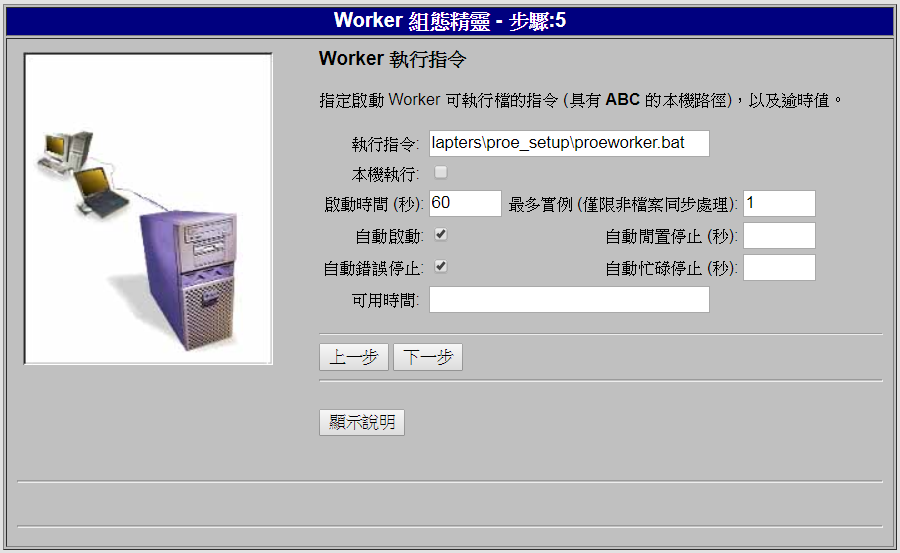
e. 在 Worker Execution Command 中指定詳細資訊,如下所述:
▪ 在 Execute Command 中,輸入 proeworker.bat 檔案的位置。
例如,D:\ptc\creo_view_adapters\proe_setup\proeworker.bat
▪ 針對 Execute Locally 清除核取方塊。
▪ 選取 AutoStart 核取方塊。
▪ 選取 AutoErrorStop 核取方塊。
f. 按一下「下一步」。
g. 在 Worker Daemon Port 中,指定 601 作為端口編號,然後按一下 Next。
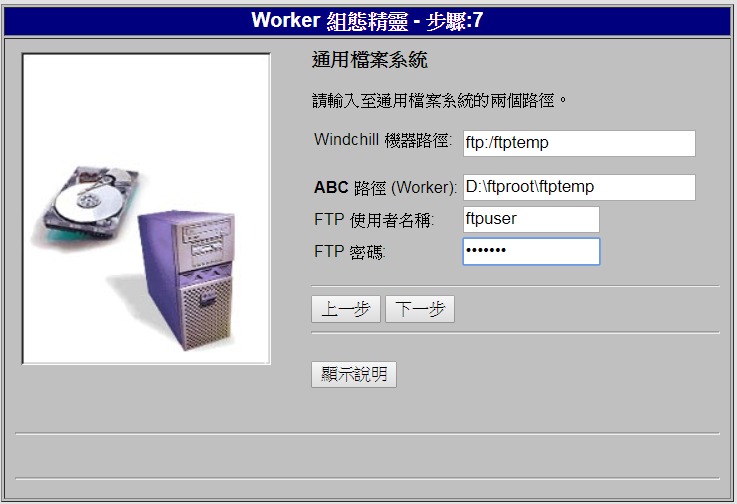
a. 在 Common File System 中指定詳細資訊,如下所示:
▪ Windchill 機器路徑:ftp:/<ftp_subfolder>
▪ 路徑 (Worker):<full_Windows_path_to_subfolder>
例如,D:\ptc\Shared_ftp\test
▪ FTP 使用者名稱:<ftp_username_in_filezilla>
▪ FTP 密碼:<ftp_password_in_filezilla>
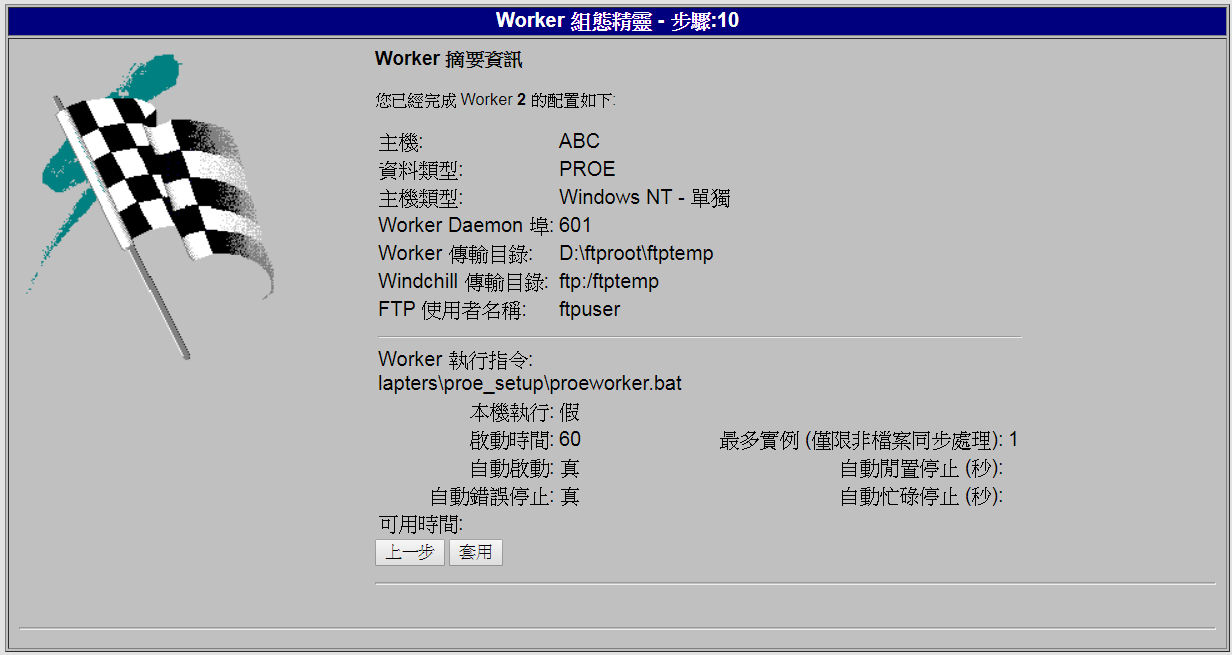
i. 按一下 Next 以顯示 Worker Summary Information。
j. 在 Worker Summary Information 中,按一下 Apply。
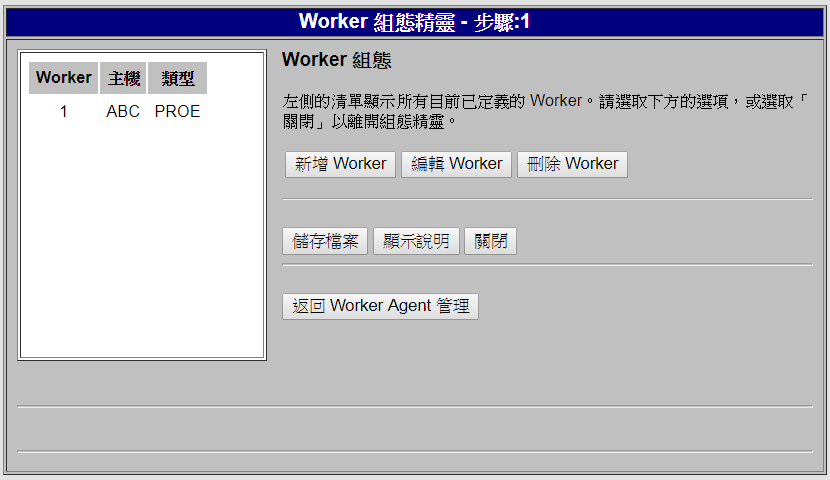
k. 在 Worker Configuration 中,按一下 Save File。
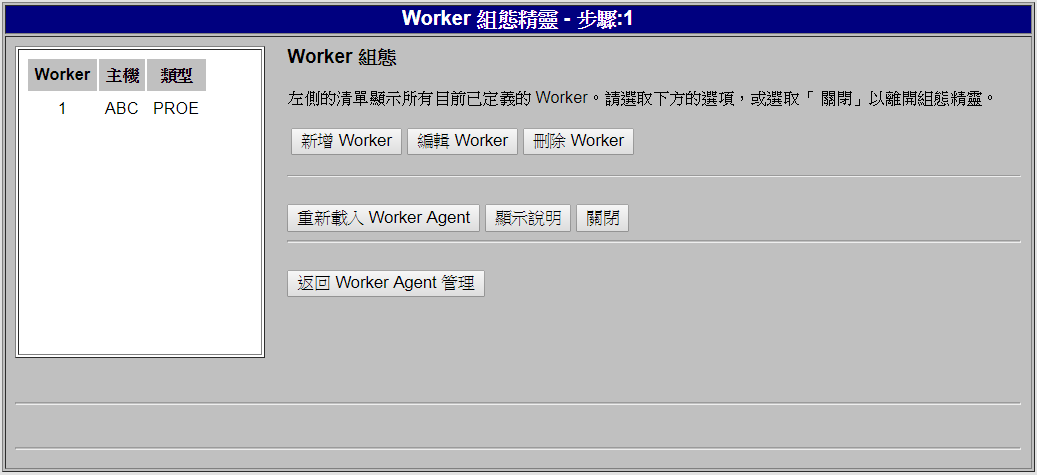
l. 按一下「重新載入 Worker Agent」。
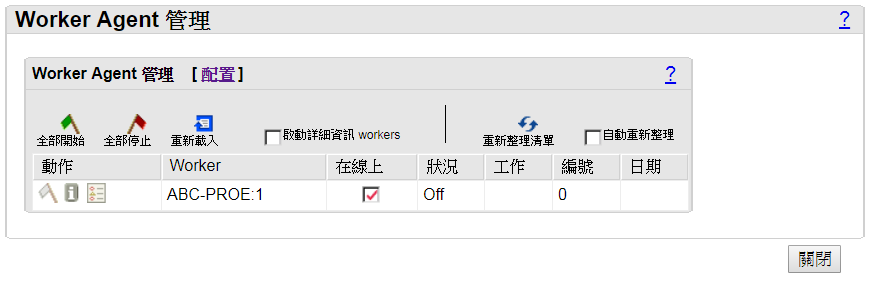
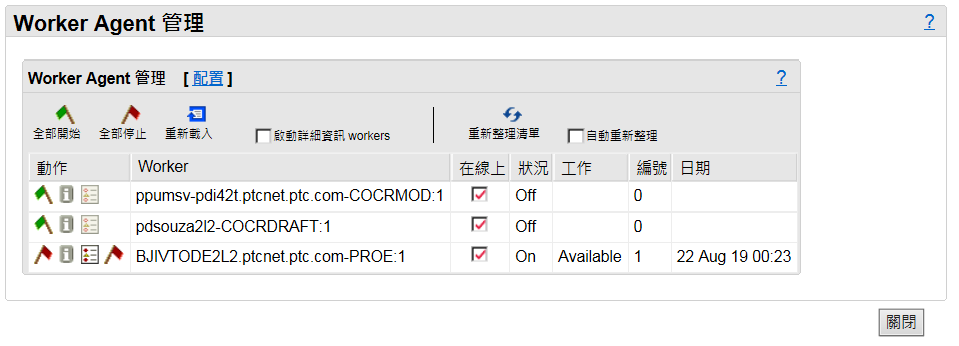
m. 按一下「返回 Worker Agent 管理」。Worker Agent Administration 對話方塊即會開啟。
n. 在 Actions 下按一下綠色旗標。等候啟動 Worker。成功完成後,會顯示紅色旗標。
疑難排解
建立標準的控制特徵時,您可能會遇到下列錯誤。
以下是出現錯誤的可能情況,及其建議的解決方案:
• 模型註釋未正確發佈至 Windchill。
解決方案:您需要確保在入庫 CAD 檔案時,CAD Worker 會開啟並執行。
• 與下游零件對應的 CAD 檔案遺失。若您在 BOM 轉換流程期間未新增將 CAD 檔案從上游部份複製到下游部份的內容,則會發生此情況。
解決方案:將以下兩個內容新增至位於 <WindchillHome>\codebase\com\ptc\windchill\mpml\xconfs\ 的 mpmlink.properties.xconf 檔案。使用 Xconf 公用程式傳播變更並重新啟動伺服器。
<AddToProperty name="com.ptc.windchill.mpml.copyOver.mapsb.newBranch.create.wt.part.WTPart" value="WCTYPE|wt.part.WTPart~MBA|buildTarget@WCTYPE|wt.epm.build.EPMBuildRule"/>
<AddToProperty name="com.ptc.windchill.mpml.copyOver.mapsb.newPart.create.wt.part.WTPart" value="WCTYPE|wt.part.WTPart~MBA|buildTarget@WCTYPE|wt.epm.build.EPMBuildRule"/>
| 使用 Creo View 4.2 或更新版本來檢視 Visualization 標籤中的模型註釋。 |
如需相關資訊,請參閱 Creo MCAD Adapters Installation and Configuration Guide (Creo MCAD 轉接器安裝與組態指南) 中的下列主題:
• Introduction to the Creo View Adapter for Creo Parametric
• Troubleshooting Server Controlled Publishing