Configuring Publish Rules
This section provides instructions on configuring publish rules using Visualization Configuration Administration.
Creating the Publish XML File
This is an example of a simple Publish Rule
<rules evaluate-rules-on-republish="true"
xsi:schemaLocation="http://www.ptc.com PublishRulesSchema.xsd"
xmlns:xsi="http://www.w3.org/2001/XMLSchema-instance" xmlns="http://www.ptc.com">
<authoring-application name="PROE">
<additional-files name="standard_files">
<file output-prefix="pdf" default="true" type="pdf" display-label="PDF"/>
</additional-files>
<condition name="ibawith value">
<and>
<attribute name="epmdoc_docType" value="Drawing"/>
<attribute name="epmdoc_lifeCycleState" value="In Work"/>
Loading the Publish XML File
Follow these steps to load the Publish Rules XML file. You must be logged on as a site administrator to access the windows shown in this example.
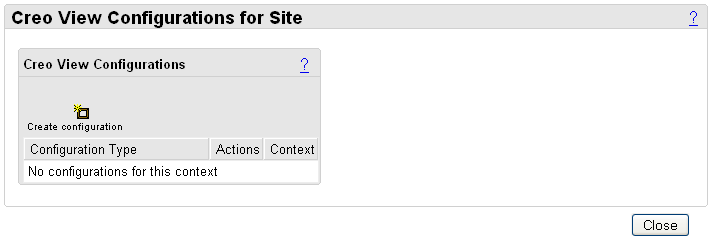
1. Navigate to the Utilities page.
2. Select Visualization Configuration Administration from the Business Administration section. This displays the Creo View Configurations dialog box.
|
|
Depending on your location in Windchill, the system can display “Creo View Configurations for Your Organization,” or a similar location identifier.
|
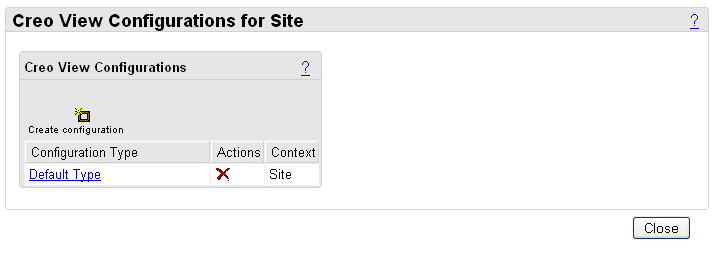
3. Click the

icon to create a new configuration at the Site level. This displays the
Create New Configuration for Site dialog box.
4. Type the name for the configuration you are creating, and click Create. In this example, the configuration is called “Default Type.” The Creo View Configurations for Site dialog box displays again with the new configuration listed in the table.
5. Under Configuration Type, click the “Default Type” link. This displays the Files pane in the Creo View Configurations for Site window. When you first create a configuration, the file list is empty. The next step is to add a file to the configuration.
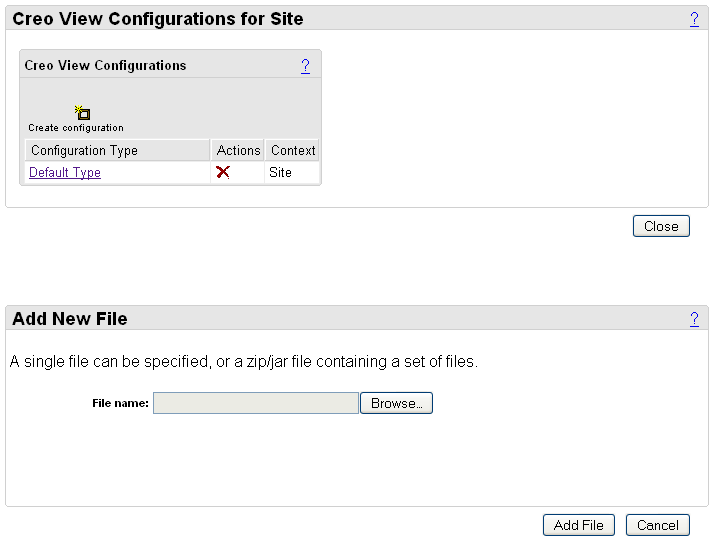
6. In the
Files pane, click
Add file to configuration. The
Add New File window appears.
7. Click Browse and select the publish rule file(s) you want to load. Click Add File to load the file to the configuration.
| If an error message appears there is a discrepancy in the rule. For assistance in finding and correcting any errors, see “Investigating Publish Rules Errors” below. |
8. If you want to change the Publish Rules, repeat the steps in the wizard above to load the updated Publish Rules file. When you see the old file listed in the
Files pane shown above, delete it by clicking

. Then, click
Add file to configuration and select the updated file.
| Changes will be realized immediately after you load the new file. |
For more advanced configuration, you can override the site template by adding a template at the Organizations level. Or, you can add a template to a library, project, program, or product within the organization to apply just to those specific areas.
Investigating Publish Rules Errors
If you attempt to load a Publish Rule but receive and error message, there is a discrepancy in the rule.