Adding Custom Workflow Attribute to Workflow Processes
There are times when you might want to view variables from a workflow process on the primary business object’s info page as an attribute. This section details how to add customized workflow process attributes to the info page of an object. This is accomplished by adding WFVariables of the WFProcess object to the primary business object’s information page.
Scope/Applicability/Assumptions
This documentation assumes familiarity with:
• type attribute layouts
• creating new xconf entries
• using xconfmanager
• resource bundles
• defining variables in a workflow process
Adding the Custom Workflow Attribute to the Workflow Process
This section contains an example of adding a work flow item attribute to the info page of a Problem Report object.
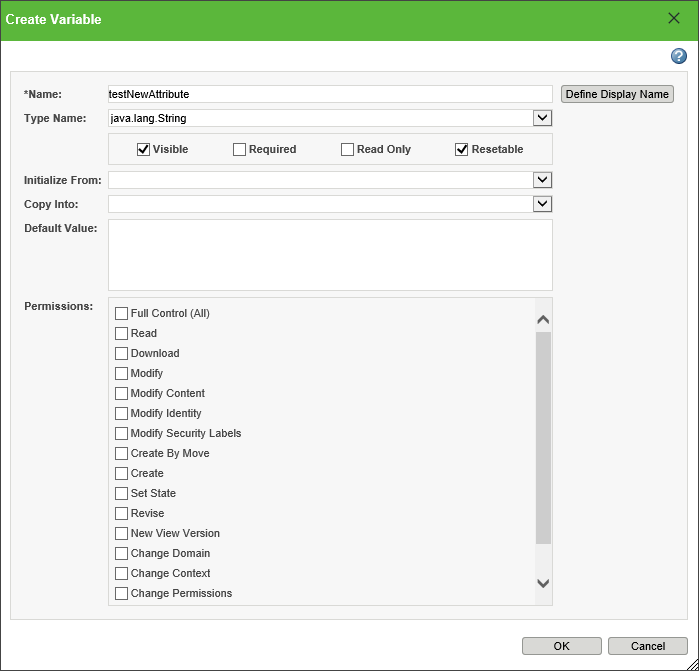
You will add a new workflow item variable to a task by using Workflow Process Management utility. In this example, add a variable with the name testNewAttribute to the WFProcess.
The supported data types for the data utility are String, Date, Boolean, and Number.
Adding the New Attribute to the Type Attribute Layout
Next, you must add a new attribute to the type attribute layout of the Primary Business Object. In this case, you will add this entry to the info page attribute layout for the loadFiles/type/WTChangeIssue.xml. The csvname is important. The csvname must be the string “WFVAR_” followed by the variable name chosen above for the WfProcess’s new variable. In this case, the full text of the csvname is “WFVAR_testNewAttribute”.
<csvBeginAttributeDefView handler="com.ptc.core.lwc.server. TypeDefinitionLoader.beginProcessAttributeDefinition">
<csvname>WFVAR_testNewAttribute</csvname>
<csvattDefClass>com.ptc.core.lwc.server.LWCNonPersistedAttDefinition </csvattDefClass>
<csvdatatype>java.lang.String</csvdatatype>
<csvIBA/>
<csvQoM/>
<csvviewStyle/>
<csveditStyle/>
<csvdefaults/>
</csvBeginAttributeDefView>
Registering the new attribute with xconfmanager
You will have to add this new attribute to be registered against the WorkItemAttributeDataUtility. This can be done by adding the following to an xconf entry to WorkItem-components.dataUtilities.properties, and propagating xconf properties (xconfmanager -pF)
<Option cardinality="duplicate"
requestor="null"
selector="WFVAR_testNewAttribute" serviceClass="com.ptc.windchill.enterprise. workitem.dataUtilities.WorkItemAttributeDataUtility"
/>
Changing the name of the attribute in the UI
By default, the name of the attribute would use the name of the key. At this point, the information page would display a new attribute with the name testNewAttribute. If you want to customize this value to a localized attribute, you can add a new entry within the WorkItem/src/com/ptc/windchill/enterprise/workitem/workItemAttributeResource.java resource.
The name of the rbinfo key should match the variable name:
After you have done this, the attribute will now show up with the value defined by the RBEntry annotation:
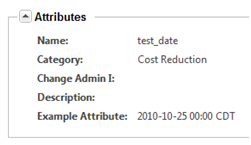
Verifying the Customization
Your customized attribute will be displayed on the information page of the primary business object.