Client-Side Customization
Customize the Ribbon UI
1. Locate the following file:
<Windchill>/codebase/com/ptc/windchill/enterprise/nativeapp/msoi/client/custom/wtCustomMenu.xml
2. Add the following text to the file:
<?xml version="1.0"?>
<groups>
<group id="ExcelActionsGroup" tag="ExcelActionsGroup"
label="Excel actions group"
screentip="Custom Excel actions group" visible="true">
<button id="SearchParts" tag="SearchParts" enabled="true" label="Search parts" screentip="Sample custom action to search parts on the Windchill server." getImage="MsoiGetImage" onAction="MsoiOnAction" keytip="sp"/>
</group>
</groups>
The next time a Windchill Desktop Integration client running Microsoft Excel connects to this server, the updated ribbon UI definition will be downloaded to the client cache.
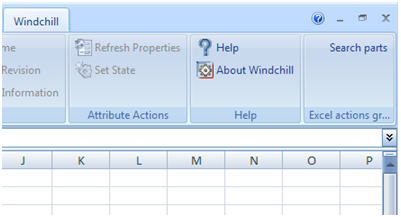
3. Close Microsoft Excel and launch it again. This step is necessary because the Windchill add-in will load in the Microsoft Office application (Excel) even before connecting to any Windchill server. When Microsoft Excel is launched a second time, you should be seeing a new group and an action:
Create a Custom Command
You now must implement the custom action that you introduced. Configuring a command involves defining a set of actions that will get invoked once the ribbon control is clicked.
The tag attribute for the control SearchParts should match the command key. This is how Windchill Desktop Integration can establish an association with the custom controls on the ribbon UI with the command.
Based on the example description, the command must do the following:
1. Read the header values from the Microsoft Excel sheet.
2. Send the property names to be sent to the server.
3. Feed the response into the sheet again.
Navigate to the following file:
<Windchill>/codebase/com/ptc/windchill/enterprise/nativeapp/msoi/client/custom/wtCustomActions.xml
Add the following text to the file:
<?xml version="1.0"?>
<commandset>
<command key="SearchParts">
<action method="run_macro" type="CLIENT">
<defaultdata key="macro_name">GetHeaders</defaultdata>
</action>
<action serverAction="customization.DTICustomizationDemo" type="WIZARD"/>
<action method="run_macro" type="CLIENT">
<defaultdata key="macro_name">PutValues</defaultdata>
<defaultdata key="macro_args"/>
</action>
</command>
</commandset>
Now you have two client side actions with a server action in between.
Run the Macros
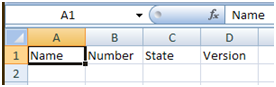
In this example, the cells A1-D1 are populated with the properties needed to query the parts:
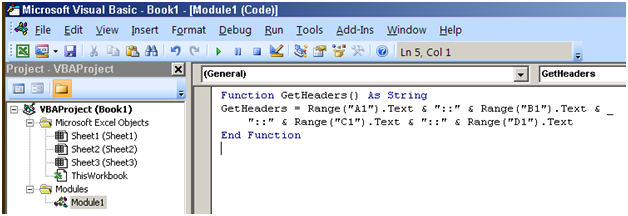
1. Introduce a macro that simply joins the text of these four cells with a separator.
| The name of the macro GetHeaders must match the action configuration data parameter macro_name. |
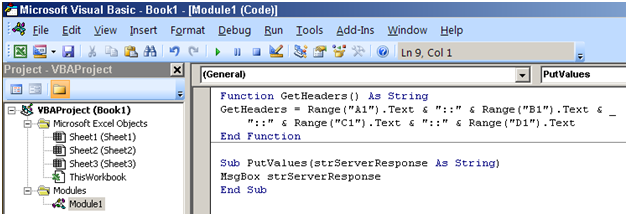
2. Create another macro that will subsequently pick up response from the server and populate it in the sheet. According to the action configuration, this macro must be called PutValues. The VBA code for the Microsoft Excel workbook now looks like the following example:
Note that the code within the PutValues macro above will simply generate an alert message with the custom response received from the Windchill server. In practice, the code could do complex actions such as generating an inline validation drop-down for certain cells.
'A reference to msxml6.dll is needed
Dim dom As New DOMDocument60
dom.LoadXML (strResponse)
'Using xpath, construct a csv list of choices for the number
Dim strNumberChoices As String
For Each elem In dom.SelectNodes("/Results/*/Number")
strNumberChoices = strNumberChoices & "," & elem.Text
Next
'Remove initial comma
strNumberChoices = Strings.Right(strNumberChoices, Len(strNumberChoices) - 1)
With Range("C1").Validation
'Remove previous validation (likely that user redoing a seed part search)
.Delete
.Add Type:=xlValidateList, _
AlertStyle:=xlValidAlertStop, _
Operator:=xlBetween, _
Formula1:=strNumberChoices
End With