Creating a Relationship Constraint
Relationship constraints can be added only to link types or link subtypes which have a Relationship Constraints tab present. To create a new relationship constraint, use the following procedure:
1. Select
Edit from the
Actions menu to enter
edit mode.
2. Click the new relationship constraint icon

.
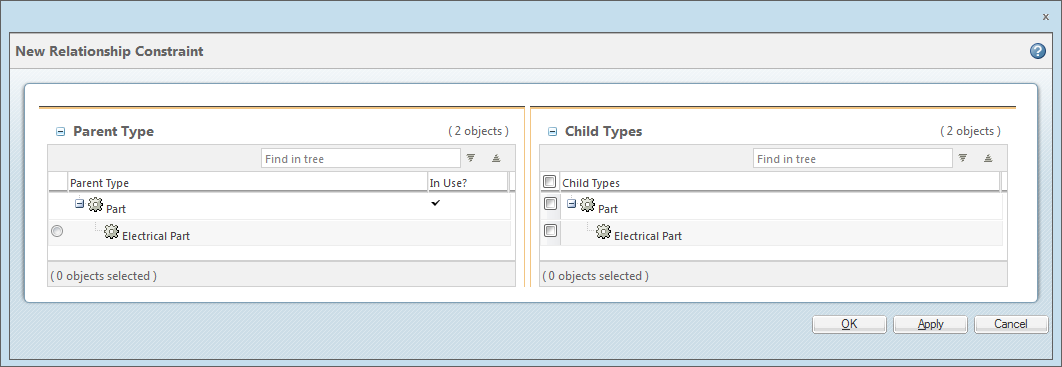
The New Relationship Constraint window displays, similar to the following screen shot:
3. Select the parent type from the Parent Type list.
The types that can be used as a parent type of a relationship constraint on the current link type are displayed. A check-mark in the In Use? column indicates that the type is already used as a parent type by another relationship constraint on this type. Subtypes of an in-use type can still be available for selection as a parent type, as shown in the previous screen shot.
Only one parent type can be selected for a relationship constraint. If all parent types are in use, then a new relationship constraint cannot be created. To add child types to an existing relationship constraint, see
Editing a Relationship Constraint.
If the Type and Attribute Management utility was launched within the context of an organization, only those parent types available within the organization are displayed.
4. Select one or more child types from the Child Types list. All types and subtypes available to be defined as child types are displayed and selectable.
5. Click OK to create the relationship constraint and return to the Relationship Constraints tab.
Click Apply to create the relationship constraint, but keep the New Relationship Constraint window open to create additional relationship constraints.
| Newly created relationship constraints are not permanently saved until Done or Save are clicked on the type information page. For more information, see View and Edit Modes. |