Using the Info*Engine Package Manager
The Package Manager utility is a simple Java application that creates, installs, and uninstalls task packages. The main Java class for the Package Manager is com.infoengine.administration.packaging.UI. The Package Manager can be started from a windchill shell. For example:
windchill "--javaargs=-DpropFile=<Windchill>/codebase/wt.properties"
com.infoengine.administration.packaging.UI
The classpath can be specified either as the CLASSPATH environment variable, or on the Java command line. An example of the classpath specified on the Java command line is:
java -classpath classpath com.infoengine.administration.packaging.UI
where classpath is the classpath noted above.
Starting the Info*Engine Package Manager
To start the Package Manager, use the following procedure:
1. Execute one of the following commands:
java com.infoengine.administration.packaging.UI
or
java -DpropFile=(<Windchill>)/codebase/wt.properties
com.infoengine.administration.packaging.UI
The Properties window opens.
|
|
Specifying the propFile property on the command line avoids requiring you to browse to the location of your property file in the following step.
|
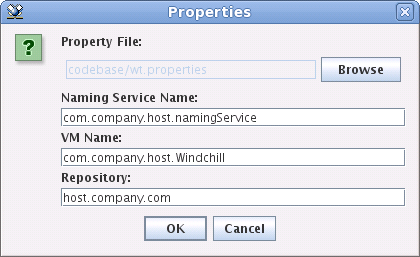
2. Verify or enter the information in the Properties window fields as needed.
◦ Property File—If you did not specify the propFile property on the command line, click Browse and browse to your properties file.
◦ Naming Service Name—The runtime service name of your naming service. This service must exist in the LDAP directory, and must be properly configured.
◦ VM Name—The name of your Windchill virtual machine. This value must be the runtime service name of your Windchill service.
◦ Repository — The name of your installation repository. The repository must exist in our directory relative to your naming service search base. Typically this value is your fully qualified host name.
3. Click OK.
If there is a problem with any of the values, the Properties window is presented again with the problem value displayed in red.
If all supplied values are acceptable, the Package Manager opens.
Navigating the Info*Engine Package Manager
The Package Manager provides a simple interface, allowing you to select the files that are part of the package, and to supply basic package information.
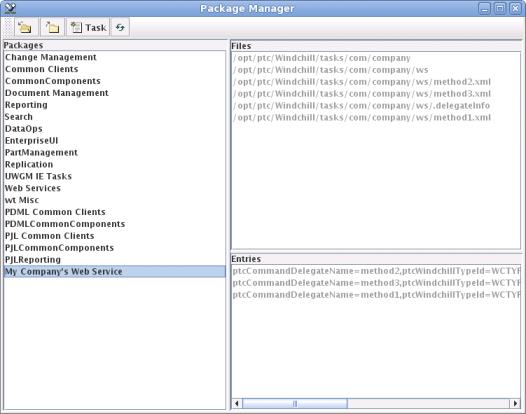
The Package Manager window consists of a toolbar and three panels.
The panels list the following information:
• Packages—Displays any packages installed on your system. Hovering your cursor over the package name displays the package description (if one is available).
• Files—Displays all files installed as a part of the selected package. All file names in this list are absolute.
• Entries—Displays all of the LDAP directory entries created as a result of the package installation.
Typically, the first time you start the Package Manager all three panels are empty, as no packages have been installed.
The icons on the toolbar include:
• Install Package
• Uninstall Package
| If you have not selected an installed package from the Packages list, then the uninstall package icon is not enabled. |
• New Task Package
Creating Info*Engine Packages
To create a package, use the following procedure:
1. Start the package manager.
2. To create a task package, click
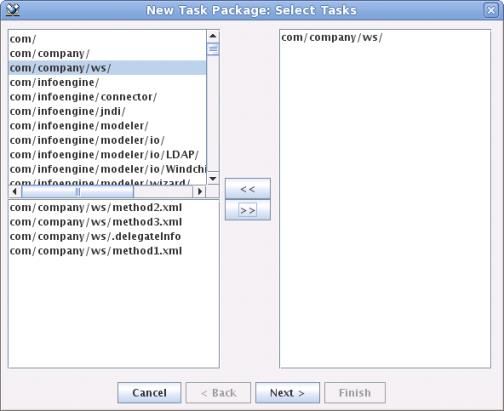
New Task Package The New Task Package: Select Tasks window opens.
The New Task Package: Select Tasks window contains three panels:
◦ The upper left panel lists all directories that can be selected from the root of the appropriate file system (either the task root or the root of the configuration specification hierarchy).
◦ The lower left panel lists files that can be found within the directory selected in the upper left list.
◦ The panel on the right lists the files or directories to be packaged.
3. Select the directories or files to be packaged:
◦ To package an entire directory and its contents, select the directory from the list on the upper left and click the add button

to move the directory name to the list on the right.
◦ To package a specific file and not an entire directory, select the appropriate directory in the list on the upper left, then select the appropriate file in the list on the lower left. Click the add button
to move the file to the list on the right.
◦ If you have selected a file or directory that you do not want packaged, select it in the list on the right, and click the remove button

to remove it from the package list.
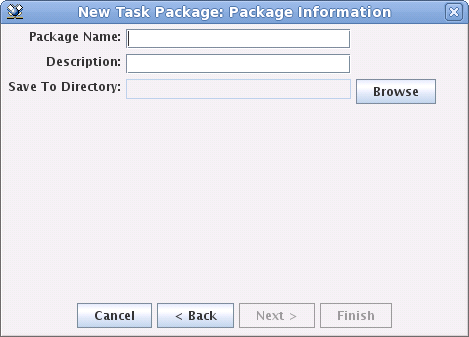
4. Click Next to open the New Task Package: Package Information window.
5. In the New Task Package: Package Information window, specify the identification and location information for the package:
◦ In the Package Name field, enter the package name. The package name should be descriptive, and can contain spaces and any characters. The value entered in this field is used for the installed label of the package as displayed in the Package Manager, and, in a compressed form, for the package filename. For the filename, any characters that are non-alphanumeric are removed. For example, if you enter the following value in the Package Name field when creating a task package:
My Company’s Web Service
then the package filename is:
myCompanysWebService.ptctar
◦ In the Description field, enter a description of the package. Any value entered in this field displays when you hover your mouse pointer over the package name on the Package Manager.
◦ Next to the Save To Directory field, click Browse to select the directory where the package is to be saved.
6. Click Finish to create the package.
Installing Info*Engine Packages
To install a package, use the following procedure:
1. Start the Package Manager.
2. Click
Install Package.
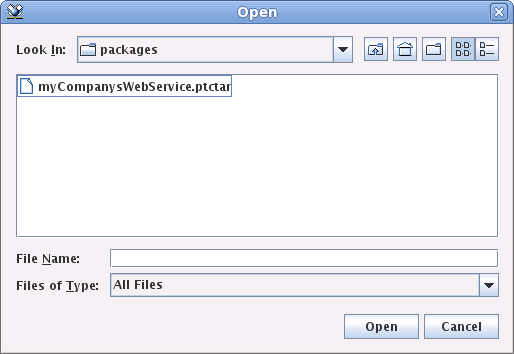
The Open window opens.
3. Browse to the package you want to install.
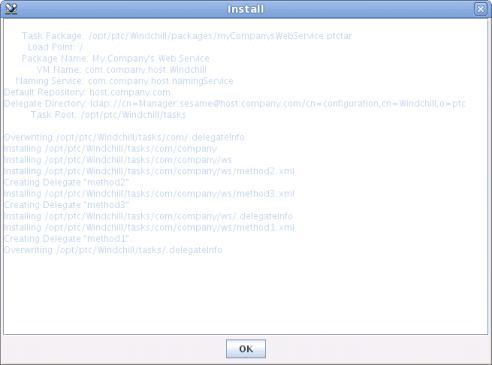
4. Select the package and click Open.
The Install window opens, reporting on the progress of the installation. Any problems that occur during installation are registered in the progress report.
5. When the installation is complete, click OK.
Uninstalling Info*Engine Packages
To uninstall a package, use the following procedure:
1. Start the Package Manager.
2. Click
Uninstall Package.
The Uninstall window opens, reporting on the progress of the uninstall. Success or failure of the uninstall is indicated in the progress report. If the package is not successfully uninstalled, then the package name remains listed in the Package Manager and contains only the contents that could not be successfully removed from the system.
3. When the uninstall is complete, click OK.