Adapter Entry Example
This section provides an example of how to create an Info*Engine adapter entry for the JNDI adapter. The example shows how to create an in-process adapter entry, but specifies the information you would need to include if you created the adapter out-of-process. For more information, see
JNDI Adapter LDAP Entry.
The following example shows how to create a JNDI adapter entry with the Property Administration utility:
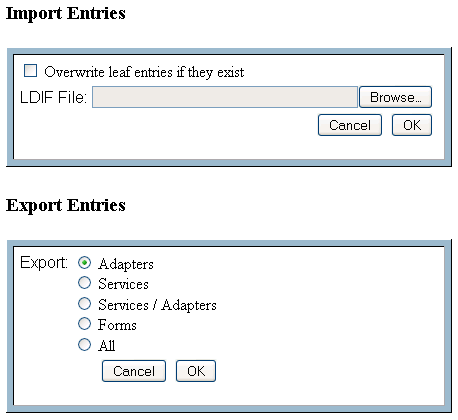
1. If the form does not exist in the Create Entry drop-down menu, or if it is not the latest form released for the adapter, click the [Import / Export] link at the top of the Info*Engine Property Administration main page. This takes you to the Import / Export Entries window where you can import the adapter form into the Property Administration utility.
2. To update an existing adapter form, select Overwrite leaf entries if they exist.
3. Next to LDIF File under Import Entries, click Browse.
4. Navigate the LDIF file containing the adapter form you want to install. For example, some adapter LDIF files are on separate adapter CD-ROMs.
| The JNDI adapter form is installed with Windchill and is maintained in the meta.ldif file along with all of the other standard Info*Engine forms. The meta.ldif file can be found in the conf/infoengine directory where Info*Engine is installed. Usually, there is no need to update this form. |
5. Select the LDIF file and click OK.
Clicking OK imports the form, overwriting any existing adapter form and returns you to the main page.
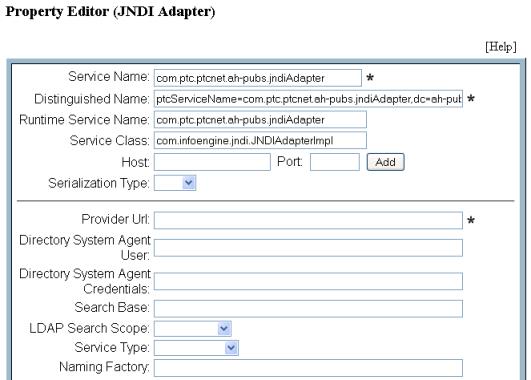
6. Select JNDI Adapter from the Create Entry drop-down menu.
The Property Editor displays the JNDI Adapter form.
7. Enter values for the required fields. The required fields are marked with an asterisk (*).
The Property Administration utility automatically suggests a Service Name, Distinguished Name, Runtime Service Name, and Service Class based on your LDAP directory structure. You can use these valued or modify them. In this example, you might want to indicate the purpose of the adapter, such as “payroll,” to the end of the service name of the JNDI adapter.
If you are setting up an out-of-process adapter, remove the Service Class and include the Host and Port.
If you are unsure how to properly fill in the information in any of the JNDI adapter fields, see
JNDI Configuration.
8. In the Dynamic Properties Configuration section, specify the interval, in minutes, you want the Property Administration utility to wait before it automatically reloads the configuration information for this adapter. If you leave this field empty, the properties do not expire.
9. The Additional Properties section can be left empty. The Additional Properties section is useful if, for example, a new adapter is released that requires additional properties. You can specify the new properties and their values here without changing the rest of the adapter form.
10. The Co-Resident Services section can be left empty. If this field is left empty, any co-resident service can access this adapter. If you specify the full distinguished name of a co-resident service in this field and click Add, it limits the co-resident services that can access this adapter to the components specified.
11. The Additional Services section can be left empty. The Additional Services section is used to specify other entries that this adapter needs to reference.
12. Click Create Adapter to create the JNDI adapter LDAP entry.