Displaying Alias Attribute Information for a Workflow Primary Business Object on the My Tasks Table
A workflow process is typically launched in the context of a primary business object (PBO), such as a change notice, change request, change task, or promotion request. Site and organization administrators can choose to display attributes from the primary business object on a work item as columns in the My Tasks table for a user by:
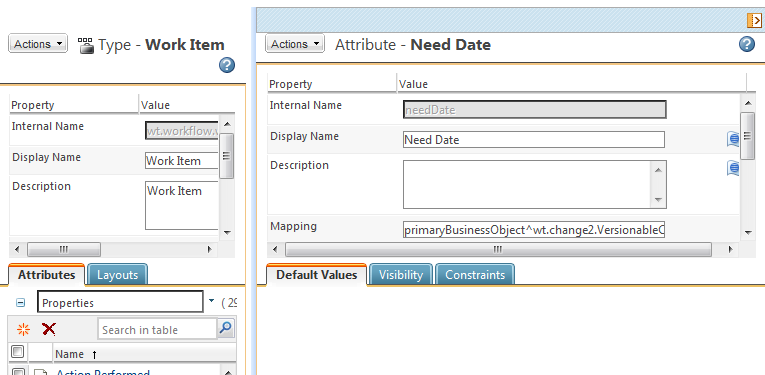
For example, to display the Need Date attribute of a change task on the assigned work item on a user’s My Tasks table:
1. In the Type and Attribute Management utility, view the Work Item type.
2. Select Edit from the Actions menu to enter edit mode.
3. Click the new attribute icon

.
4. On the Define Attributes step, specify the Internal Name for the attribute as “needDate”, and select the Alias type for the attribute.
5. On the Choose Data Type step, select Date and Time.
6. On the Set Properties step, specify the following mapping syntax for the Mapping property: primaryBusinessObject^wt.change2.VersionableChangeItem~needDate
7. Click Save to finish creating the attribute.
8. From the
My Tasks table on the
Home
page, select
Customize from the view drop-down list, and create or edit a view.
9. (Optional) On the Set Name step of the New View or Edit View window, ensure that the Share with all users checkbox is selected, if you want to make this table view available to all users.
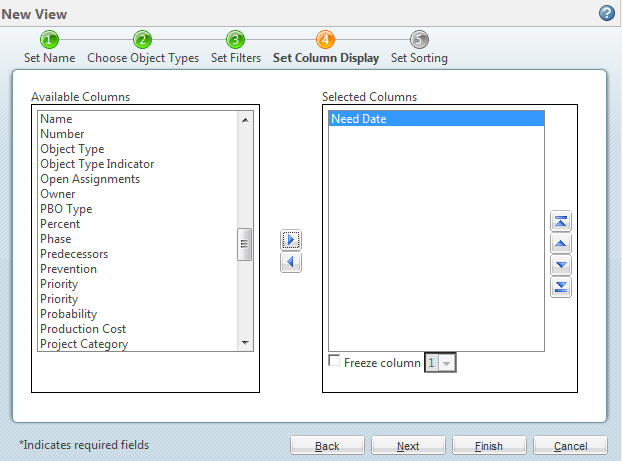
10. On the Set Column Display step, select the Need Date attribute.
11. Click OK.
When users select the table view, the Need Date attribute will now display as a column in the My Tasks table.