Configuring the Client-side Worker Agent for Theorem Worker
To configure the client-side worker agent:
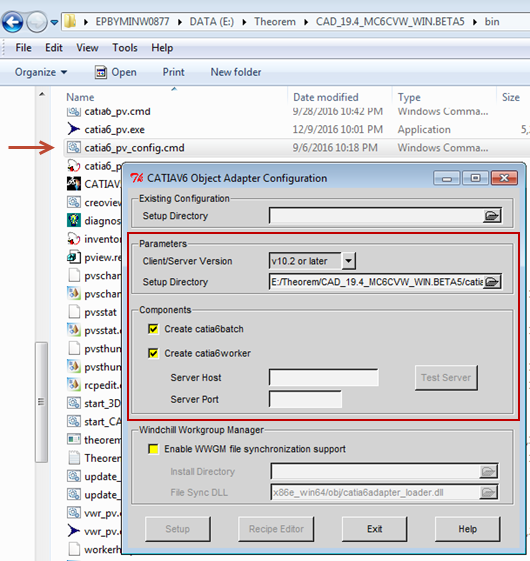
1. Run bin\catia6_pv_config.cmd from your Theorem adapter installation directory.
The CATIAV6 Object Adapter Configuration window opens as shown in the following figure.
2. In the Parameters panel, confirm your desired client and server versions.
3. In the Components panel, enter your server host name (for example:icenter01.ptcnet.ptc.com).
4. Enter your server port.
| The default is 5600, but you can verify it from the “Error! Hyperlink reference not valid. Port” entry. |
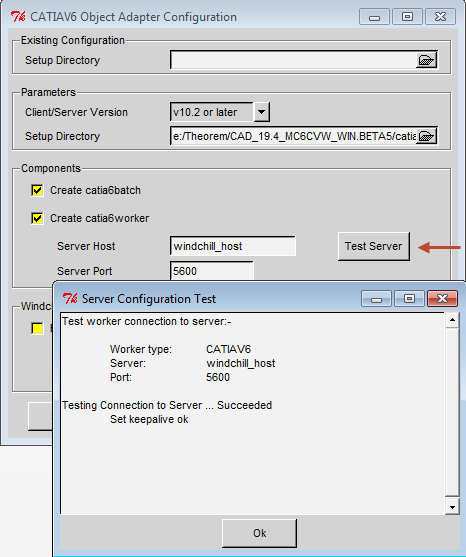
5. Click Test Server.
A CATIA 3DEXPERIENCE worker definition for the client machine must be present in the Windchill Worker Agent Administration.
If the test fails, check to see if you can access the server from a web browser, or access the shared \\V6 Worker Host\Share directory. If not, verify with your administrator if the IP addresses for the worker and server are set correctly on the DNS server.
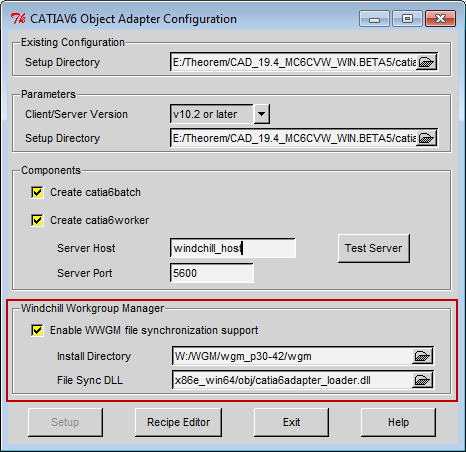
6. In the Windchill Workgroup Manager panel, select (check) Enable WWGM file synchronization support. Specify the path to your Windchill Workgroup Manager installation directory, and leave File Sync DLL to the default path.
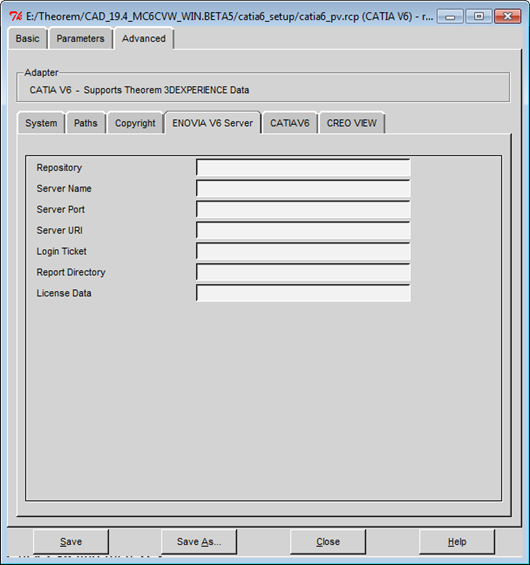
7. Click Recipe Editor, then select the ENOVIA V6 Server tab as shown in the following figure.
Provide all required information to access your ENOVIA 3DEXPERIENCE server.
For example:
Repository | PLM1 |
Server Name | 3dspace.my_host.com |
Server Port | 447 |
Server URI | 3dspace |
Login Ticket | BASE64 encoded string (result from the following two steps). |
Report Directory | Folder that is used for storing reports. For example, the results of conversions to Creo View format. |
License Data | Refer to Dassault Systems documentation about the license data used for standard batches. |
8. Log in to your ENOVIA 3DEXPERIENCE server with credentials that are to be used when publishing.
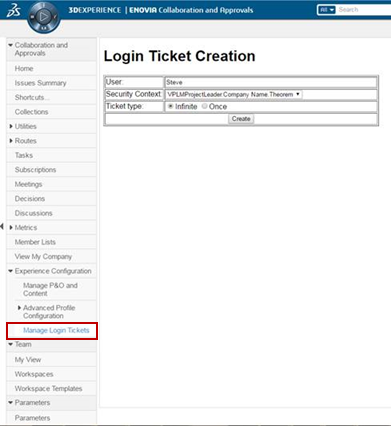
Select > > as shown in the following figure.
| Ensure that the 3DEXPERIENCE user is assigned with the Leader role for Security Context that is to be used when publishing. |
9. On the Login Ticket Creation page, for theTicket type choose Infinite, then click Create.
This produces a BASE64 encoded string, for example: REEyNzM3STE1REM2NDgxQzlFNzk1QzIwNjDFVfrvrRb45645DVRBGTR545fHww==
Use this string as the value for Login Ticket in the ENOVIA V6 Server tab.
10. In the CATIAV6 Object Adapter Configuration window, click Save, and then click Close to exit.
The client-side worker agent configuration is complete.
| You can find Theorem run time log files at <User Profiles>\<user>\Local Settings\Temp under the names tscprogressyj* and tscsummaryyj. |