Process Action Links
Action links connect activity nodes together into a sequence:

In their simplest form, links simply tell the workflow what to do next after an event. When an activity has more than one possible outcome, you use links to configure what should happen next depending on how the activity is completed.
With the exception of the Start node, all nodes must have an incoming link to be included in the workflow.
Once a node has been added, you must link it to another node:
1. Select the linking tool
.
| You cannot add links while a node is selected. If you are struggling to add a link, ensure that no nodes are selected. Selected nodes have a black border: |
2. Click the first node and drag your cursor towards the second node.
3. Release the mouse button when your cursor has reached the second node.
See the following examples below:
Basic Links | Process action links when using the default process action states. |
Routing Event Links | Process action links for activities that include custom routing events. |
Loop Links | Setting the Loop Link option in the link properties. |
Basic Links
The most basic link is one which simply states that when one event is complete, the next one can begin. You can also create links for other workflow actions. For example, you can specify that an event should be aborted if a specific activity is suspended.
Consider the following example:
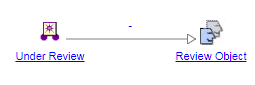
1. You create the following nodes:
◦ “Under Review”—A method robot automatically sets the object state to Under Review. No user interaction is required.
◦ “Review Object”—This is a task assigned to a single user to review the object.
2. You create a basic link between the two nodes:
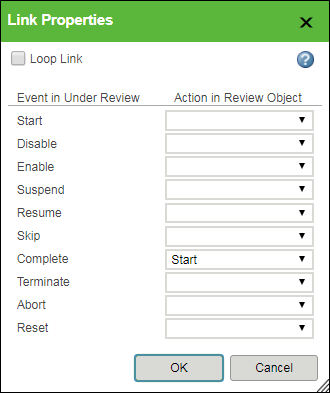
3. Double-click the link to open the Link Properties window:
This means that as soon as the method robot has completed its task (placing the object in the Under Review state), then a new “Review Object” task is automatically created and assigned to the user.
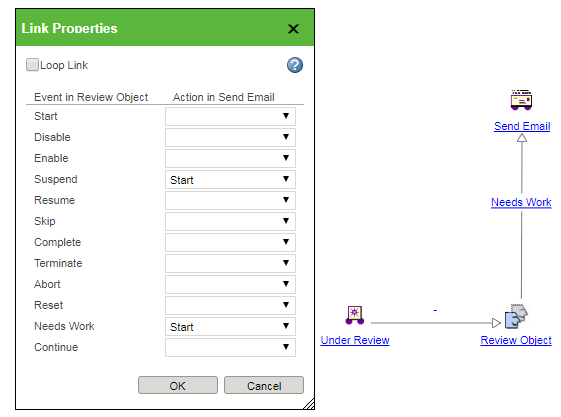
4. You can use the additional options in the Link Properties window for a more complex workflow, typically involving routing connections or workflow administration actions.
For example, a user with appropriate permissions can use the
Workflow Process Manager actions to suspend a node. You can then use the link events to ensure that an email is sent to the project manager if the activity is suspended:
Routing Event Links
Activities commonly have routing events. For more information, see
Routing Tab.
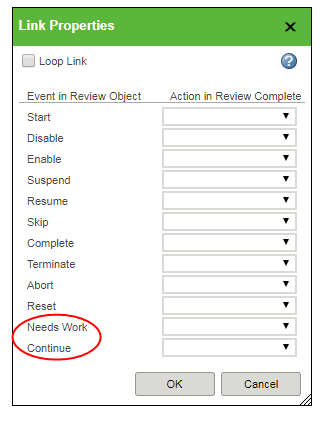
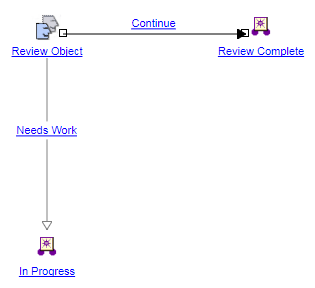
For example, you decide to give the “Review Object” user two options when completing the task: “Needs Work” and “Continue.”
When you configure outbound links from the activity, the Complete option is no longer available. Instead, your routing events appear:
You must configure an outgoing link for each custom routing event. For example, you can specify that if the user selects “Needs Work,” then the object moves to the In Progress state. If the user selects “Continue,” then the object moves to the Review Complete state:
Loop Links
You can use a loop link for sections of the workflow that might need to be revisited more than once. A loop link resets all nodes in its path, allowing you to execute nodes more than once.
For example, your workflow includes the following series of events:
1. An object moves to the Under Review state.
2. When an object is in the Under Review state, a “Review Object” task is created and assigned to a designated user.
3. If the user completes the activity with a “Needs Work” vote, the object moves to the In Progress state.
a. When the object is in the In Progress state, a “Revise Object” task is created and assigned to the object owner.
b. When the object owner completes the “Revise Object” task, it goes back to the Under Review state.
4. The reviewer is assigned a new “Review Object” task to complete.
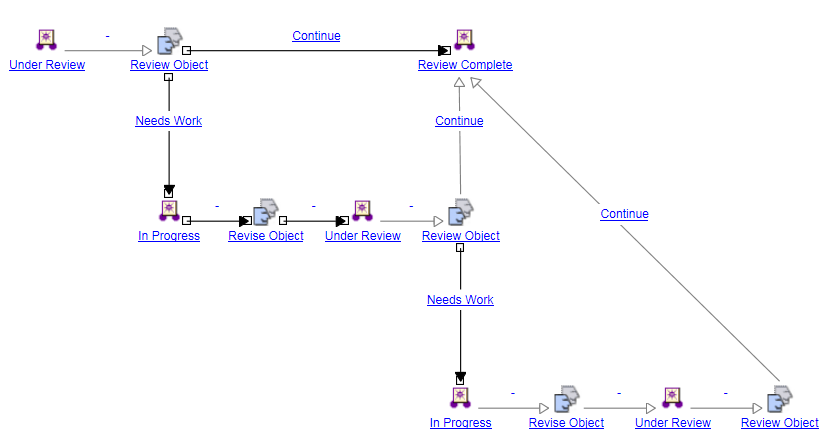
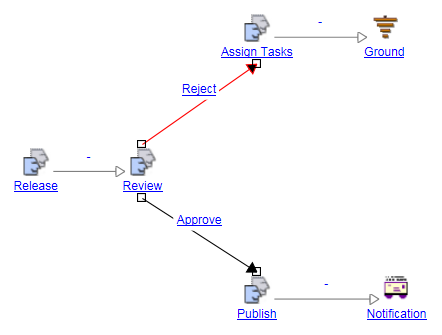
You do not know how many times the reviewer might choose the “Needs Work” option, and attempting to manually configure the process is overly complex:
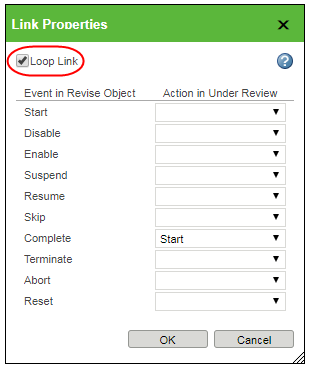
A much better option is to instruct a section of the workflow to start over again. To do this, you select Loop Link in the link properties:
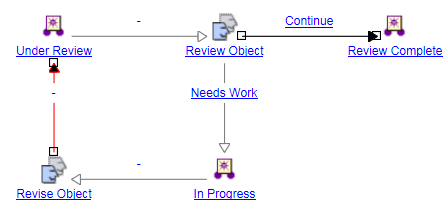
As a result, whenever the “Revise Object” task is completed, the object goes back to the Under Review state and a new task is assigned to the reviewer. Loop links are displayed in red:
A few additional notes about loop links:
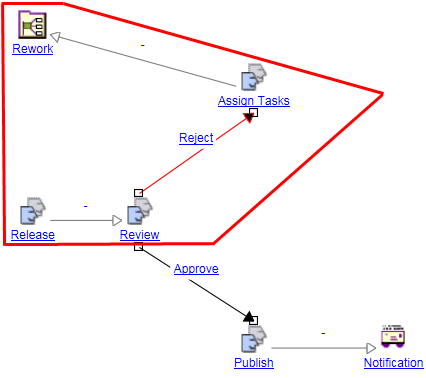
• Loop links require a closed loop. The loop link in the following workflow is meaningless:
The loop link needs to be part of a closed loop in order to affect the workflow:
• Loop links reset any connectors immediately outside the loop.
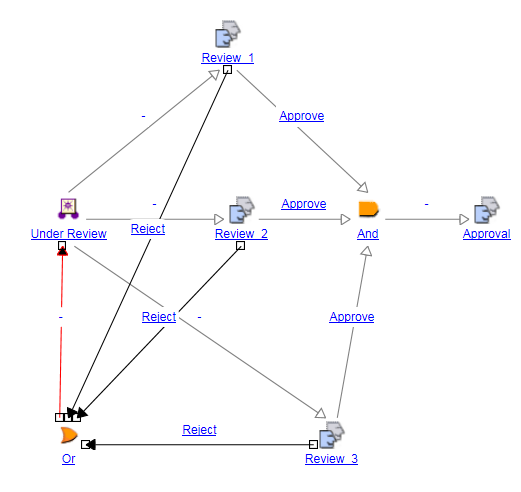
For example, you have the following workflow:
The Approval task is initiated when all three review activities are completed with an “Approve” vote.
The loop link is initiated when Review 1, Review 2, or Review 3 is completed with a “Reject” vote. The loop link consists of the following nodes:
Under Review
Review_1
Review_2
Review_3
OR connector
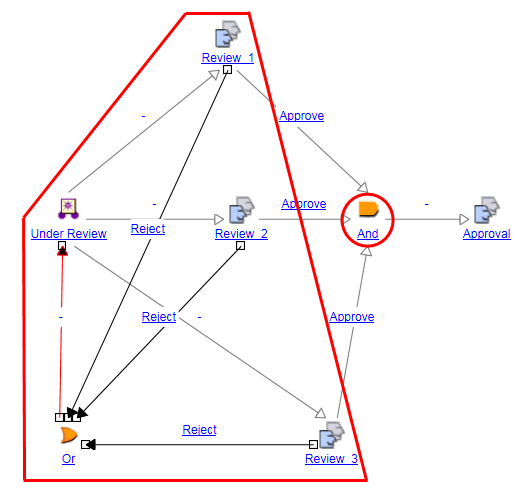
However, the loop also resets any immediately adjacent connectors. In this example, that includes the AND connector:
Therefore, consider the following scenario:
1. The Under Review robot triggers, initiating the Review_1, Review_2, and Review_3 tasks.
2. Review_1 is completed with “Approve.”
3. Review_2 is completed with “Approve.”
At this point, the AND connector is still waiting for Review_3 to vote “Approve” before triggering the Approval task.
4. Review_3 is completed with “Reject,” initiating the loop link.
5. The Under Review robot triggers again, re-initiating Review_1, Review_2, and Review_3.
6. Review_3 is completed with “Approve.”
However, even though all three reviews have now been completed with an “Approve” vote, the Approval task is not triggered.
The reason is because when the loop link initiated, the AND connector was also reset. This effectively nullified the previous “Approve” votes from Review_1 and Review_2. Now the workflow is waiting for Review_1 and Review_2 to complete again.
• Only the connectors immediately adjacent to the loop link are affected, even if their behavior might be affected by the loop link.
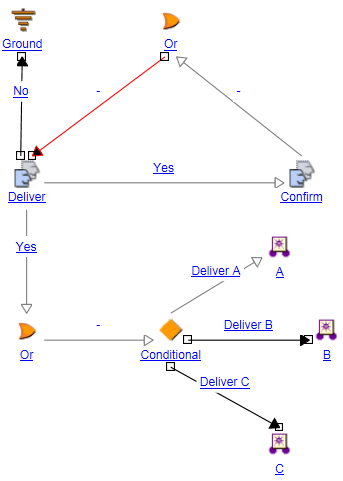
For example, you have the following workflow:
The Deliver task is customized so that you can vote “Yes” or “No.” If you select “Yes,” you can choose any of the following options: “Deliver A,” “Deliver B,” and “Deliver C.”
If you complete the Deliver task with “Yes”:
◦ The workflow checks to see if you selected any of the delivery options. If you did, it proceeds to the conditional connector, which will trigger the Deliver A, Deliver B, or Deliver C task depending on the options you selected.
◦ The workflow initiates the Confirm task. When the Confirm task completes, a loop link resets the Deliver task and any adjacent connectors:
However, it does not affect connectors that are not adjacent, even if they are critically affected. Consider the following scenario:
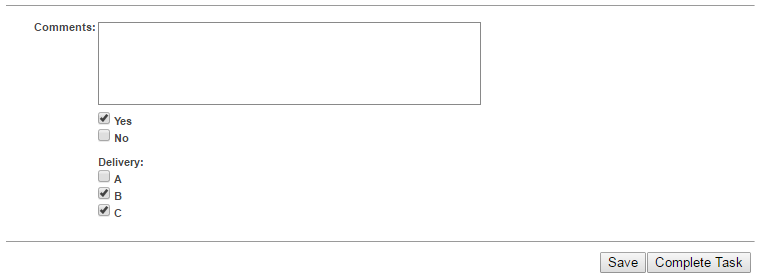
1. You complete the Deliver task with a “Yes” vote and select the “Deliver B” option:
▪ The Confirm task initiates.
▪ The “Deliver B” option initiates the B task robot.
2. The Confirm task is completed, triggering the loop link.
3. The Deliver task is re-initialized.
4. You complete the Deliver task with a “Yes” vote and select “Deliver A,” “Deliver B,” and “Deliver C.”
The Deliver A and Deliver C task robots are never triggered. Only the Deliver B robot is triggered. The reason is because the conditional connector was not reset as part of the loop link, only the adjacent OR connector.