Classification Binding Attributes
To classify an object, an administrator must first define a classification binding attribute. This is a reusable attribute that is defined on a classifiable object type or its subtype as a string attribute with a classification constraint.
You only need one binding attribute. However, you can optionally define multiple binding attributes:
• You can use binding attributes to group and categorize classified objects. For an example, see Use a Binding Attribute For Categorization below.
• You can map a binding attribute to a specific branch in the classification structure. For an example, see Use a Binding Attribute to Restrict Node Selection below.
Creating a Classification Binding Attribute
2. From
Manage Reusable Attributes, create a reusable attribute with a string data type. For more information, see
Creating Reusable Attributes.
3. From Manage Types, select the classifiable type or a subtype.
4. Select > .
5. Under
Attributes, click the new attribute icon

.
a. Provide an internal name for the attribute. This should be different than the name you provided the reusable attribute created in step 2.
b. In the Type field, select Global.
Click Next.
c. Select the reusable attribute you created in step 2.
d. Set the following attribute properties:
Display Name | The name that should appear when the attribute is displayed in the user interface. |
Description | Provide a description for the binding attribute. |
Filterable | Select Yes to allow the binding attribute to be used when filtering structures. |
e. Click Finish.
a. From the New Constraint window, select Classification. Click OK.
b. In the Enter namespace field, enter the namespace that you have created for the classifiable type that you have selected.
| • Optionally, use the Enter node name field to enter the internal name of a branch node. This restricts node selection to child nodes of that branch. For more information, see Use a Binding Attribute to Restrict Node Selection below. • By default, a single value constraint is added. Remove this constraint to allow multiple classification nodes from the same binding attribute to be configured for a classifiable object. |
8. Click Done.
To allow users to select the binding attribute when creating a new classifiable object, you must add the attribute to the
Create New layout. For more information, see
Layouts Tab.
Example: Use a Binding Attribute For Categorization
For example purpose, we have used part type object.
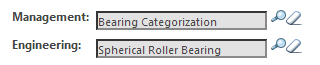
You create two binding attributes: “Engineering” and “Management.”
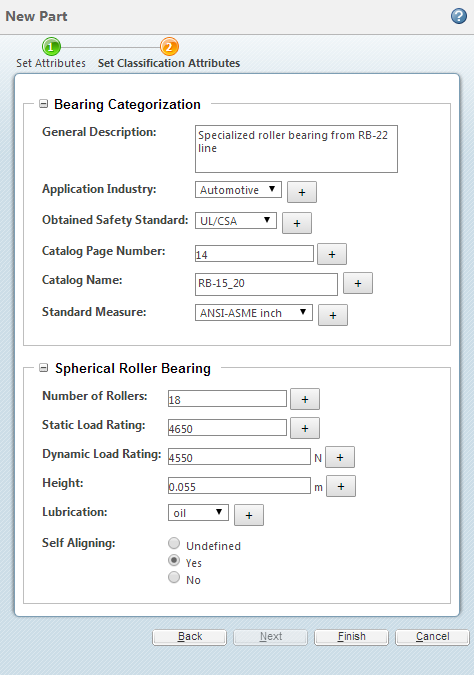
You add the “Management” attribute to all part types; you add the “Engineering” attribute to the Mechanical Part subtype. When a user creates a new Mechanical Part, they can select a different node for each binding attribute:
Example: Use a Binding Attribute to Restrict Node Selection
When you add a binding attribute to a part type, you can optionally specify a node name using the Classification constraint. This restricts node selection to child nodes of that branch.
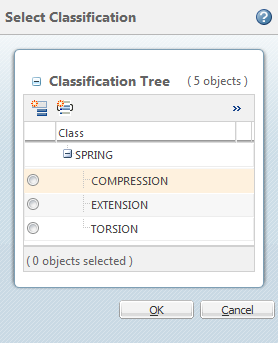
For example, the internal name for the “Spring” branch node is SPRING:
You enter SPRING as the node name:
As a result, when a user creates a new part and selects this binding attribute, their selection is limited to nodes within the Spring branch:


 .
.