Setting Attribute Values
The Edit Attribute Value window, launched by the Set Value action, allows you to modify any of the editable displayed, configured soft-type attributes of objects selected for the action. Attribute values are only editable for new or checked out objects. If you select both checked-out and checked-in objects and then choose Set Value, the Edit Attribute Value window is launched. However, changes made in it only apply to the selected objects that are modifiable.
If you select a family table member, the table-driven attributes may be modified just for this object; however, attributes that are shared by all members are only editable on the generic. If you modify a shared attribute on the generic, then the instances will show as read only and they will be automatically updated to match the generic’s value. If you modify an attribute on the generic, while editing attributes in the workspace, then the system will require you to check out the other family table members that inherit this value.
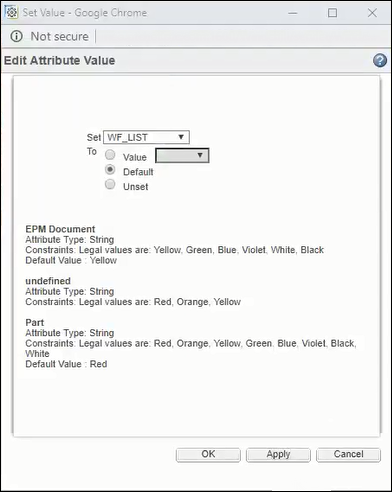
In the Edit Attribute Value window, the Set menu contains a list of object attributes currently displayed in the columns of the Edit Properties page. Depending on the attribute selected in the Set drop-down menu, the To field presents a menu (for list-specified values) or input panel (for range-delimited values).
To set an attribute value:
1. From the toolbar, select the checked-out objects for which you want to edit attribute values and click the set value icon

.
The Edit Attribute Value window opens.
2. From the Set menu, select the attribute you want to edit.
3. In the To field, select one of the following options:
a. Value—Enter or select the desired value.
b. Default—Resets the attribute to the default values for the object’s soft-type.
c. Unset—Removes the attribute’s value and assignment to this object.
Unset is not supported for CAD Document attributes, since the values cannot be removed from the native file content).
| Help text is displayed to indicate the type, any constraints defined and default value of EPM Documents, Windchill documents and parts. |
4. Click Apply to set the value (the value is refreshed on the Edit Properties page) and leave the Edit Attribute Value window open
or
Click OK to exit the Edit Attribute Value window and return to the Edit Properties page, where the newly set value is displayed.