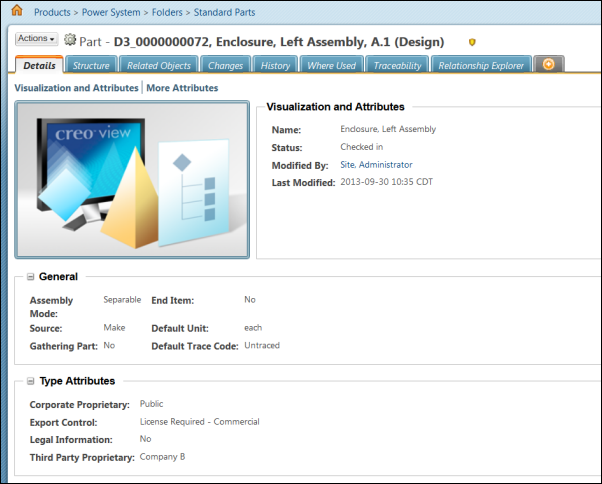
Step 26: Display Security Labels and Security Label Values on Object Information Pages - Optional
Security labels and their values can be added as attributes to an object information page using an alias attributes. The following steps provide additional information about what is required specifically for displaying security labels. For general information about how to add attributes to an object type, see
Creating a New Attribute.
1. Select the object type from the Manage Types list in the Type and Attribute Management utility.
2. Select Edit from the Actions menu on the type information page.
3. Click the create a new attribute icon

on the
Attributes tab. The
New Attribute window opens.
4. Specify the internal name of your security label attribute in the Internal Name field, select the Alias type, and click Next.
| The internal name must be unique. You can set the internal name to the logical form of the security label as specified in the LogicalAttributesSite.xml file, but it is not required. For more information, see Step 7. Edit LogicalAttributesSite.xml. |
5. Select String from the Datatype drop-down list and click Next.
6. Specify the applicable attribute properties on the Set Properties step. In the Mapping field, specify the logical form of the security label as specified in the LogicalAttributesSite.xml file.
| You can also set the Mapping field to the external form of the security label, but PTC recommends using the logical form. |
| While it is not required to match the Display Name field to the display name of the security label as specified in the accessModelRB.rbinfo file, it is recommended for consistency. For more information, see Step 1. Define Security Labels. |
7. Click Apply to save the current attribute and create another, or click Finish to save the current attribute and close the window.
8. Add the new security label alias attributes to the information page layout for your object type. For more information, see
Editing Attribute Layouts.
| If your Windchill system has more than one locale, you can manually enter a localized value for the attribute display names by clicking the localize icon  next to the Display Name field on the attribute information page. For more information, see Localizing Property Values. |
Repeat these steps for each object type for which you would like security labels to display.

