To set e-mail notification in the Web interface
|
CLI EQUIVALENT
|
im setnotification
|
The Web interface allows you to set simple e-mail notification rules, for example, receiving e-mail notification when new submitted éléments are assigned to you.
|
|
To create advanced e-mail notification rules, you must create them in the GUI.
|
1. Click My Profile on the right side of the title pane.
|
|
When the view is maximized, click  in the title pane and select My Profile. |
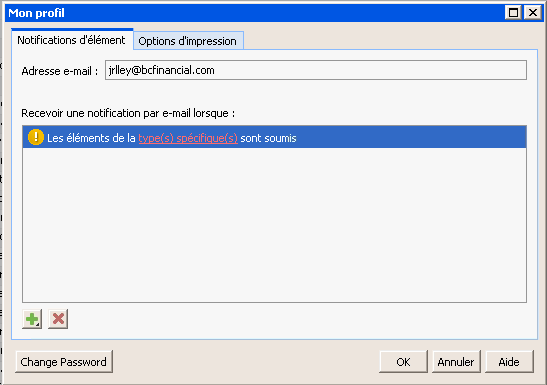
The My Profile dialog box displays. Your e-mail address displays on the Item Notifications tab. To notify multiple users, you can specify e-mail addresses separated by a semi-colon in Email Address.
|
|
If you create a notification rule in the GUI that is too complex to view or edit in the Web interface, you are asked whether you want to delete the existing rule and create a new one in the Web interface.
|
2. Click

and select a pre-defined notification rule. In the list,

displays next to the pre-defined rule.
3. Click specific type(s) in the rule and use the data filter to select one or more item types to be notified about when the condition described in the rule is satisfied. For example, if you set the notification rule Items of type(s) Defect are submitted you would be notified when a new Defect item type is submitted.
If you select a rule that has an item state condition, click specific state(s) and use the data filter to select one or more states that the specified item type must be in for a notification to be sent. For example, if you set the notification rule Items of type(s) Docs are assigned to state(s) Rejected you would be notified when a documentation item is rejected. The list of states you can select depends on the workflow implemented by your administrator.
If you add more than one rule at a time without defining any values for them,

displays next to all rules. After defining the values for one of the rules,

changes to

.
4. Repeat steps 2 and 3 for any additional notification rules. All rules are connected using the logical or, which indicates that one or more of the specified conditions must be true.
To remove a notification rule, select it and click

.
5. When all the notification rules are set, click OK.
 in the title pane and select My Profile.
 and select a pre-defined notification rule. In the list,
  displays next to the pre-defined rule.
 displays next to all rules. After defining the values for one of the rules,
  changes to
  .
. .
.