WRS OAuth Authentication
Authorization
The first step of OAuth 2 is to get authorization from the user. For browser-based or mobile apps, this is usually accomplished by displaying an interface provided by the service to the user.
Create a "Log In" link sending the user to:
https://authorization-server.com/auth?response_type=code& client_id=CLIENT_ID&redirect_uri=REDIRECT_URI&scope=photos&state=1234zyx
where:
• response_type=code—Indicates that your server expects to receive an authorization code.
• client_id—The client ID you received when you first created the application.
• redirect_uri—Indicates the URI to return the user to after authorization is complete.
• scope—One or more scope values indicating which parts of the user's account you wish to access.
• state—A random string generated by your application, which you'll verify later.
In this example the link is:
https://pun-w13-utf038.ptcnet.ptc.com:9031/as/authorization.oauth2?
response_type=code&state=my-client-state&client_id=wnc-rp-client&scope=WINDCHILL_READ&
redirect_uri=https://app.getpostman.com/oauth2/callback
response_type=code&state=my-client-state&client_id=wnc-rp-client&scope=WINDCHILL_READ&
redirect_uri=https://app.getpostman.com/oauth2/callback
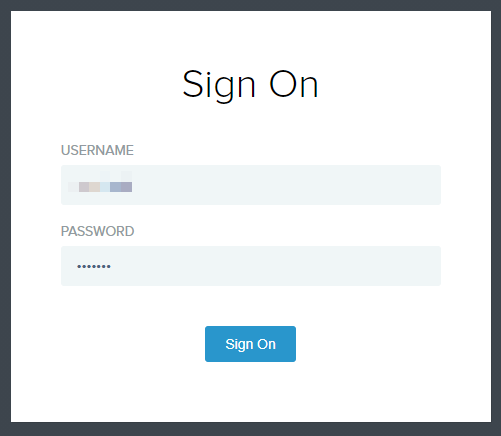
The user sees the authorization prompt as shown below:

When the user clicks Sign On the service redirects the user to an approval page as shown below:

When the user clicks Allow, the redirect URL is called with an authorization code
https://example-app.com/cb?code=AUTH_CODE_HERE&state=1234zyx
where:
• code—The server returns the authorization code in the query string,
• state—The server returns the same state value that you passed.
In this example:
https://app.getpostman.com/oauth2/callback?code=EXTtWU5ydKI1j1m4kLwdh_aGDjx-3DVmr444eu_k&
state=my-client-state
state=my-client-state
You should first compare this state value to ensure it matches the one you started with. You can typically store the state value in a cookie or session, and compare it when the user comes back. This helps ensure your redirection endpoint isn't able to be tricked into attempting to exchange arbitrary authorization codes.
Examples of a redirect_uri might be to redirect right back into a web application that requested the sign-on in the first place, or it might redirect into a native application on the client OS using URI schemes.
Getting an Access Token
Your server exchanges the authorization code for an access token by making a POST request to the authorization server's token endpoint:
POST https://api.authorization-server.com/token
grant_type=authorization_code&
code=AUTH_CODE_HERE&
redirect_uri=REDIRECT_URI&
client_id=CLIENT_ID&
client_secret=CLIENT_SECRET
grant_type=authorization_code&
code=AUTH_CODE_HERE&
redirect_uri=REDIRECT_URI&
client_id=CLIENT_ID&
client_secret=CLIENT_SECRET
where:
• grant_type=authorization_code—The grant type for this flow is authorization_code
• code=AUTH_CODE_HERE—This is the code you received in the query string
• redirect_uri=REDIRECT_URI—Must be identical to the redirect URI provided in the original link
• client_id=CLIENT_ID—The client ID you received when you first created the application
• client_secret=CLIENT_SECRET—Since this request is made from server-side code, the secret is included
The server replies with an access token and expiration time:
{
"access_token":"RsT5OjbzRn430zqMLgV3Ia",
"expires_in":3600
}
"access_token":"RsT5OjbzRn430zqMLgV3Ia",
"expires_in":3600
}
or if there is an error the server response is as follows:
{
"error":"invalid_request"
}
"error":"invalid_request"
}
In this example, the authorization server is configured so that the client_id and client_secret MUST NOT be sent as part of the query string. So in this case it uses Basic Auth using the client_id as the user, and client_secret as the password.
POST https://pun-w13-utf038.ptcnet.ptc.com:9031/as/token.oauth2?grant_type=authorization_code&
code=EXTtWU5ydKI1j1m4kLwdh_aGDjx-3DVmr444eu_k&
redirect_uri=https://app.getpostman.com/oauth2/callback
code=EXTtWU5ydKI1j1m4kLwdh_aGDjx-3DVmr444eu_k&
redirect_uri=https://app.getpostman.com/oauth2/callback
The server replies with:
{
"access_token": "gaqeWSCbP9NcbP1a7hwlkVvjziDW",
"refresh_token": "KOc89tfkDUS4DQF3NpYGoSiejJWhHWPJ6591GNNWP3",
"token_type": "Bearer",
"expires_in": 7200
}
"access_token": "gaqeWSCbP9NcbP1a7hwlkVvjziDW",
"refresh_token": "KOc89tfkDUS4DQF3NpYGoSiejJWhHWPJ6591GNNWP3",
"token_type": "Bearer",
"expires_in": 7200
}
Using the Access Token
Now that you have the access token you can perform the WRS call specifying the access token as the Bearer Token in the Authorization header:
GET https://i7752.ptcnet.ptc.com:443/Windchill/oauth/servlet/odata/ProdMgmt/Parts
Request Headers:
Authorization: Bearer gaqeWSCbP9NcbP1a7hwlkVvjziDW
Request Headers:
Authorization: Bearer gaqeWSCbP9NcbP1a7hwlkVvjziDW
Refreshing the Access Token
Access tokens have a set lifespan which is typically short, around 7 seconds in my example case. To save the user from login in again you can use the refresh_token returned when getting the original access token.
POST https://api.authorization-server.com/token?
grant_type=refresh_token&refresh_token=REFRESH_TOKEN_HERE&client_id=CLIENT_ID&client_secret=CLIENT_SECRET
grant_type=refresh_token&refresh_token=REFRESH_TOKEN_HERE&client_id=CLIENT_ID&client_secret=CLIENT_SECRET
where:
• grant_type=refresh_token—The grant type for this flow is authorization_code.
• refresh_token=REFRESH_TOKEN_HERE—This is the refresh tokenyou received when initially getting the access token.
• client_id=CLIENT_ID—The client ID you received when you first created the application.
• client_secret=CLIENT_SECRET—Since this request is made from server-side code, the secret is included.
For the example, the authorization server is configured so that the client_id and client_secret MUST NOT be sent as part of the query string. So in this case it uses Basic Auth using the client_id as the user, and client_secret as the password.
https://pun-w13-utf038.ptcnet.ptc.com:9031/as/token.oauth2?grant_type=refresh_token&
refresh_token=KOc89tfkDUS4DQF3NpYGoSiejJWhHWPJ6591GNNWP3
refresh_token=KOc89tfkDUS4DQF3NpYGoSiejJWhHWPJ6591GNNWP3
The server replies with:
{
"access_token": "gaqeWSCbP9NcbP1a7hwlkVvjziDW",
"refresh_token": "KOc89tfkDUS4DQF3NpYGoSiejJWhHWPJ6591GNNWP3",
"token_type": "Bearer",
"expires_in": 7200
}
"access_token": "gaqeWSCbP9NcbP1a7hwlkVvjziDW",
"refresh_token": "KOc89tfkDUS4DQF3NpYGoSiejJWhHWPJ6591GNNWP3",
"token_type": "Bearer",
"expires_in": 7200
}
You can then use the new access token for subsequent WRS calls and the refresh token to get subsequent access tokens.
Resources
OAuth 2 is a standard documented at https://oauth.net/2/. Most of the information in this document can be found here.
This document presents the detailed calls required to use OAuth 2. It’s likely it can be simplified using a code library tailored to your particular use case. The OAuth website has a list of these libraries: https://oauth.net/code/
The PTC Identity and Access Management Help Center contains information on setting up PingFederate and OAuth: https://www.ptc.com/en/support/refdoc/thingworx_platform