Configuring Attributes and Parameters
To ensure that attributes and parameters are published in
Windchill, they need to be configured both in
Windchill and in the authoring application. If a CAD drawing or part has been checked in or saved in
Windchill, the
Properties page displays the authoring application default parameters. These parameters are read-only. However, if required by your company, they can be modified by a
Windchill administrator. To modify these parameters, the
Windchill administrator changes a preference in the
Preference Management utility page in
Windchill and maps it to the authoring application preference. Mapping is performed so that the preference is recognized between
Windchill and the authoring application. For more information about mapping, refer to
Attribute and Parameter Types.
Before you create a CAD document and before it is checked in, you can set up attributes in the Preference Management utility. For example, for naming and numbering you can go to the authoring application menu in the Set Preference window and set up the attributes you plan to use.
If a user creates an authoring application parameter that conflicts in type with a Windchill system attribute, then this user-created parameter should be deleted and the system parameter of the correct type should be created by the Windchill administrator. In this way, there is no conflict between the authoring application and Windchill, and the parameter is published to the authoring application user interface.
To change a default Windchill preference value for your authoring application:
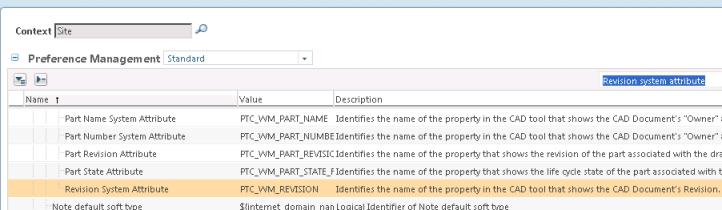
1. In the WindchillPreference Management window, locate the preference called, PTC_WM_REVISION as shown in the following figure.
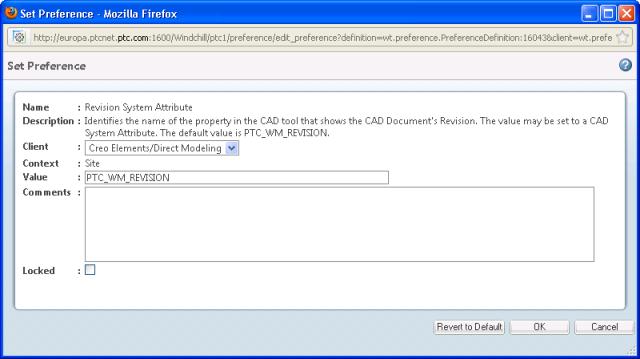
2. Right-click on the value in the Value column and select Set Preference from the menu to display the Set Preference window. The Set Preference window appears as shown in the following figure.
3. Select your application from the Client menu.
4. In the Value field, enter the preference value.
For example, PTC_WM_REVISION=XYZ.
5. Select OK. Using the example in the previous step, the CAD modeled system parameter XYZ is available for revision within the authoring application.