Installation and Setup for MPMLink - Creo Illustrate Integration
You can use Creo Illustrate with MPMLink to generate Illustrations for objects, such as process plan operations. To satisfy requirements, you must first have the following PTC products pre-installed and operational on the client machine used to generate the illustrations.
• Creo Illustrate
• Windchill Workgroup Manager for Creo Illustrate
MPMLink Setup
Preferences
There are two preferences that need to be enabled within the Preference Management Utility on your Windchill MPMLink server. By default, the values for these preferences are set to No. Set them both to Yes.
• > > > >
• >
Publishing Rule File
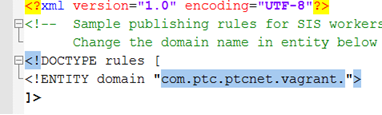
To properly manage WVS configurations on your Windchill MPMLink server, you need to add a publishing rule file for MPMLink objects that includes a domain value specific to your site. A sample publishing rule file can be found at: /opt/wnc/MpmLink/ProcessPlanBrowser/src_web/config/actions/MPMSamplePublishingRule.xml, and is shown in the following figure with a sample domain value highlighted.
| You must edit the sample publishing rule xml document, change the domain value to the specific domain value for your site, and then save the file to a different location (your desktop) for later use. |
Your specific domain value can be referenced in the Type and Attribute Management utility on your server by selecting Dynamic Document in the Manage Types panel, as shown in the following figure (sample domain value highlighted in blue).
To add a publishing rule file for MPMLink objects:
1. As an administrator on your Windchill MPMLink server, from the Navigator pane, select > > .
The Creo View Configurations for Site window opens.
2. Click Create configuration.
The Create New Configuration for Site window opens.
3. In the Configuration type field enter MPMLink, then selectCreate.
A new “MPMLink” visualization configuration type is created in Windchill.
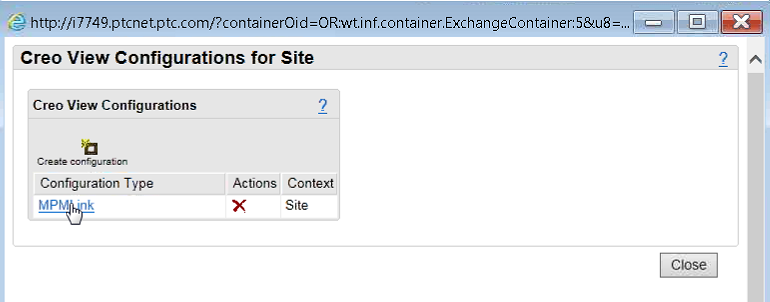
4. Click on the listed “MPMLink” configuration type to select it.
A “Files for MPMLink (Site)” section is added to the bottom of the window, as shown in the following figure.
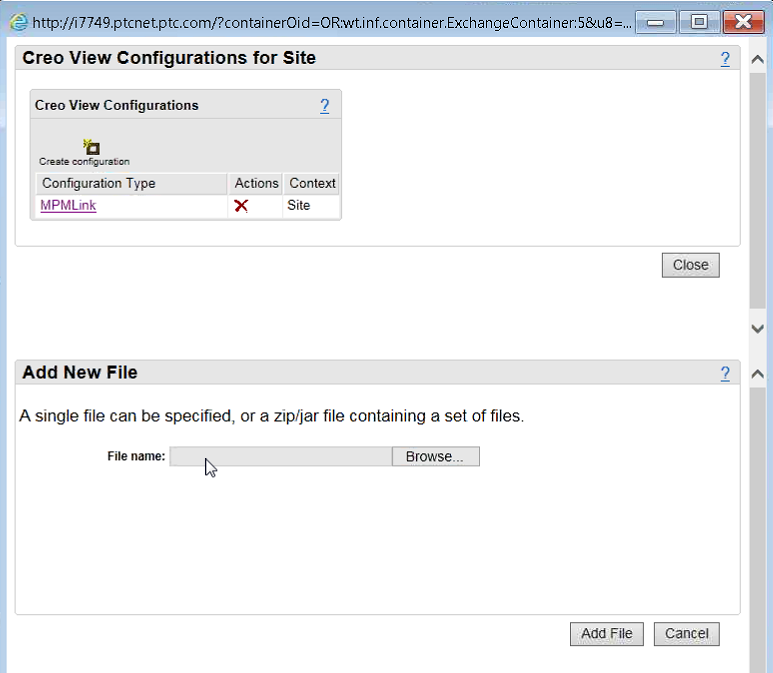
5. In the “Files for MPMLink (Site)” section, click Add file to configuration.
A new “Add New File” section is added to the bottom of the window, as shown in the following figure.
6. In the File name: field, browse for, or enter the absolute file path to your edited MPMLinkSamplePublishRule.xml file.
The filename appears in a new “Files for MPMLink (Site)” section at the bottom of the window, as shown in the following figure.
7. Select Close to dismiss the Creo View Configurations for Site window.
The MPMLink publication rule file is added to Windchill and the visualization configuration is complete.
Creo Illustrate Setup
You must add a publish option in Creo Illustrate to enable Windchill MPMLink objects to be published.
To add a publish option in Creo Illustrate:
1. On your client machine, launch Creo Illustrate.
2. In Creo Illustrate, select > .
The Creo Illustrate Options window opens.
3. At the top of the window next to Showing:, select Defaults.
4. In the left pane, select > .
Publishing - 3D Figures options are displayed in the right pane, as shown in the following figure.
5. Select + Add to add a new publishing option for Windchill MPMLink.
The Add Publish Option window opens as shown in the following figure.
6. In the Name: field of the Add Publish Option window, enter a descriptive name for the option (for example, “Work Instruction Image”) and choose Image for the type.
7. Click OK.
The MPMLink publishing option has been added and the Creo Illustrate setup is complete.
Windchill Workgroup Manager for Creo Illustrate Setup
You must register your Windchill MPMLink server with Windchill Workgroup Manager for Creo Illustrate and set a primary workspace to publish and manage MPMLink illustrations in Windchill . If not registered previously, use the following procedure to register your server.
To register your Windchill MPMLink server with Windchill Workgroup Manager for Creo Illustrate:
1. On your client machine, launch Windchill Workgroup Manager for Creo Illustrate.
2. From the Windchill Workgroup Manager menu, select >
The Server Management window opens.
3. From a standalone Windchill browser, drag-select and copy the initial portion of your server URL (ending with Windchill/). A sample URL is shown in the following figure.
4. In the Server Management window, select > from the menu bar.
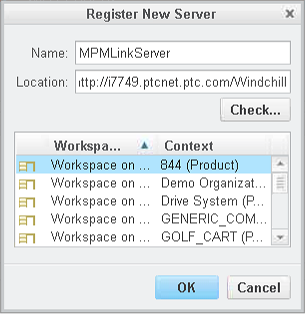
The Register New Server window opens.
5. In the Name: field, enter a name for your server (for example, “MPMLinkServer”.
6. Click in the Location: field and paste the initial portion of your server URL copied earlier.
7. Click Check and log in to your server as a regular user to verify the server connection with Windchill Workgroup Manager.
A list of available server workspaces appears in the Register New Server window if the connection is successful.
8. Select an existing workspace already associated with your MPMLink product (where the illustrations are to be used), or create a new workspace. Be sure to set it as your primary workspace.