Adding a Toolbar
In order to add a toolbar, the key attribute must be set to “actionModel” and the value attribute must be set to the name of the action model that contains the toolbar actions.
For example:
TableConfig table = factory.newTableConfig();
table.setActionModel("customToolbar");
This example uses a toolbar named “customToolbar” that contains pre-existing folder actions.
If the table uses a new action model for the toolbar, it must be registered in the actionModels.xml file.
<model name="CustomToolbar">
<action name="list_cut" type="object"/>
<action name="list_copy" type="object"/>
<action name="fbpaste" type="object"/>
<action name="list_delete" type="object"/>
<action name="separator" type="separator"/>
<action name="create" type="folder" shortcut="true" />
</model>
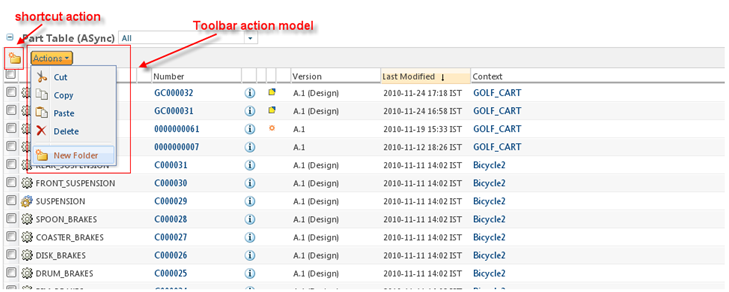
Configuring above action will produce an toolbar action model displayed as:
The *actions.xml and *actionModels.xml files can be modularized with logical packaging. These files are located in <Windchill>/codebase/config/actions. There is also a custom-actions.xml and custom-actionModels.xml file available to register new actions and action models. The “customToolbar” action model is registered in the custom-actionModels.xml file.
If the user selects few records and does a right click on the selected records, table toolbar action model shall be displayed. But note, only the actions having attributes selectRequired=”true” and multiSelect=”true” shall be displayed.