Batch Print
The
Batch Print function is accessible from the

drop-down menu in the
Organizations or
Site areas of Windchill.
Batch Print is also available from the

drop-down menus for Documents, Parts, and CAD Documents; on the representation listing; from the Clipboard; in the
Search table toolbar; or by right-clicking on an object in the Folder view.
| Batch Print must be enabled in the Windchill Preference Management utility before it can be accessed. See Batch Print Preferences for details. |
Select the
Batch Print
option to get started.
| In order to use the Batch Print feature, a valid PrinterConfig.xml file, containing printer configuration(s) for your site, must be added to an appropriate Windchill container(s) using the Visualization Configuration Administration utility. Batch Print first looks in the user's Organizations container for a valid PrinterConfig.xml file; if one does not exist there, the application looks in the Site container. The Products and Projects containers do not support Batch Print. Check with your system administrator to ensure that the PrinterConfig.xml file is in place before proceeding. See Printer Configuration for complete printer configuration options and instructions about the PrinterConfig.xml file. |
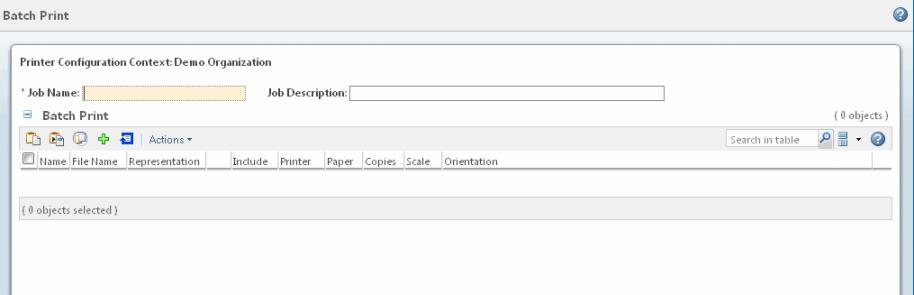
The first items in the Batch Print UI are the Job Name and Job Description fields.
• Enter a name in the Job Name field. If you have launched Batch Print from the Details page of an object, the Job Name field is populated with a default name for that object. You can also enter an optional description of the job in the Job Description field.
• Click the
Add Printable Items
icon to open the
Find Object window, where you can search for printable objects by Context, Name, Number, Revision, or Iteration, and add them to the
Batch Print table.
The result of a search for Batch Print items in the Find Object window is displayed below.
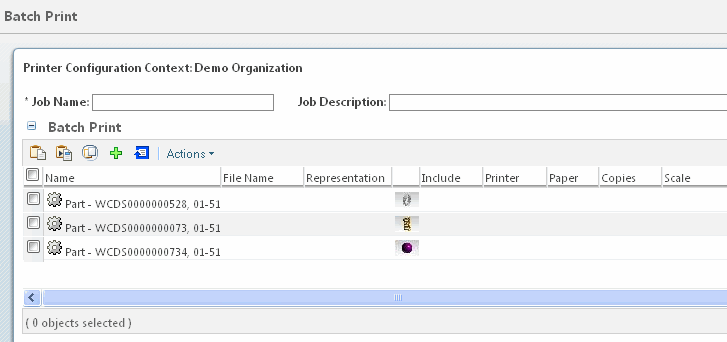
Enable the check boxes next to the objects you want to add to the Batch Print table and click OK. The items you selected appear in the Batch Print table.
The actions and information available in the Batch Print window are described below.
Batch Print Icons
The following table describes the icons that appear at the top of the window:
Icon | Description |
| Pastes a copied object into the Batch Print table. |
| After objects have been placed on the clipboard by cutting or copying, choosing the Paste Selection action allows you to view the content of the clipboard and choose specific objects to be pasted in the Batch Print table. |
| Directs you to the Return Collected Objects page, where you can select additional related objects to include in the Batch Print session. |
| As described above, clicking the Add Printable Items icon opens the Find Object window, where you can search for printable objects by Context, Name, Number, Revision, or Iteration, and add them to the Batch Print table. |
| Opens the Print Options window, where you can modify the Print Options for a selected job. Options include Printer Name, Layout (Orientation and Scale), Advanced (such as Monochrome On/Off) and Copies, where you set the number of copies to be printed. |
| You can set the Table display options option to View Selected Objects Only to display only those jobs you have selected by enabling the check boxes alongside those jobs. |
| You can search the list of Batch Print jobs for specific details such as file name, printer, paper, and so on. Click in the field alongside the icon, enter the text you want to search for, and press Enter. |
Batch Print Actions Menu
The Batch Print Actions drop-down menu provides additional batch Print options:
• The first four items are the same as those described in the first four rows of the Batch Print Icons Table, above.
• The
Remove Items
option removes checked items from the
Batch Print table.
• Add Print and Remove Print – By default, when launching Batch Print, all items in the Batch Print table are included in the job to be printed. You can select some items and choose Remove Print to indicate that these selected items must not be in the print job. These items appear unchecked in the Include column, described below. Add Print adds items to the Batch Print job; these items appear checked in the Include column.
• The Print Options selection is described in the next section.
The Print Options Window
Clicking the

icon displays the
Print Options window. The contents of the drop-down lists for the options in this window are defined in the
PrinterConfig.xml file for your site and/or specific configuration. See
Printer Configuration for complete printer configuration options and instructions about the
PrinterConfig.xml file.
• Printer – The Printer field shows the printer specified as the default printer in the PrinterConfig.xml file. The drop-down list can display other configured printers. The Comment:, Location:, and Paper Tray: settings are also controlled by thePrinterConfig.xml file. These fields are optional.
• Layout – The Layout field contains settings for Orientation: (such as Landscape or Portrait), and Scale: (such as Fit to Page, or printing at a percentage of the original image size (100%, 75%, and so on)).
• Copies – The number of copies to be printed of this job.
• Advanced – The Monochrome: setting default is Off (color printing enabled); setting this field to ON prints the job in black-and-white.
Batch Print Column Items
The following table describes the columns that appear in the Batch Print table once objects have been added to the table.
| The contents of the drop-down lists available in each table column are specific to your site. These values are determined by the PrinterConfig.xml file, discussed previously. If you do not see a particular value in a drop-down list, see your system administrator. |
Column Name | Description |
Name | Identifies the name of the object. |
File Name | Identifies the file name of the object. |
Representation | Identifies the representation type of the object. |
Thumbnail Navigation column | Contains the mini-thumbnail representation of the object. Hovering over the mini-thumbnail displays the mini information page, where you can view attribute information for the related object. | The mini-thumbnail and the mini information page always display the default representation of an object. |
|
Include | You can enable/disable the check boxes in this column to include or exclude the selected object(s) from the Batch Print session. |
Printer | This column contains a drop-down list of all available printers for each object in the table, and allows you to select different printers (or identify the same printer) for each job listed in the table. |
Paper | Defines the paper size(s) supported by the selected printer. |
Copies | Specifies the number of copies to be printed for each job in the table. |
Scale | This drop-down list offers optional scale values of image size to be printed. Options include Fit to Page, and/or printing the image at a percentage of the original image size, rendered in decimal format (such as 1.00 = 100% of original size, 0.75 = three-quarters original size, and so on). |
Orientation | Specifies the image orientation of each job – typically, Portrait or Landscape. |
Batch Print Column Options Menu
The Batch Print Column Options menu is accessible from the heading of each column. Hover over the column name and select the

icon to display the menu.
| If a column option appears grayed out, it is not applicable to that column’s contents. |
Option Name | Description |
Sort Ascending | Sort the contents of the column in ascending order (alphabetical A-Z, numerical 1–X). |
Sort Descending | Sort the contents of the column in descending order (alphabetical Z-A, numerical X–1). |
Lock | Lock the column so that its contents cannot be modified. |
Unlock | Removes the lock from a locked column. |
Columns | Mousing over this option displays a cascading menu, containing entries for all the columns in the Batch Print table. You can select which columns to display in the table by enabling/disabling the check boxes in this menu. (The menu default is all columns displayed.) When a column display is disabled, it is only “hidden”, and can be redisplayed by enabling the check box. |
Group By This Field | Display the contents of the table based on the contents of the current column. Selecting this option automatically enables the Show in Groups check box. |
Show in Groups | When selected, changes the column display to show the column entries by type. For example, in the Printer column, selecting Show in Groups displays the table entries first as all jobs to be sent to “Printer_01”, followed by all jobs to be sent to “Printer_02”, and so on. |
Monitoring the Batch Print Jobs
Once the
Batch Print table has been populated and configured to your liking, click
Submit to send the selected job(s) to the specified printer(s). The progress of your
Batch Print session can be observed in the
WVS Job Monitor, accessed from various locations in Windchill by clicking on the
WVS Job Monitor icon

. See
The WVS Job Monitor for a complete discussion about this feature.