Generating License File for ePLM License Transition
PTC has introduced new ePLM licenses to streamline the rollout of Windchill. Previously, Windchill functionality was delivered through enterprise license packages such as Base, Advanced, and Premium. As part of this transition, licensing is moving from enterprise-based packages to role-based license packages.
The section below describes how to generate the license file for your new ePLM package, configured for a new production licensing host. Each license feature is mapped to a license group, and an order may include one or more serviceable items. License files grant the right to use specific features, while users are assigned to predefined license groups based on the functionality they require. License profiles define the actions that you can perform, and the combined set of assigned profiles determines the complete capabilities available to each user.
License File Generation for Non-Production Host
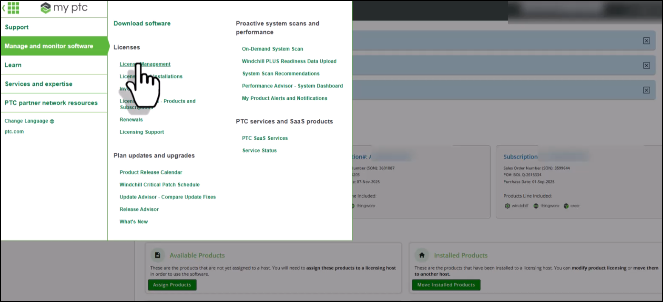
1. Navigate to > to create a new non-production licensing host. This allows you to configure licenses without taking from the quantity of your license count.
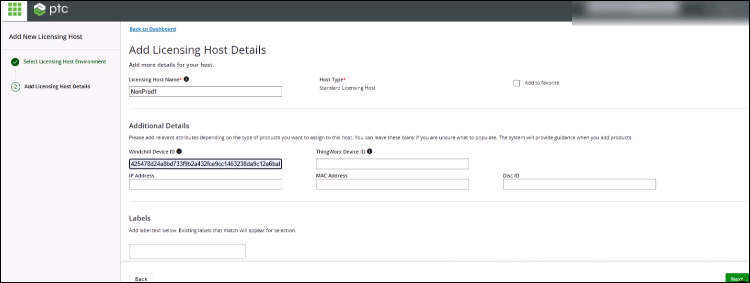
2. Provide Name and Device ID for the host.
3. Browse to Licensing Host. Find the newly created host using Add Filter.

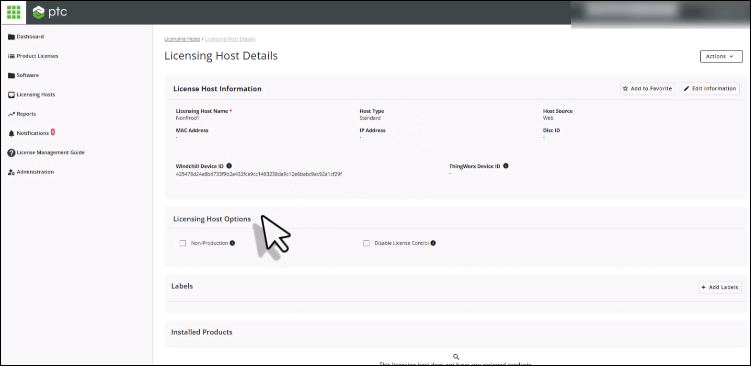
4. Click on the host name hyperlink. Update the Licensing Host Options by selecting Non-Production and Disable License Controls. You are required to acknowledge the information about disabling options.

5. Click Assign Product Packages on the Licensing Host Details page. You are ready to assign new ePLM license packaging to the host created.
6. On Select Products, filter the products using the Sales Order Number(SON) and the product family using Add Filter. SON is the order number of the new ePLM package and you have received in the shipping confirmation letter. This shows the selection of licenses that are associated with the SON that you provided and for the product family that you have selected.
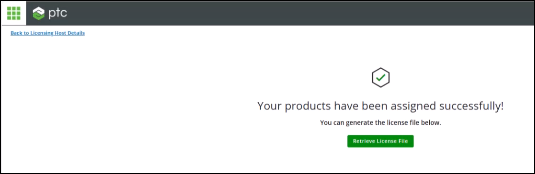
7. Select the quantity of the product that you are required to associate with the non-production host that you have created. With this, new ePLM licenses have been generated and configured to the host created.
8. Click Retrieve License File. License files are generated at the latest version. To Update the version to the version for which you need the license file, navigate to > > .
Generating License File For Transitional Use
To generate a separate license file for transitional use, navigate to the Licensing Host page of the License Management portal and select the host that contains the current PLM packaging configuration extended for a period of 60 days. Use the download option available for the selected host to obtain the license file. This downloaded file represents the most recent license file and includes your extended PLM package.
Creating Production Host for ePLM Package
You can choose to clone an existing non-production environment host to create a production environment for hosting the ePLM license package. Follow the steps outlined below to create the production environment setup and configure the required ePLM package.
1. Browse to Licensing Host. To find the non-production host created earlier, filter the list using Apply Filter.
2. Click on the host name hyperlink.
3. Click > . Provide New Licensing Host Name and Windchill Device ID for this host.
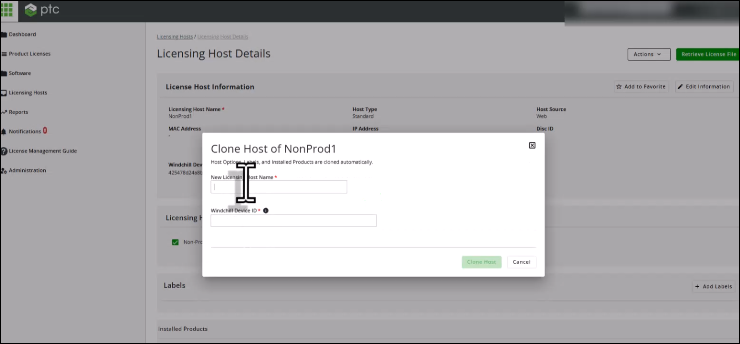
4. Click Clone Host.
5. Go to Licensing Host Options. De-select Non-Production and Disable License Controls. Now the licenses have been configured and license usage is enabled.
6. Verify that the products are configured to the correct host. Go to > > . Filter by your ePLM package SON.
7. Click Apply. To narrow down the search result, apply Product Family Filter.
8. Verify that the Status of the products that are configured to the production environment is Installed. Select any of the product that is listed, on the Product Details page, and check the Host Name. You must see the correct host names where these products are configured.
9. Go to Product Details page. Select any of the product that is listed and check the host name. You must see the correct host names where these products are configured.