Middleware Customization to Support Plant Specific Attributes
This example provides the steps for customizing the TIBCO project so that it can support plant specific attributes. In this example, it is assumed that Windchill ESI services are customized so that the ESI Response contains the PlantBuyerID element in the Part bucket. The TIBCO project changes are similar to those described in section 9.4. Only a few steps are different, but all the steps are mentioned in this section too.
The ESI Response would contain different part buckets for the same part as the value of PlantBuyerID would be different for different distribution targets.
Windchill ESI Services Process:
1. Create a copy the ESI response meta information file ($CODEBASE$/com/ptc/windchill/esi/ESIResponseMetaInfo.xml) in a directory that is accessible to the MethodServer.
|
|
Do not modify the response meta information file that was provided when you installed Windchill ESI, directly. The file may be replaced by future software releases. If you wish to modify the file, copy it to a new location and modify the copy instead.
|
2. Add an entry to the Map element for parts in the copy of the response meta information file created in step (1) as shown below. Make sure the entry is added to the element at the same location as it exists in the ESIResponse schema:
<esi:Map id="ESIPart">
…
<esi:attributeMapping sourceAttribute="PlantBuyerID" plantSpecificAttribute=”true”>PlantBuyerID</esi:attributeMapping>
…
</esi:Map>
…
<esi:attributeMapping sourceAttribute="PlantBuyerID" plantSpecificAttribute=”true”>PlantBuyerID</esi:attributeMapping>
…
</esi:Map>
3. Modify the id attribute of the modified Map element to a value that is not used by any other Map element in the system – for example, as in:
<esi:Map id="ESIPlantSpecificPart">
…
…
</esi:Map>
…
…
</esi:Map>
4. Modify the content of the mapRef element of the corresponding MapInformation element in the file as shown below:
<esi:MapInformation id="ESIPartInfo">
…
<esi:keyAttribute>PlantBuyerID</esi:keyAttribute>
<esi:mapRef>ESIPlantSpecificPart</esi:mapRef>
</esi:MapInformation>
…
<esi:keyAttribute>PlantBuyerID</esi:keyAttribute>
<esi:mapRef>ESIPlantSpecificPart</esi:mapRef>
</esi:MapInformation>
5. Save the file with the above changes. Using the Edit Distribution Target UI for the distribution targets to publish the data to, edit the attribute ESI Response Meta Information File Path to point to the modified version of the response meta information file.
6. Set the Windchill ESI preference Publish Plant Specific Attributes to Yes.
7. Using the View Administrator UI, create views in Windchill PDMLink that represent the plants in SAP to publish plant specific attributes to. For example, if the distribution targets that are associated to the part being published have their Plant attribute set to 1100 and 1200, create views with names 1100 and 1200 as children of the Manufacturing view.
8. Using the Type and Attribute Management UI, add a global attribute called PlantBuyerID to the View Specific Data object.
9. Bring up the Manufacturing Product Structure Explorer for the part being published and select the > tab. Using the Add New View Data option, add a new View Specific Data entry, selecting 1100 for View and ID1 for PlantBuyerID from the Add New View Data dialogue. Add a second View Specific Data entry, selecting 1200 and ID2 for the View and PlantBuyerID attributes respectively.
|
|
An underlying assumption here is that the Windchill MPMLink preference Soft Types for Automatic ERP Material Creation was set to include “wt.part.WTPart” as one of the tokens in its value, when the part being published was created in Windchill. Without this setting, the Add New View Data option will not be available for selection from the View Specific Data tab.
|
EAI Software Components Process:
1. Modify the ESIResponse schema.
Location:
> > > > .
a. Create element for PlantBuyerID of type String.
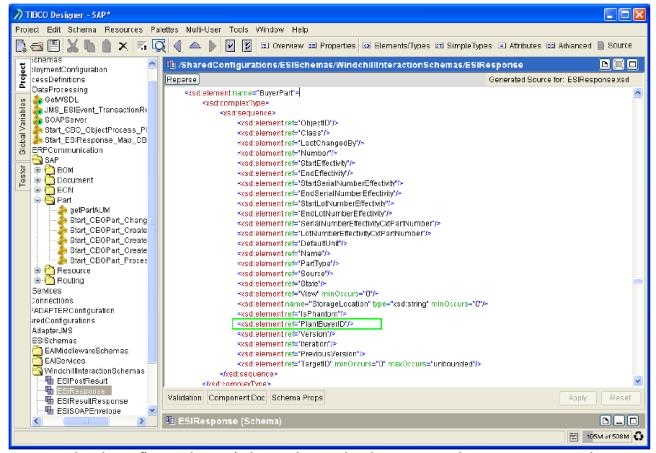
Make changes in part element as shown below
In the above figure, “PlantBuyerID” has been added as reference.
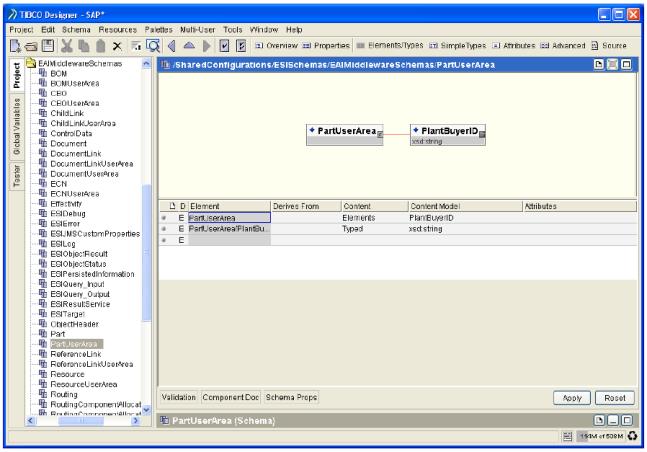
2. Modify the CBO Schema.
B) Changes in PartUserArea
Location: > > > > .
Rename UserAreaFields to PlantBuyerID
3. Mapping from Collection to CBO:
Location:
Process: > > .
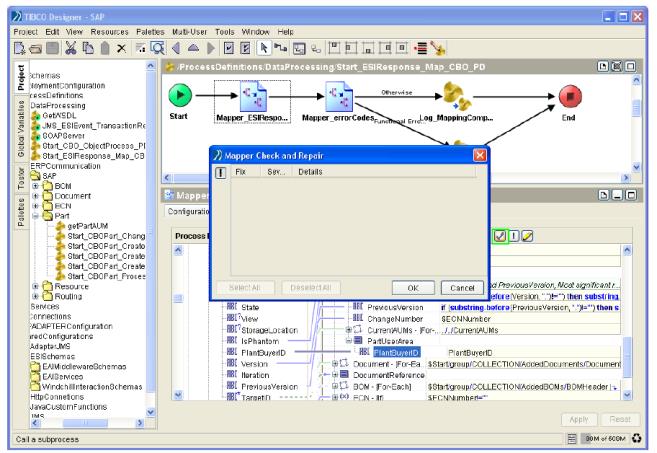
Activity: Mapper_ESIResponse_CBO_Headers
a. Change the mapping to map PlantBuyerID.
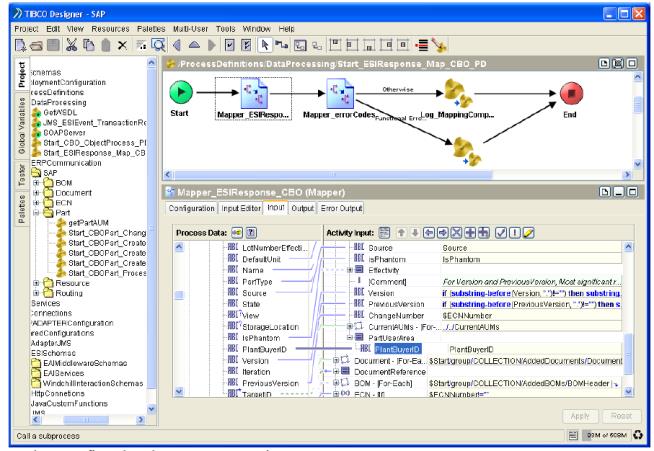
b. Confirm that there are no mapping errors.
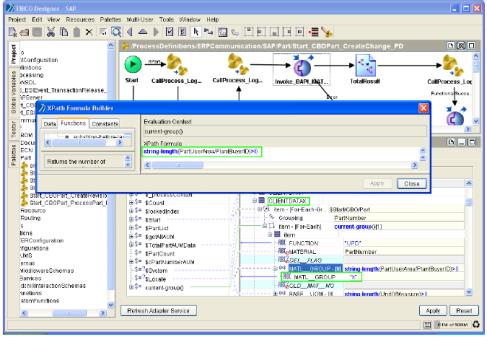
4. Mapping to ERP call.
Location:
Process: > > > > .
Activity: Invoke_BAPI_MATERIAL_SAVEREPLICA Changes in ClientData
Changes in ClientData
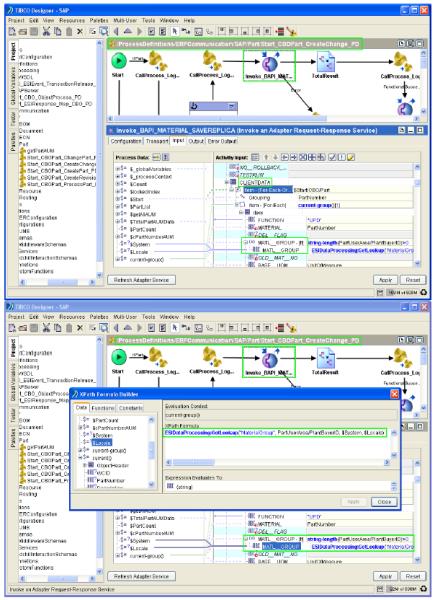
Changes in ClientDataX
Changes in PlantData
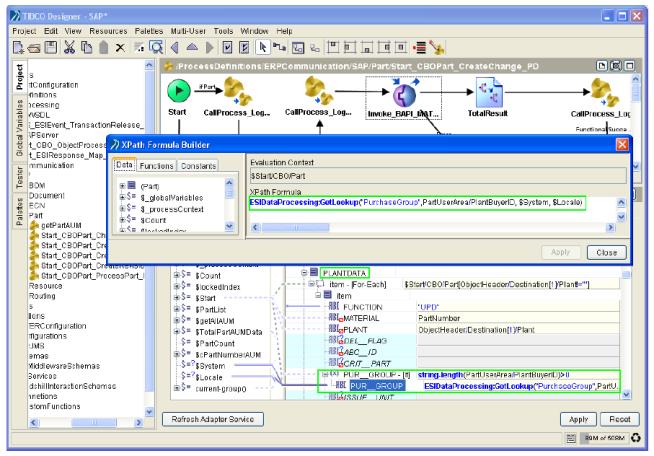
Changes in PlantDataX

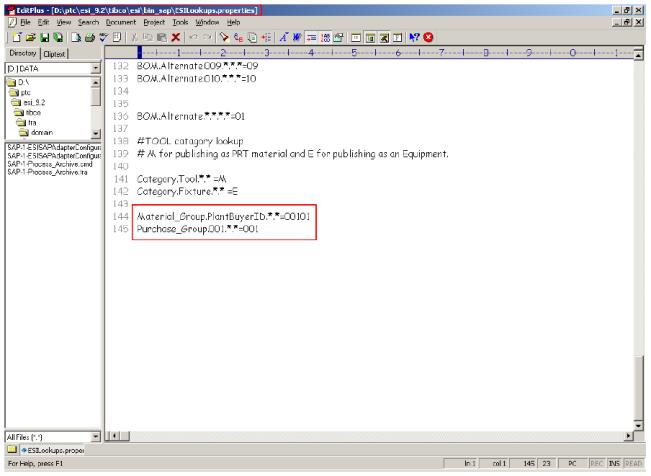
5. Add to the ESILookup.properties. Add the lookup information to the ESILookup.properties file according its data structure.
How to run this example:
1. Verify that the properties files in the ESILookup.properties have the appropriate modifications.
2. Verify that the appropriate distribution targets have been loaded into Windchill.
3. Verify that there is at least one Lifecycle that has a Released state.
4. Verify that all components (Windchill, TIBCO, SAP) are up and running.
5. Verify that the Windchill MPMLink preference Soft Types for Automatic ERP Material Creation is set to include “wt.part.WTPart” as one of the tokens in its value.
6. Verify that the Windchill ESI preference Publish Plant Specific Attributes has a value Yes.
7. Create a new part, associate distribution targets to it as needed, add the required View Specific Data entries from the MPSE for the part and release it to SAP using the sample Windchill ESI workflow by setting the lifecycle state of the part to Released.
8. Once the process is complete, log into SAP and verify the data was created correctly in the relevant plants.