Middleware customization to support multiple type/soft type extensions
This example provides the steps for customizing the TIBCO project so that it can support publishing customized parts. In this example, it is assumed that Windchill ESI services are customized so that the ESI Response contains a BuyerPart element besides a Part element (BuyerPart being an extension of WTPart).
Windchill ESI Services Process:
1. Create a copy the ESI response meta information file ($CODEBASE$/com/ptc/windchill/esi/ESIResponseMetaInfo.xml) in a directory that is accessible to the MethodServer.
|
|
Do not modify the response meta information file that was provided when you installed Windchill ESI, directly. The file may be replaced by future software releases. If you wish to modify the file, copy it to a new location and modify the copy instead.
|
2. Add a new Map element to the file as shown below. This is same as the existing Map element for parts, except that an entry for PlantBuyerID has been added and the id attribute has been modified. The differences (between the newly added and the existing Map element for parts) are shown in bold below:
<esi:Map id="ESIBuyerPart">
<esi:attributeMapping sourceAttribute="obid">ObjectID</esi:attributeMapping>
…
…
<esi:attributeMapping sourceAttribute="storageLocation" plantSpecificAttribute="true">StorageLocation</esi:attributeMapping>
<esi:attributeMapping sourceAttribute="phantom">IsPhantom</esi:attributeMapping>
<esi:attributeMapping sourceAttribute="PlantBuyerID">PlantBuyerID</esi:attributeMapping>
<esi:attributeMapping sourceAttribute="versionInfo.identifier.versionId">Version</esi:attributeMapping>
<esi:attributeMapping sourceAttribute="iterationInfo.identifier.iterationId">Iteration</esi:attributeMapping>
<esi:attributeMapping sourceAttribute="PreviousVersion">PreviousVersion</esi:attributeMapping>
</esi:Map>
|
|
Ensure that the attributeMappingentries in the newly added Map element occur in the same order as they do in the ESIResponse schema.
|
3. Add a new MapInformation element to the file as shown below:
<esi:MapInformation id="ESIBuyerPartInfo">
<esi:typedef>wt.part.WTPart|BuyerPart</esi:typedef>
<esi:elementMetaName>BuyerPart</esi:elementMetaName>
<esi:keyAttribute>Number</esi:keyAttribute>
<esi:keyAttribute>Version</esi:keyAttribute>
<esi:keyAttribute>PreviousVersion</esi:keyAttribute>
<esi:keyAttribute>View</esi:keyAttribute>
<esi:keyAttribute>StorageLocation</esi:keyAttribute>
<esi:mapRef>ESIBuyerPart</esi:mapRef>
</esi:MapInformation>
4. Modify the GroupInformation elements for Parts as shown below:
<esi:GroupInformation>
<esi:logicalName>AddedParts</esi:logicalName>
<esi:physicalName>AddedParts</esi:physicalName>
<esi:releaseClass>com.ptc.windchill.esi.Part</esi:releaseClass>
<esi:releaseActivityNeeded>true</esi:releaseActivityNeeded>
<esi:mapInformationRef>ESIPartInfo</esi:mapInformationRef>
<esi:mapInformationRef>ESIBuyerPartInfo</esi:mapInformationRef>
</esi:GroupInformation>
The above change is needed in the GroupInformation elements for changed and unchanged parts as well.
5. Save the file with the above changes. Using the Edit Distribution Target UI for the distribution targets to publish data to, set the attribute ESI Response Meta Information File Path to point to the modified version of the meta information file.
|
|
An underlying assumption here is that a soft extension of WTPart having the internal name BuyerPart, and having the attribute PlantBuyerID is already created using the Type and Attribute Management option of Windchill PDMLink.
|
EAI Software Components Process:
1. Modify the ESIResponse schema.
Location: > > > > .
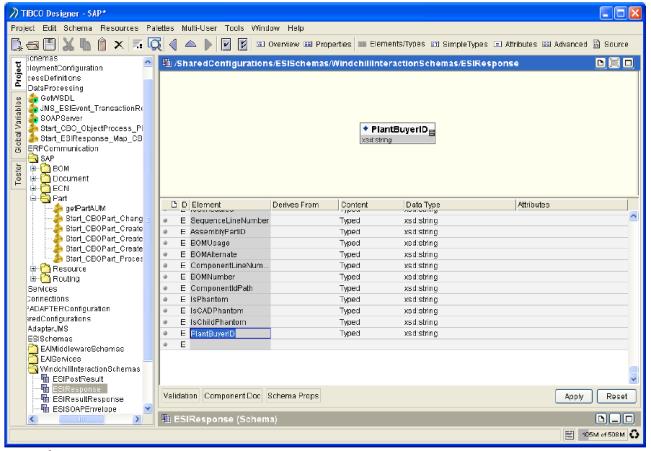
a. Create element for PlantBuyerID of type String.
b. Create BuyerPart.
BuyerPart is very similar to Part element so you can copy the Part element schema and then make changes as below:
In ESIResponse Schema , click on source button and schema source editor will be opened. Search the source for Part element as shown below:
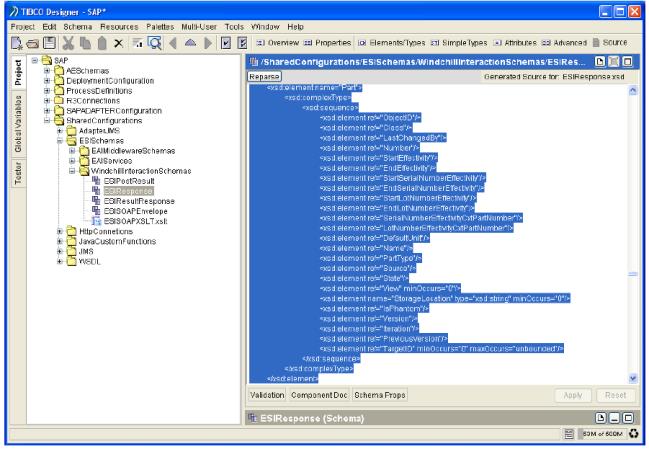
Copy the above Part Element and paste it immediately after Part element. Then make changes as below:

In the above figure, the copied Part element has been renamed as “BuyerPart” and “PlantBuyerID” has been added as reference.
c. Adding BuyerPart as reference for Added, Changed and Unchanged Part.
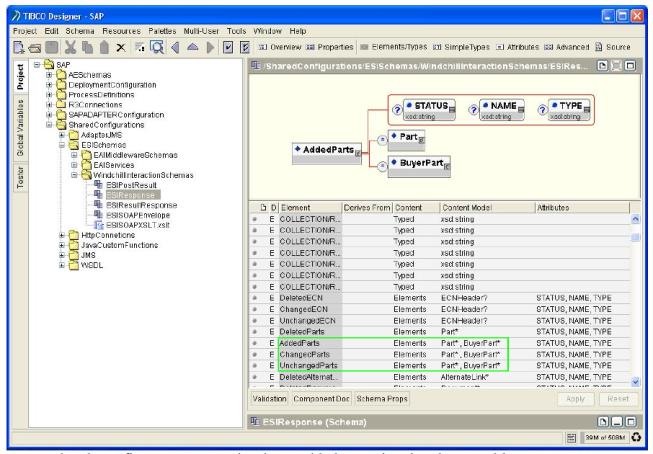
In the above figure BuyerPart has been added as optional and repeatable to AddedPart, ChangedPart, UnchangedPart elements.
2. Modify the CBO Schema.
A) Changes in PartUserArea
Location: > > > >
Rename UserAreaFields to PlantBuyerID

3. Mapping from Collection to CBO:
Location:
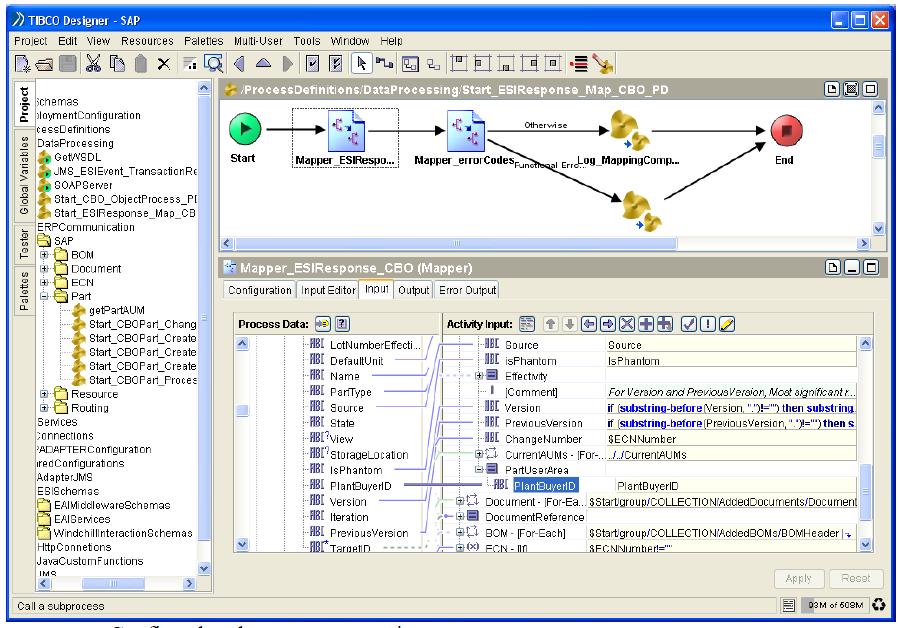
Process: > > Activity: Mapper_ESIResponse_CBO_Headers
a. Go to the input mapping and duplicate the mapping for Part as shown below:
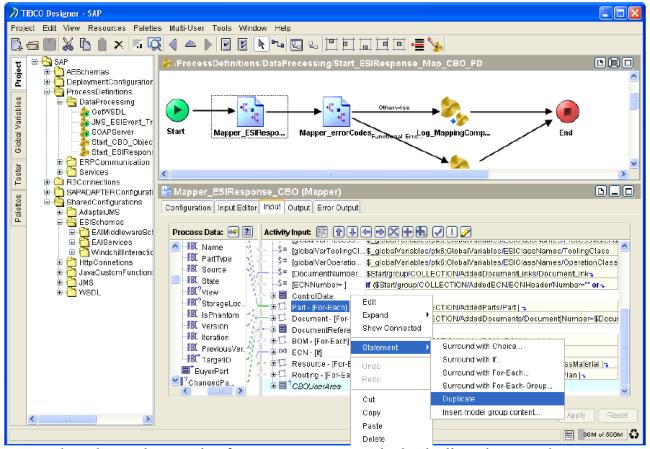
b. Change the mapping from Part to BuyerPart in the duplicated Part as shown below.
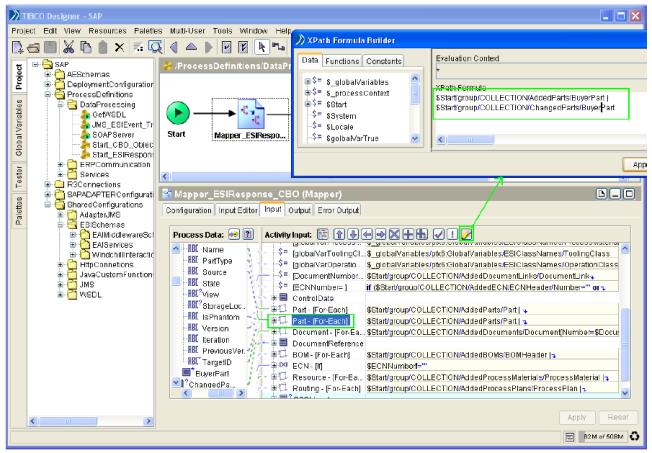
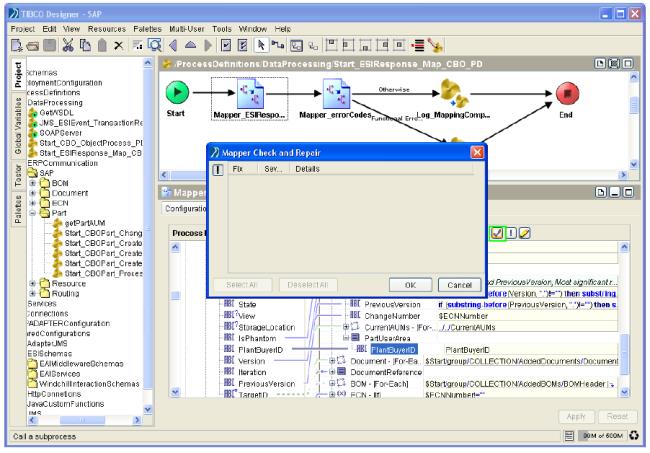
c. Confirm that there are no mapping errors.
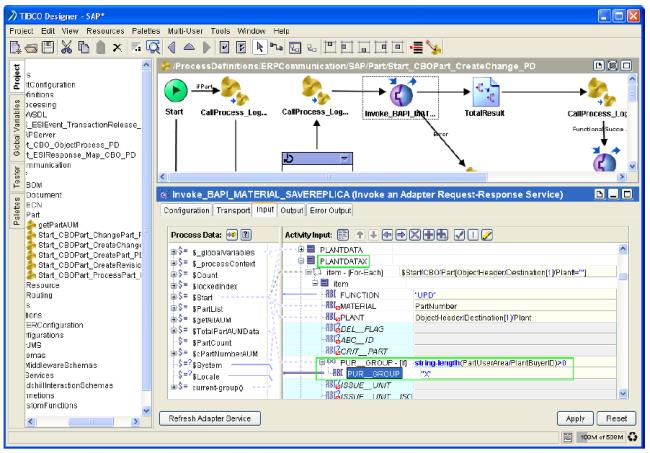
4. Mapping to ERP call.
Location:
Process: > > > >
Activity: Invoke_BAPI_MATERIAL_SAVEREPLICA Changes in ClientData
Changes in ClientData
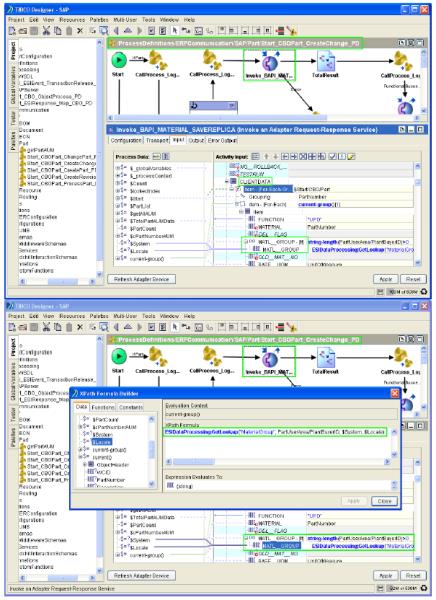
Changes in ClientDataX
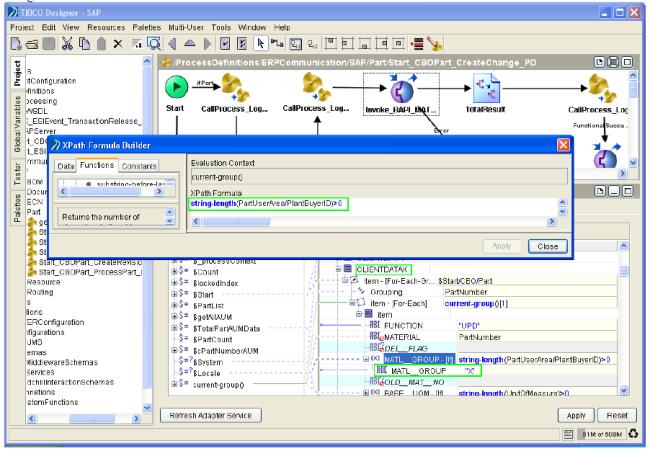
Changes in PlantData
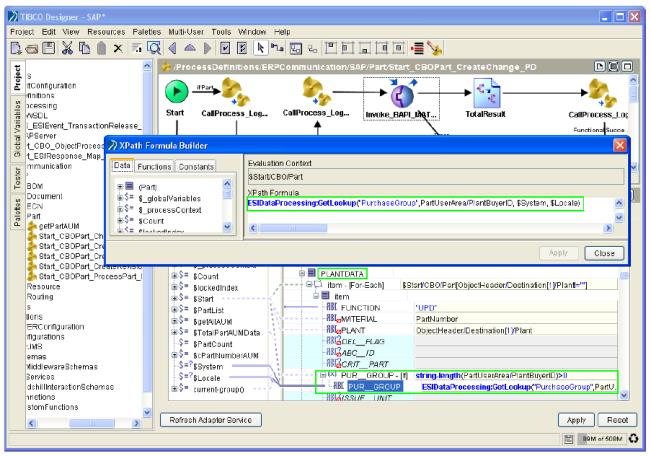
Changes in PlantDataX
5. Add to the ESILookup.properties. Add the lookup information to the ESILookup.properties file.
MaterialGroup.001.*.*=00101
PurchaseGroup.001.*.*=001
How to run this example:
1. Verify that the properties files in the ESILookup.properties have the appropriate modifications.
2. Verify that the appropriate distribution targets have been loaded into Windchill.
3. Verify that there is at least one Lifecycle that has a Released state.
4. Verify that all components (Windchill, TIBCO, SAP) are up and running.
5. Create a new part of type BuyerPart, associate distribution targets to it as needed, set its PlantBuyerID attribute and release it to SAP using the sample Windchill ESI workflow by setting the lifecycle state of the part to Released.
6. Once the process is complete, log into SAP and verify the data was created correctly.