Publish Costing Information from Windchill to SAP
In this example, WTPart is extended by adding new attributes. Parts are then created using the new WTPart and published to SAP. In SAP two additional views are created, Costing 1 and Costing 2.
The images and steps described in this procedure are for informational purposes only and may not match the images and steps available to you in your system. For more information refer to the online help.
|
|
The Windchill ESI Services and Middleware processes would be the same, if a soft sub-type of WTPart were created in Windchill instead of adding soft attributes directly to WTPart. For more information about soft attributes and soft types, refer to the Windchill PDMLink Customizer's Guide.
|
Windchill Process:
A. Create Attributes
1. In the Attribute Definition Manager window, create a new Organizer by clicking the Create Organizer button  and call it CustomizationOrganizer
and call it CustomizationOrganizer
2. Highlight the CustomizationOrganizer and click the Create Attribute button to create the attributes to create the attributes
button to create the attributes to create the attributes3. Enter one of the following values in the Create Attribute screen and click OK. Repeat 2 and 3 for the three attributes
a. StandardPrice (String)
b. PriceUnit (String)
c. PlantStatus (String)

B. Modify the WTPart type
1. In the Type Manager window, highlight the wtpart type
2. Click the Update button 
3. Add the attributes created in step 3 to the wtpart type
a. Click the Update button
b. Go to the Template tab
c. Select Root and click the Add Attribute button
d. Select PlantStatus and click Select

e. Re-select Root and click on the Add Attribute button
f. Select Price Unit and click Select
g. Repeat step e and f and select the StandardPrice attribute
h. Repeat step e and select the PlantStatus attribute and click on the Show Constraint button
i. Click Add
j. Select the Discrete Set Constraint

k. Enter the following value in the Data field: |ProcurementWarehouse|TaskListBOM|Purchasing|Costing|PilotPhase|
l. Enter default values seen in the figure below

m. Click OK
Windchill ESI services Process:
1. Create a copy the ESI response meta information file ($CODEBASE$/com/ptc/windchill/esi/ESIResponseMetaInfo.xml) in a directory that is accessible to the MethodServer.
Do not modify the response meta information file that was provided when you installed Windchill ESI, directly. The file may be replaced by future software releases. If you wish to modify the file, copy it to a new location and modify the copy instead. |
2. Verify the names of the attributes.
3. Add entries to the Map element for parts in the copy of the response meta information file created in step (1), as shown below. Make sure the entries are added to the element in the same order (and at the same location) as they exist in the ESIResponse schema:
<esi:Map id="ESIPart">
…
<esi:attributeMapping sourceAttribute="StandardPrice">StandardPrice</esi:attributeMapping>
<esi:attributeMapping sourceAttribute="PriceUnit">PriceUnit</esi:attributeMapping>
<esi:attributeMapping sourceAttribute="PlantStatus">PlantStatus</esi:attributeMapping>
…
</esi:Map>
…
<esi:attributeMapping sourceAttribute="StandardPrice">StandardPrice</esi:attributeMapping>
<esi:attributeMapping sourceAttribute="PriceUnit">PriceUnit</esi:attributeMapping>
<esi:attributeMapping sourceAttribute="PlantStatus">PlantStatus</esi:attributeMapping>
…
</esi:Map>
4. Modify the id attribute of the modified Map element to a value that is not used by any other Map element in the system – for example, as in:
<esi:Map id="ESINewPart">
…
…
</esi:Map>
…
…
</esi:Map>
5. Modify the content of the mapRef element of the corresponding MapInformation element in the file as shown below:
<esi:MapInformation id="ESIPartInfo">
…
<esi:mapRef>ESINewPart</esi:mapRef>
</esi:MapInformation>
…
<esi:mapRef>ESINewPart</esi:mapRef>
</esi:MapInformation>
6. Save the file with the above changes. Using the Edit Distribution Target UI for the distribution target(s) to publish the data to, edit the attribute ESI Response Meta Information File Path to point to the modified version of the response meta information file.
EAI Software Components Process:
1. Modify the ESIResponse schema.
Location:
> > > > .
a. Create element for StandardPrice and PriceUnit of type String.

b. Make changes in part element as shown below and click Apply.

2. Modify the CBO Schema.
Location: > > > >
Edit the source to set UserArea fields to Costing and change it to a complex element as follows

3. Mapping from Collection to CBO.
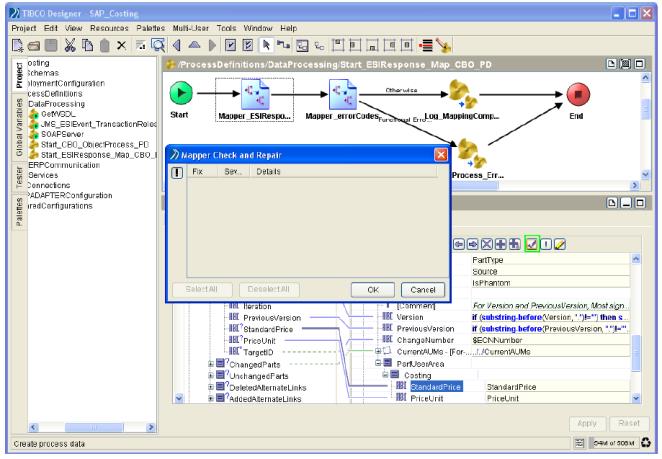
Location: Process: > > Activity: Mapper_ESIResponse_CBO_Headers
a. Change the mapping to map newly created costing elements.

b. Confirm that there are no mapping errors.
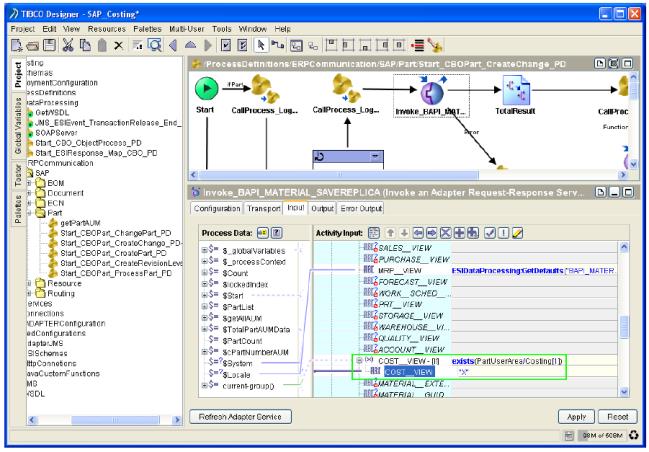
4. Mapping to ERP call.
Location:
Process: > > > >
Activity: Invoke_BAPI_MATERIAL_SAVEREPLICA
Changes in HeadData
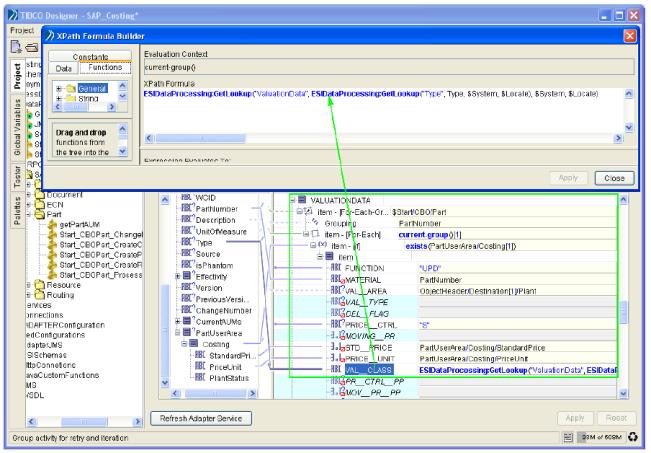
Changes in VALUATIONDATA
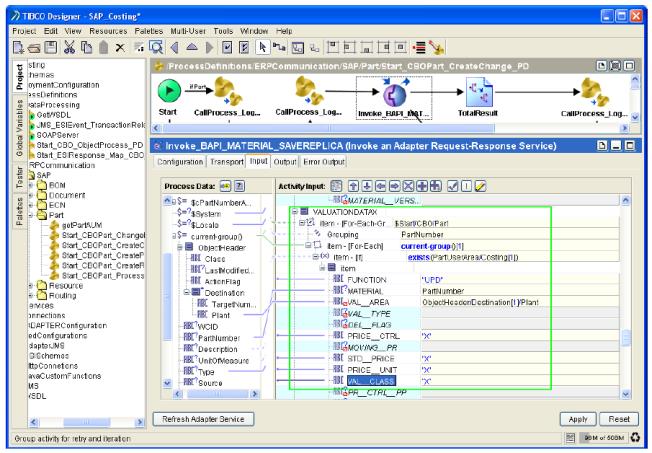
Changes in VALUATIONDATAX
5. Add to the ESILookups.properties files. Add the looked-up information to ESILookup.properties file.
ValuationData.ROH.*.*=3000
ValuationData.HALB.*.*=7900
ValuationData.HALB.*.*=7900
How to run this example:
1. Verify that the properties files in the ESIDirectory have the appropriate modifications.
2. Verify that the appropriate distribution targets have been loaded into Windchill.
3. Verify that there is at least one Lifecycle that has Released state.
4. Verify that all components (Windchill, TIBCO, SAP) are up and running.
5. Create a new part.
6. Enter the required attributes, and the three attributes for this scenario (StandardPrice, PriceUnit and PlantStatus).
7. Add the desired Distribution Targets.
8. Release the part.
9. At this point, response generation should be kicked off, and the process should be started.
Once the process is complete, log into SAP and verify the data was created correctly and the Costing Views are populated.