WRS OAuth Authorization
Prerequisites
This topic assumes familiarity with the OAuth 2.0 protocol and Single Sign-On (SSO) concepts.
In OAuth 2.0, there are several grant types. The Authorization Code grant type is generally used for interactive use cases requiring a user interaction during the authentication.
This topic describes the manual steps for authorizing access to resources and authenticating resource owners using the OAuth Authorization Code grant type. Typically, when implementing an OAuth-enabled client, third-party libraries are used to streamline the acquisition, use, and secure management of the access and refresh tokens. Implementers are encouraged to evaluate a library appropriate for their use case and programming language. For more information on OAuth libraries of various languages, refer to Code: OAuth Libraries.
For more information about OAuth and grant types, refer to the following documentation:
For more information Single Sign-On (SSO) and OAuth configuration with PTC Products, refer to PTC Identity and Access Management Help Center.
All subsections of this document assume that both the Central Authorization Server (CAS), Windchill, and the client application have been configured for OAuth. Windchill must be configured as a Resource Server using OAuth. The OAuth Client must be registered as a Service Provider.
For more information, refer to the following documentation:
• PingFed as CAS: See the Configuring the Central Auth Server – PingFederate topic in PTC Identity and Access Management Help Center.
• SSO and OAuth delegated Authorization in Windchill, see Single Sign-on Authentication in Windchill Help Center.
Before You Begin
Before you begin, make sure to have the following information:
• Your client OAuth callback URL
• Your client ID as defined in the CAS
• Your client secret as defined in the CAS
• CAS Auth URL
• CAS Token URL
Authorization
The first step of OAuth 2 is to get the authorization from the user. For browser-based or mobile apps, this is usually accomplished by displaying an interface provided by the service to the user.
It could take the form of a “Log In” link sending the user to the CAS server for an authorization. The URL of that link should resemble the following:
GET <URL_CAS_SERVER_AUTH>?response_type=code&state=<CLIENT_STATE>&client_id=<CLIENT_ID>&scope=<SCOPE>&redirect_uri=<REDIRECT_URI>
where:
• URL_CAS_SERVER_AUTH—The URL to the auth endpoint of your CAS server. This differs from vendor to vendor. For PingFederate, it looks like:
https://mypingfed.mycompany.com:9090/as/authorization.oauth2
• response_type—Must be "code", indicating that your server expects to receive an authorization code.
• CLIENT_ID—The client ID you generated in your CAS for this web application. See the Creating OAuth Client Connections for Windchill topic of PTC Identity and Access Management Help Center.
• REDIRECT_URI—The URI to return the user to after the authorization is complete. Typically, this is the URI of your web application where the user clicked the "login" button. If using Postman, then it is:
https://app.getpostman.com/oauth2/callback
• SCOPE—Must be WINDCHILL_READ when accessing Windchill or WRS
• CLIENT_STATE—A random string generated by your application, which you will verify later.
In this example, the client application is Postman, and the URL called is:
https://<host>:<port>/as/authorization.oauth2?response_type=code&state=my-client-state&client_id=wnc-rp-client&scope=WINDCHILL_READ&redirect_uri=https://app.getpostman.com/oauth2/callback
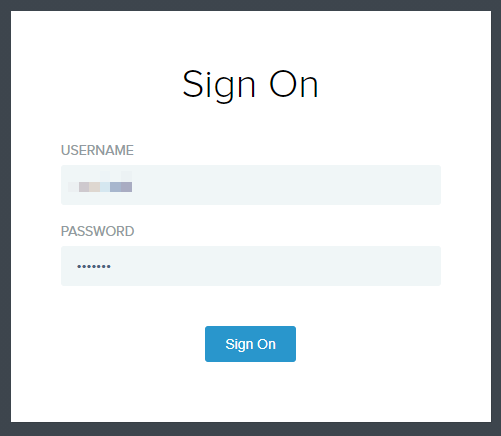
The user sees the authorization prompt as shown below:

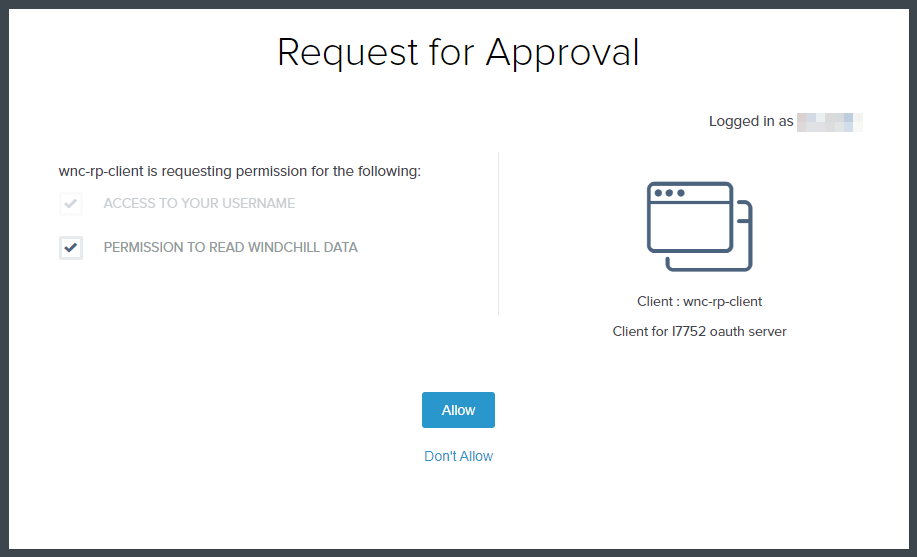
When the user clicks Sign On, the service redirects the user to an approval page as shown below:

When the user clicks Allow, the URL specified in redirect_uri above is called by the CAS, with an authorization code and the application state:
<REDIRECT_URI>?code=<AUTH_CODE>&state=<CLIENT_STATE>
where:
• REDIRECT_URI is the URI specified in the previous step. Typically, it is the URI of your web application in charge of handling OAuth.
• AUTH_CODE is the authorization code you'll use later to obtain the access token.
• CLIENT_STATE is the client state you used in the previous step. You need to validate it and make sure they match.
In this example:
https://app.getpostman.com/oauth2/callback?code=EXTtWU5ydKI1j1m4kLwdh_aGDjx-3DVmr444eu_k&state=my-client-state
You should first compare this state value to ensure it matches the one you started with. You can typically store the state value in a cookie or session, and compare it when the user comes back. This helps ensure your redirection endpoint isn't able to be tricked into attempting to exchange arbitrary authorization codes.
Examples of a redirect_uri might be a redirect back into a web application that requested the sign-on in the first place, or a redirect into a native application on the client OS using URI schemes.
Getting an Access Token
Your web app server exchanges the authorization code for an access token by making a POST request to the authorization server's token endpoint, with the request body containing the previously obtained authorization code. Note that according to RFC 6749, the request body must have the application/x-www-form-urlencoded content type.
URI
POST <URL_CAS_SERVER_TOKEN>
Request Headers
Content-Type: application/x-www-form-urlencoded
Request Body
grant_type=authorization_code&code=<AUTH_CODE>&redirect_uri=<REDIRECT_URI>&client_id=<CLIENT_ID>&client_secret=<CLIENT_SECRET>
where:
• grant_type—The grant type for this flow is authorization_code.
• AUTH_CODE—The authorization code you obtained in the previous step.
• REDIRECT_URI—Must be identical to the redirect URI provided in the original link.
• CLIENT_ID—The client ID your generated in your CAS for this web application. See the Creating OAuth Client Connections for Windchill topic of PTC Identity and Access Management Help Center.
• CLIENT_SECRET—The client secret you entered in the CAS when configuring this web application. See the Creating OAuth Client Connections for Windchill topic of PTC Identity and Access Management Help Center.
The server returns an access token and a refresh token.
The response contains the access token (access_token) you will use to call WRS endpoints. Note that the response also includes the token lifetime in seconds (expires_in) and the refresh token (refresh_token). The refresh token will be used later.
The response body is in JSON format described in The OAuth 2.0 Authorization Framework: Successful Response. In example, the POST request looks like this:
URI
POST https://<host>:<port>/as/token.oauth2
Request Headers
Content-Type: application/x-www-form-urlencoded
Request Body
grant_type=authorization_code&code=jX7WwngoKBnqdpGNFsSRfz5wT7083ToiCyLqE17G&redirect_uri=https%3A%2F%2Fapp.getpostman.com%2Foauth2%2Fcallback&client_id=sp1-oauth2-client&client_secret=sp1-oauth2-client_1234
Response
{
"access_token": "0001XJx87GKUKnyNiGwwHnJseWpY",
"refresh_token": "dvufSzgyGvKOh32G8c0bv7zpK4vOu5PJzeguWS751v",
"scope": "WINDCHILL_READ",
"token_type": "Bearer",
"expires_in": 3600
}
"access_token": "0001XJx87GKUKnyNiGwwHnJseWpY",
"refresh_token": "dvufSzgyGvKOh32G8c0bv7zpK4vOu5PJzeguWS751v",
"scope": "WINDCHILL_READ",
"token_type": "Bearer",
"expires_in": 3600
}
Using the Access Token
Now that you have the access token, you can perform the WRS call specifying the access token as the Bearer Token in the Authorization header:
URI
GET https://<host>:<port>/Windchill/oauth/servlet/odata/ProdMgmt/Parts
Request Headers
Authorization: Bearer gaqeWSCbP9NcbP1a7hwlkVvjziDW
Note that to authenticate against WRS endpoints with an OAuth Bearer token, the client must call URLs containing the “oauth” prefix. Windchill must be configured to support OAuth. For more information, see Configure OAuth Delegated Authorization in Windchill Help Center.
For example:
• OAuth Disabled:
GET https://<HOSTNAME>/Windchill/servlet/odata/ProdMgmt/Parts
• OAuth Enabled:
GET https://<HOSTNAME>/Windchill/oauth/servlet/odata/ProdMgmt/Parts
Refreshing the Access Token
Access tokens have a limited lifespan (in the example above, 3600 seconds or 1 hour). The access token lifetime is configured in your CAS. It should typically be short-lived (a few minutes maximum).
When the token expires, the user must login and grant authorization again. To avoid that, the client can request a new access token from the CAS using the refresh token. This is done by making a POST request to the CAS:
URI
POST <URL_CAS_SERVER_TOKEN>
Request Headers
Content-Type: application/x-www-form-urlencoded
Request Body
refresh_token=<REFRESH_TOKEN>&grant_type=refresh_token
Where:
• REFRESH_TOKEN is the refresh token received when obtaining the initial access token (see refresh_token in the access token response), along with the original access token.
• grant_type must be refresh_token
For example:
POST https://<host>:<port>/as/token.oauth2
Content-Type: application/x-www-form-urlencoded
refresh_token=dvufSzgyGvKOh32G8c0bv7zpK4vOu5PJzeguWS751v&grant_type=refresh_token
Content-Type: application/x-www-form-urlencoded
refresh_token=dvufSzgyGvKOh32G8c0bv7zpK4vOu5PJzeguWS751v&grant_type=refresh_token
The server replies with a new access token, similar to the previous step. For example:
Response
{
"access_token": "00012HruUI95RRbWDsrB8Hu63rOP",
"refresh_token": "Ux19slOZN2xxfaKx18f2jmbZUCP6cLEvXltYRE2JkC",
"token_type": "Bearer",
"expires_in": 72000
}
"access_token": "00012HruUI95RRbWDsrB8Hu63rOP",
"refresh_token": "Ux19slOZN2xxfaKx18f2jmbZUCP6cLEvXltYRE2JkC",
"token_type": "Bearer",
"expires_in": 72000
}
You can then use the new access token for subsequent WRS calls.
If the response also contains a new refresh token, then it means the original refresh token has also expired. The client should then securely store both the new access token and the new refresh token for subsequent uses.
The lifetime of the tokens is configurable in the CAS.
For instance, in Ping Federate it is possible to configure tokens roll refresh, so that the refresh token is single-use. Each time a new access token is requested using the refresh token, a new refresh token is issued.
Resources
OAuth 2 is a standard documented at: OAuth 2.0.
Most of the information in this document can be found here.
This document presents the detailed calls required to use OAuth 2. You may be able to simplify it using a code library tailored to your particular use case. The OAuth website has a list of these libraries: Code: OAuth Libraries.
For information on setting up PingFederate and OAuth, refer to: PTC Identity and Access Management Help Center.