Configuring SAP S/4 HANA for Windchill ESI
Following are the configuration settings for SAP S/4 HANA ERP system.
Configuration Settings to Activate Function Modules from the Deny List
To support this integration, you need to enable the following three functional modules from the deny list in SAP S/4 HANA ERP setup:
• CSAP_MAT_BOM_MAINTAIN
• CSAP_MAT_BOM_READ
• BAPI_MATERIAL_SAVEREPLICA
|
|
• In S/4 HANA 2020, the functional modules CSAP_MAT_BOM_MAINTAIN, CSAP_MAT_BOM_READ, and CP_BD_DIRECT_INPUT_PLAN are blocked.
• In S/4 HANA 2021, the functional modules CSAP_MAT_BOM_MAINTAIN, CSAP_MAT_BOM_READ, and CP_BD_DIRECT_INPUT_PLAN are blocked.
• In S/4 HANA 2022, the functional modules CSAP_MAT_BOM_MAINTAIN, CSAP_MAT_BOM_READ, and CP_BD_DIRECT_INPUT_PLAN are blocked.
|
SAP recommends that you consult its development support before enabling a functional module from the deny list. You can approach SAP Support in the following way:
1. Raise a ticket on the component of the blacklisted object from a deny list and confirm with SAP development support whether the particular object is from the deny list and how customer may use it according to the SAP allowlist or dedicated note.
2. Based on the approval of development support through the ticket, you get a clearance to proceed with enabling the functional modules from the deny list.
For more information on why a functional module is included in the deny list, see article 2295840 in the SAP Knowledge Base. Also see article 109533 in the SAP Knowledge Base for information on SAP policy on supporting functional modules from the deny list.
To reactivate the above function modules from the deny list, perform the following procedures:
1. Run the program RS_RFC_BLACKLIST_CUSTOM using T-Code SE38.

2. Enter the name of the blocked function module on the selection screen, for example — BAPI_MATERIAL_SAVERECPLICA. Press Enter twice to update the original settings on the screen.
3. The original deny list settings for this function module on this system are shown in the below image. A check mark appears on Blocked on Server under > if the RFC functional module is blocked by any object from the deny list.

4. To override the RFC functional module from the deny list, clear the Blocked on Server option.
5. Click Save to save the customizing entry.
6. Select a Customizing Transport Request to save the change in the deny list settings:
◦ Provide a customizing transport request, if your system is configured to request for one.
◦ The blacklist override settings will reach the SAP systems when you release the customizing transport request.
7. Repeat the steps 1 through 6 for the other blacklisted function modules, CSAP_MAT_BOM_MAINTAIN and CSAP_MAT_BOM_READ.
Publishing Objects From Windchill to S/4 HANA
To publish Windchill object to S/4 HANA, set SendToSAPHanaERP to true as shown below:
1. Open > > on the TIBCO Administrator screen and click the application name.
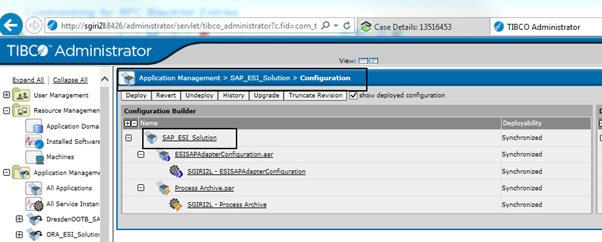
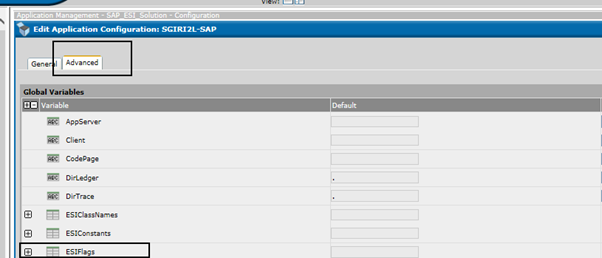
2. Select > and set SendToSAPHanaERP to True. It is set to False by default.
Configuration Settings for Document
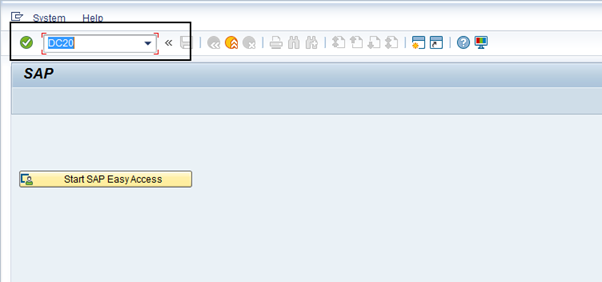
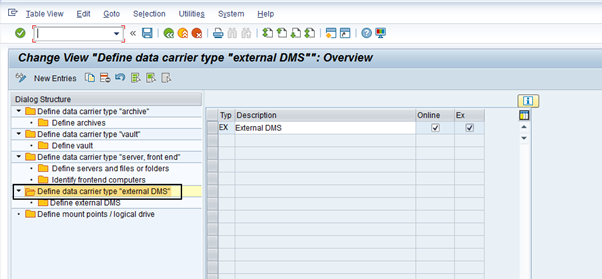
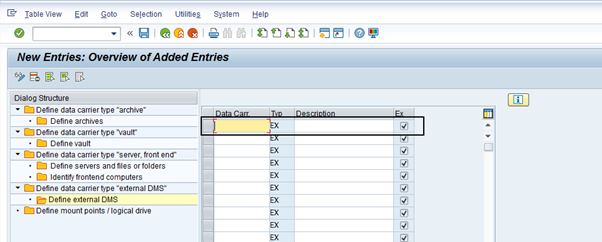
1. To make sure the external Data Carrier INTERNET is defined in SAP, enter T-Code DC20 in the Input field.
2. Double-click Define data carrier type “external DMS” in the left pane of Change View “Define data carrier type “external DMS””: Overview window.
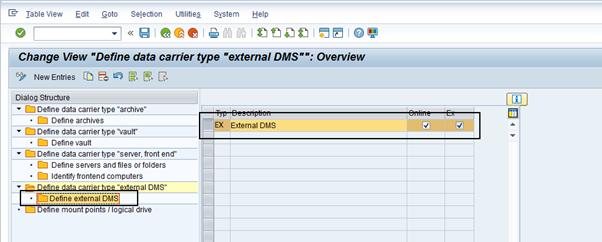
3. Select row with type “EX” in right pane and double-click Define external DMS in the left pane.
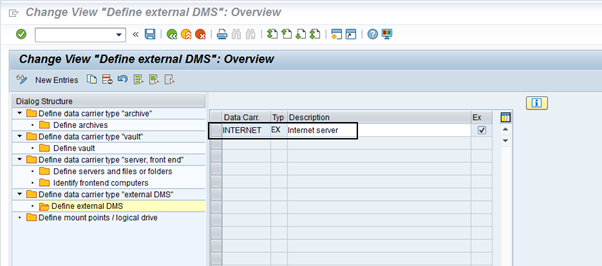
4. Verify that the Data Carrier is set to INTERNET.
5. If Data carrier INTERNET doesn’t exist, define it using New Entries on the window.
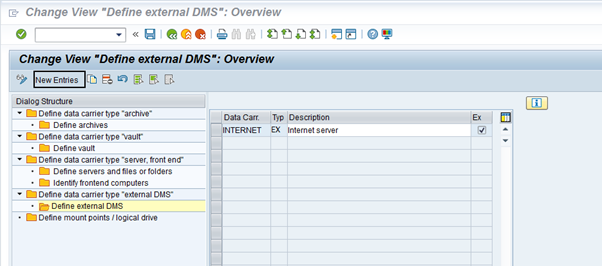
6. Add new entry for data carrier INTERNET. Specify INTERNET in the Data Carrier field. Enter description in Description field on the New Entries: Overview of Added Entries window and save the changes.
The Data Carrier field is case-sensitive. |
Configure Active Storage Category for Documents
Perform the following steps to configure the active storage category:
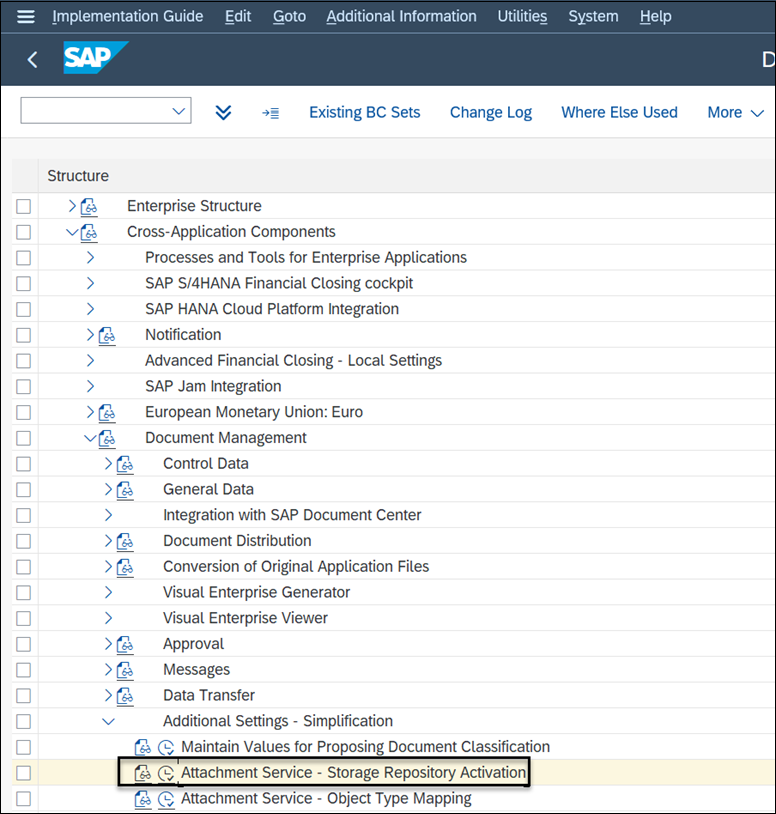
1. Enter the T-Code SPRO in the Search field.
2. Navigate to > > > > .
3. Click New Entries.
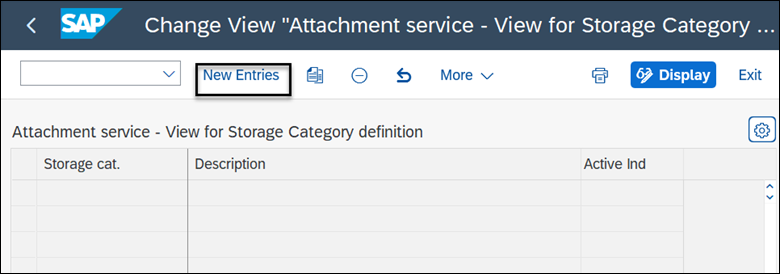
4. Set Storage cat. to INTERNET and then select the Active Ind checkbox.

Configuration Settings for Equipment
1. Enter T-Code SPRO in the Input field and navigate to > > > > .
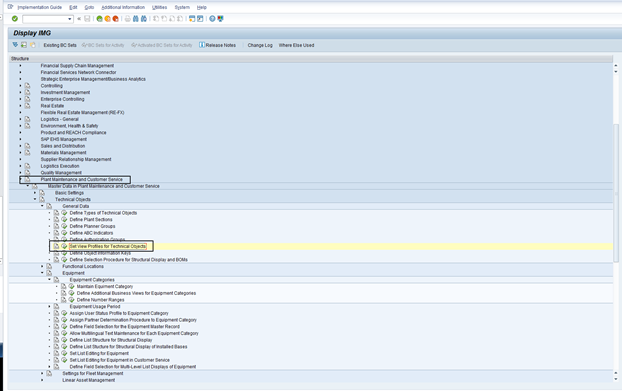
2. Create new Profile “IT” using New Entries on Change View “Definition of view profiles”: Overview window.

3. Click Define external DMS Add following activities and layouts and save the changes.

4. Enter T-Code SPRO in the Input field and navigate to > > > > > .
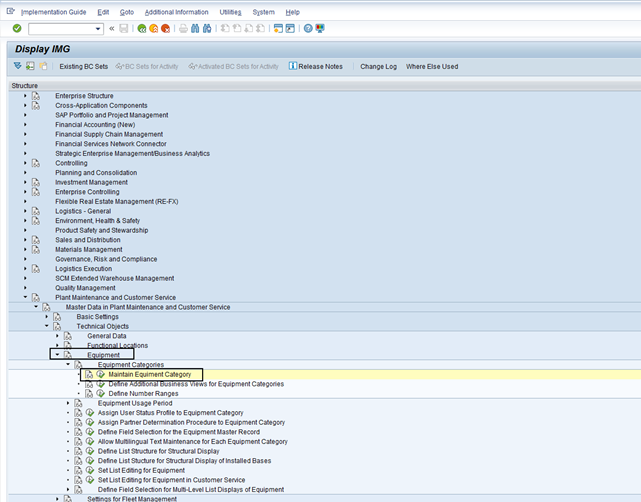
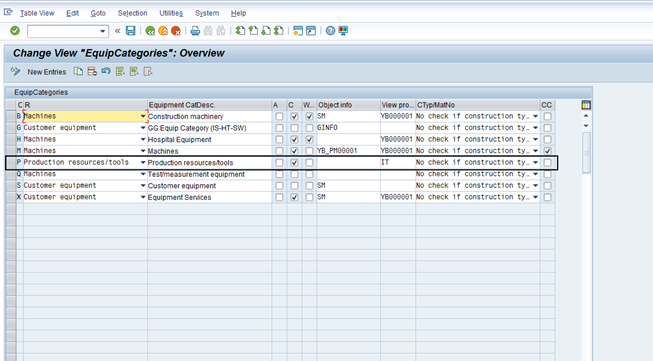
5. Make the changes to Equip Category P by updating view profile with newly created equipment profile IT.
6. Enter T-Code SPRO in Input field and navigate to > > > > > .
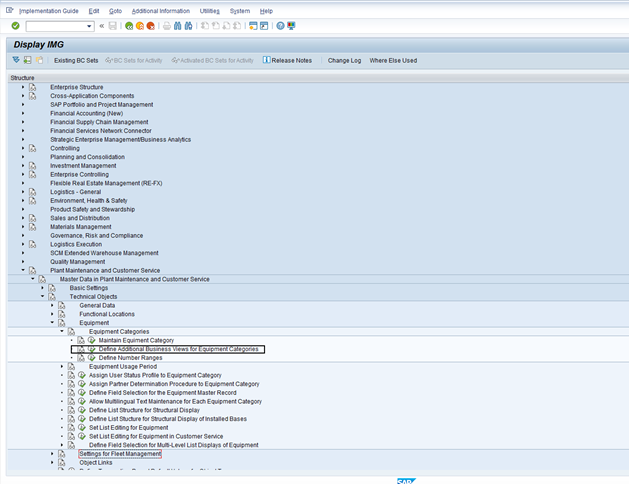
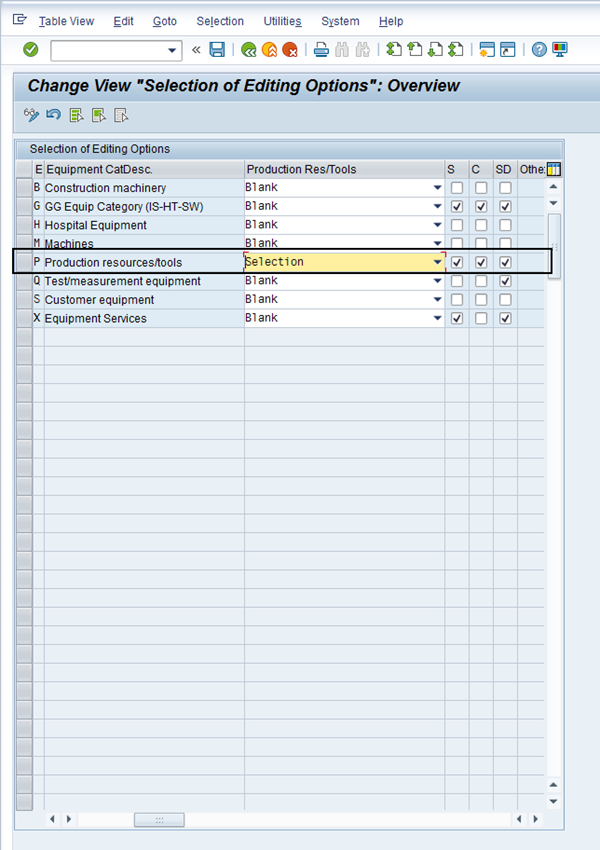
7. Change the Production resources/tools column value for Equip Category P to Selection (By default value is Blank) and select the three columns S, C and SD.
8. Enter T-code IE01. Enter Equipment name and set Equipment category to P i.e. Production resource/tools.
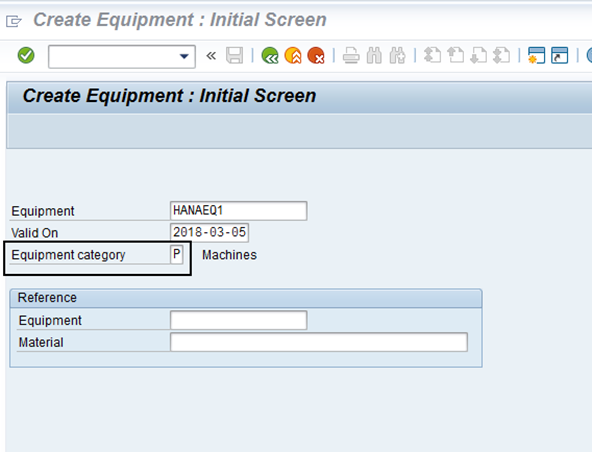
9. The missing PRT data tab will now appear for both IE01 and IE02 T-codes.
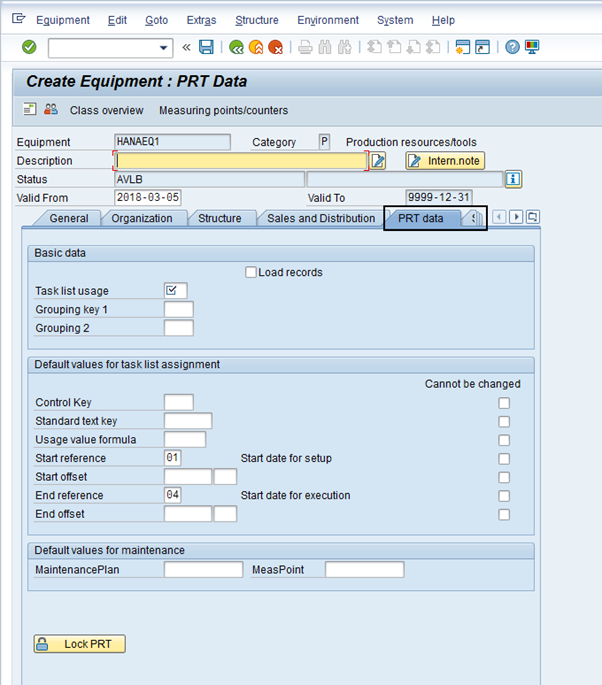
Configuration settings for Engineering Change Order
1. Enter T-Code OS56 in the Input field.
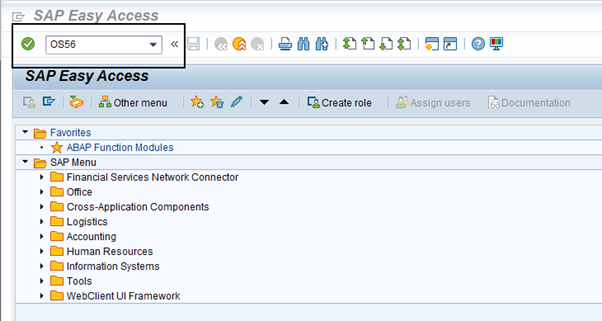
2. Check for the entry for the below ChgTyp. If the entry does not exist, add a new record with New Entries on the Change View “Change Types”: Overview window.
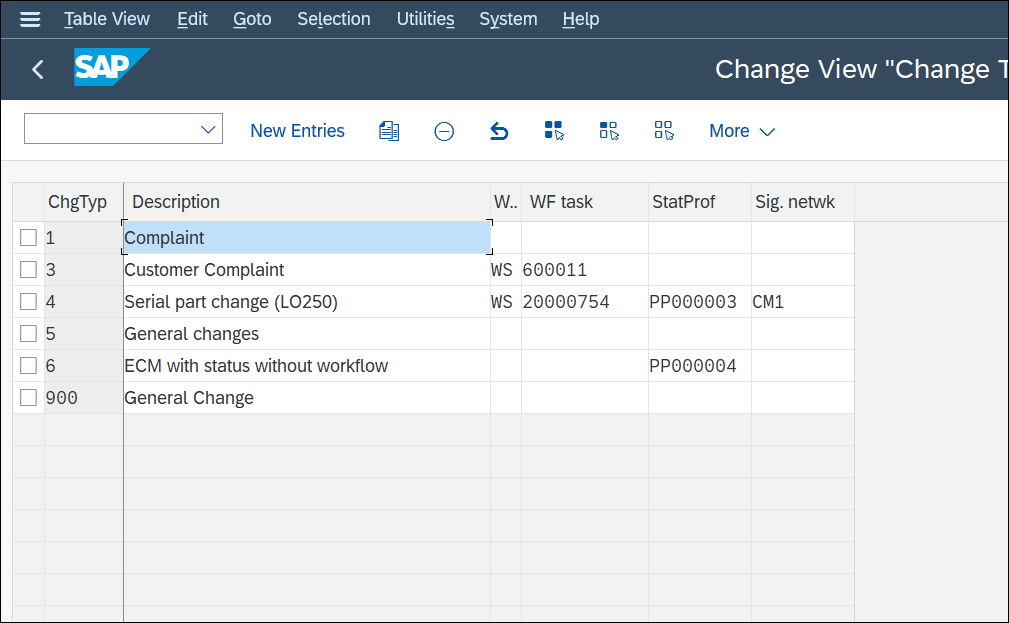
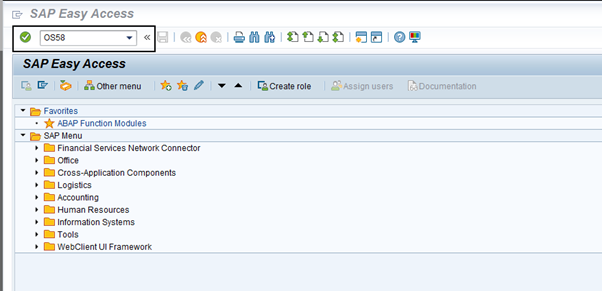
3. Enter T-Code OS58 in the Input field.
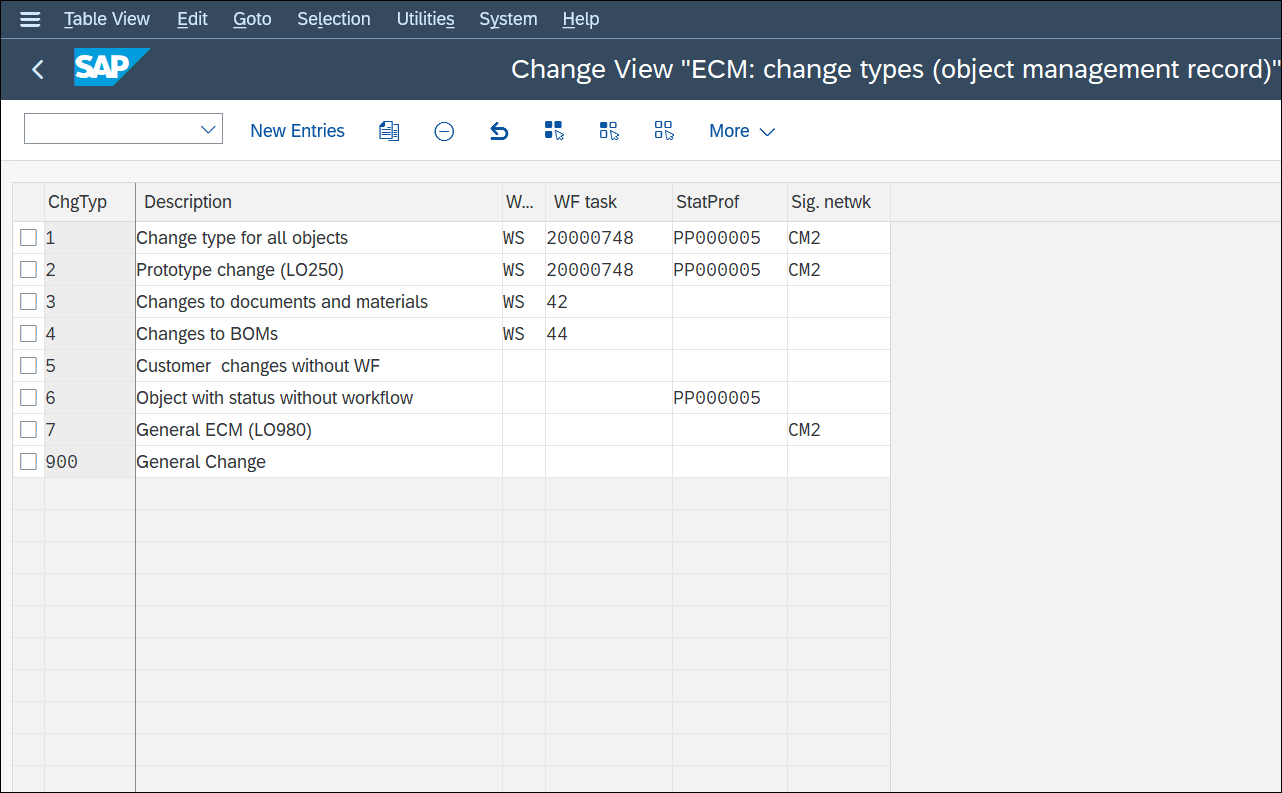
4. Check the entry for the below ChgTyp. If the entry does not exist, add a new record with New Entries in the Change View “ECM: change types (object management record)” : Overview window.
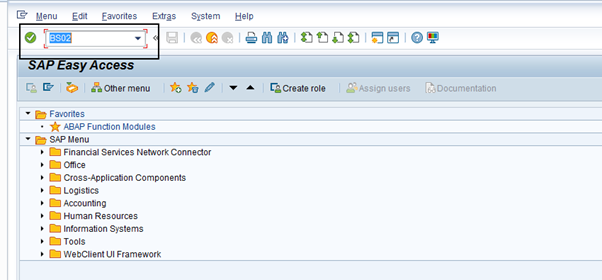
5. Enter T-Code BS02 in Input field.
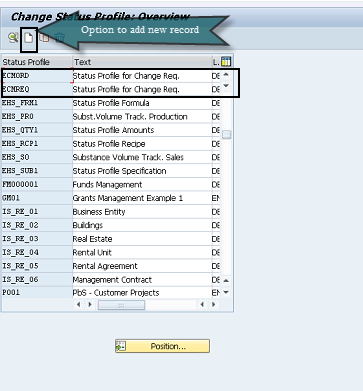
6. Check record for column Status Profile values “ECNORD” and “ECNREQ”. If the record doesn’t exist add new records with new entry option on Change Status Profile: Overview window.
Configuration for Long Description of Operation and Sub-operation
By default, SAP supports maximum 72 characters for each line of long text for Routing. Hence the system configuration of text editor required to persist the long text must be configured to have character length of 72.
Following are the steps to configure the long text character length for text editor in SAP:
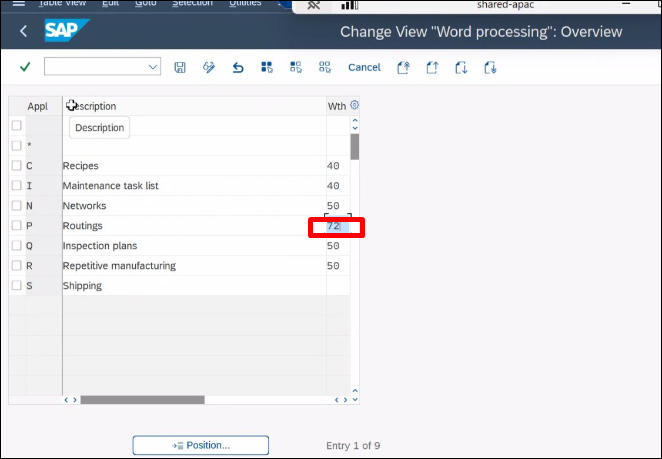
• Go to T-code OP04 transaction and change the routing width to 72 characters as highlighted in the below image.
